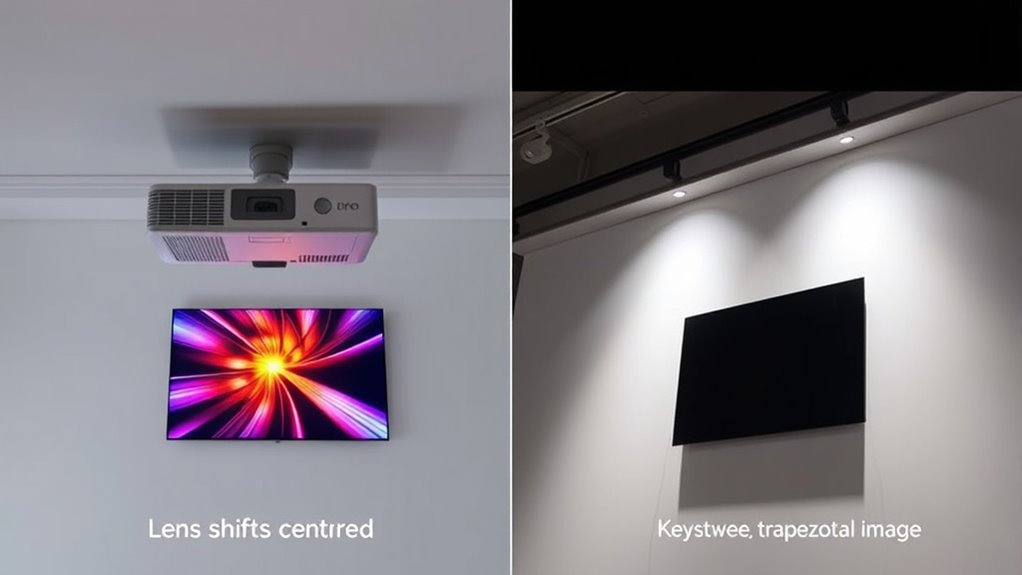

If you’re new to projectors, understanding the difference between lens shift and keystone correction helps you get the best image quality. Lens shift moves the lens for adjustments without affecting picture clarity, ideal for fixed setups. Keystone correction digitally alters the image shape, which can reduce quality if overused. Knowing when to use each—lens shift for minimal adjustments and keystone for quick fixes—can improve your setup. Keep exploring to learn more about these useful features.
Key Takeaways
- Lens shift is hardware-based, moving the lens inside the projector to adjust the image without quality loss; keystone correction is digital and may reduce clarity.
- Use lens shift for precise, distortion-free adjustments; keystone correction is a quick fix for off-angle images but can compromise image quality.
- Proper initial projector placement minimizes the need for keystone correction; lens shift allows flexible positioning without distorting the image.
- Excessive keystone correction can cause blurriness, pixelation, and color inaccuracies; avoid overusing it to maintain optimal image clarity.
- Combining both features carefully can help achieve the best image alignment while preserving picture quality.
What Is Lens Shift and How Does It Work?

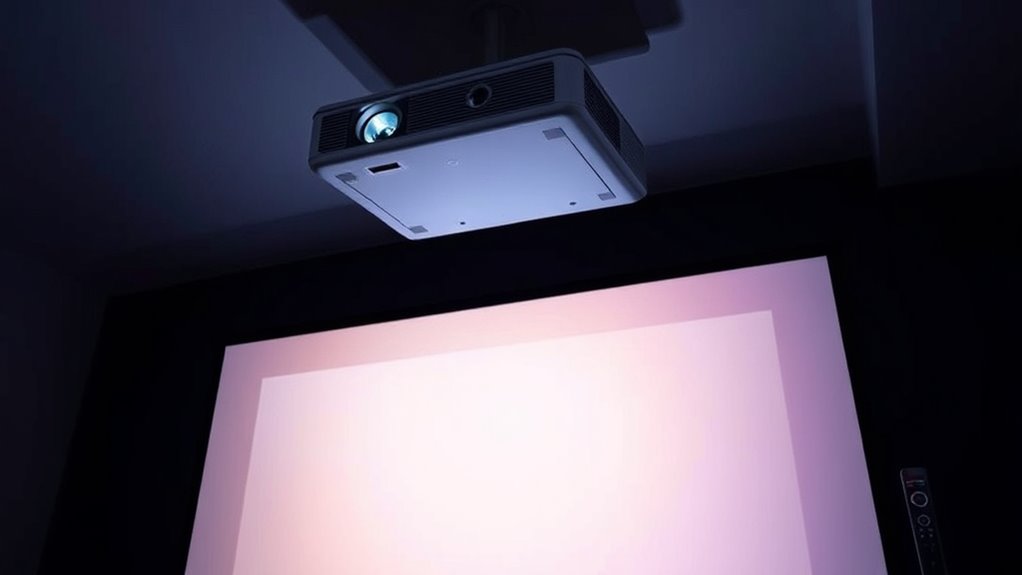
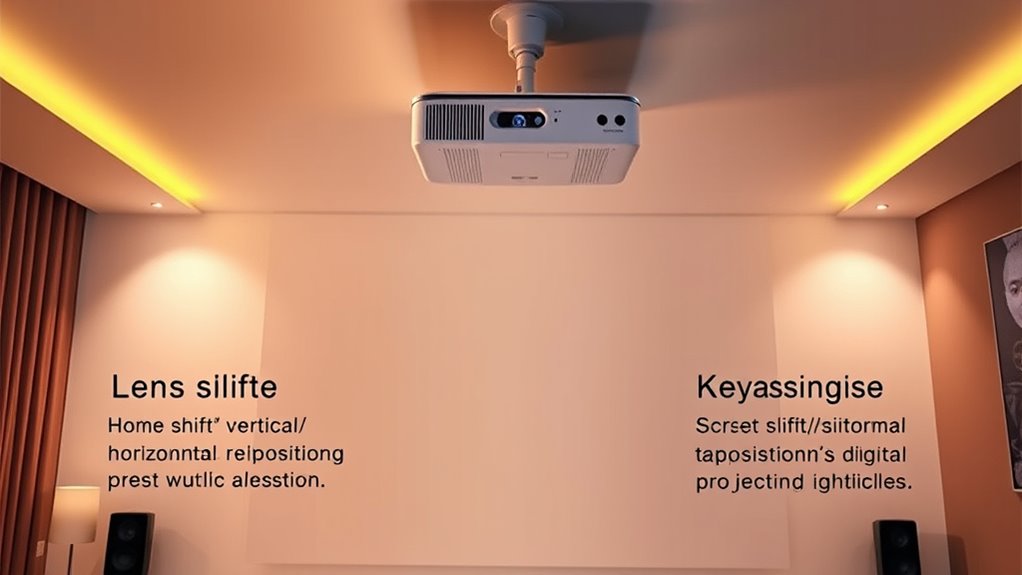
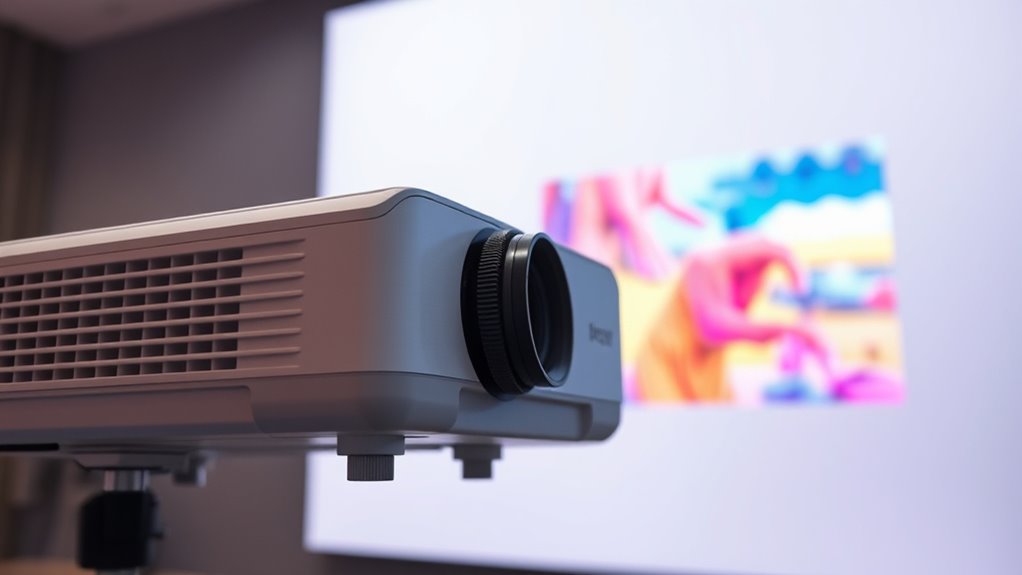
Lens shift is a feature that allows you to adjust the position of the projected image without moving the projector itself. This makes projection alignment much easier, especially if your setup space is limited. By shifting the lens vertically or horizontally, you can align the image perfectly on your screen or wall. Unlike keystone correction, lens shift maintains image quality because it doesn’t introduce digital adjustments that can cause image distortion. This feature is especially useful for positioning the projector in less-than-ideal spots while still achieving a clear, properly aligned picture. With lens shift, you avoid the common pitfalls of distorted images or uneven projections, ensuring your display remains sharp and accurate without the need for complex adjustments. Additionally, image quality preservation is a key advantage, as it allows for flexible positioning without sacrificing clarity or color accuracy.
Understanding Keystone Correction and Its Functionality
Keystone correction adjusts your projected image to appear rectangular even when the projector isn’t perfectly aligned. There are digital and optical types, each with different impacts on image quality. Keep in mind, excessive correction can introduce distortions or reduce sharpness. Additionally, understanding Halloween themes can help you better plan decorations or costumes for the event.
How Keystone Works
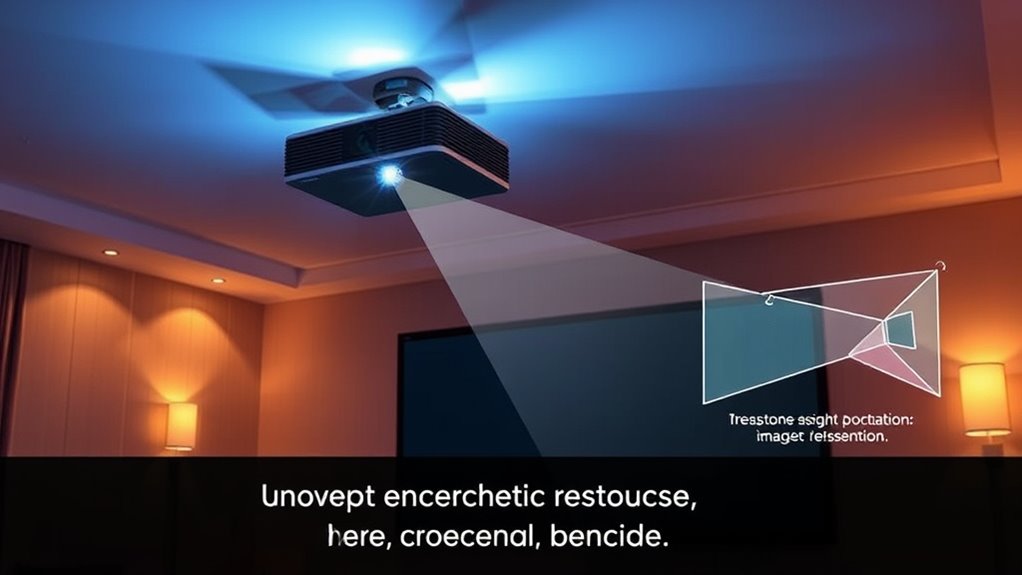
When a projector isn’t perfectly aligned with the screen, the image can appear distorted or trapezoidal. This is where keystone correction comes in. It adjusts the image digitally, compensating for improper projector placement. Instead of repositioning your projector, you can correct the shape through settings, reducing image distortion. Here’s how it works:
| Adjustment Type | How It Affects the Image |
|---|---|
| Vertical Keystone | Corrects distortions caused by high or low placement |
| Horizontal Keystone | Fixes side-to-side misalignment |
| Digital Correction | Adjusts the image shape without moving the projector |
| Manual Settings | Requires user input to align the image |
| Auto Correction | Automatically detects and fixes distortions |
Understanding these options helps you maintain a clear, properly shaped image even when projector placement isn’t ideal. Additionally, being aware of projector compatibility with your setup can prevent the need for excessive correction.
Types of Correction
Understanding the different types of correction available can help you achieve a perfectly aligned image, even if your projector isn’t ideally positioned. Keystone correction adjusts for image distortion caused by projecting at an angle, ensuring a rectangular display despite uneven placement. It works by digitally modifying the image to compensate for the optical alignment issues, reducing the trapezoidal shape often seen with off-center projections. There are two main types: digital keystone and physical correction, with digital being more common in portable projectors. While keystone correction improves image shape, it can sometimes slightly reduce image quality. Knowing how these correction methods work enables you to fine-tune your setup, making sure the projected image remains clear, properly proportioned, and free from unwanted distortion. Additionally, understanding projector placement can help minimize the need for correction altogether.
Limitations and Effects
Although keystone correction helps fix distorted images caused by off-angle projections, it has some limitations that can affect your viewing experience. One major issue is reduced color accuracy, especially when using aggressive corrections, leading to less vibrant images. Additionally, keystone correction can increase installation complexity, as aligning your projector perfectly minimizes the need for extensive adjustments. When overused, it may cause image blurriness or pixelation, degrading overall quality. Here’s a quick overview:
| Limitation | Effect |
|---|---|
| Reduced color accuracy | Colors may appear washed out or mismatched |
| Increased installation complexity | More effort needed for optimal setup |
| Image distortion | Fine details may become unclear |
| Quality loss | Overcorrection can cause blurriness |
Furthermore, electric projectors often incorporate keystone correction features to compensate for placement issues, but relying heavily on this can compromise image quality.
Key Differences Between Lens Shift and Keystone Correction

Lens shift and keystone correction are two common methods to adjust a projector’s image, but they serve different purposes and work in distinct ways. Lens shift moves the lens internally, allowing you to reposition the image without physically moving the projector. Keystone correction adjusts the image digitally, fixing trapezoidal distortion caused by the projector’s mounting angle. Additionally, understanding the versatility of hybrid bikes can help you appreciate the importance of flexible adjustments in different contexts. Key differences include:
- Mounting options: Lens shift offers more flexibility for various mounts without image distortion.
- Image quality: Lens shift maintains clarity, while keystone correction can reduce resolution.
- Adjustment type: Lens shift is hardware-based; keystone correction is software-based.
- Image distortion: Keystone correction may introduce artifacts or blurriness.
- Ease of use: Lens shift is manual, requiring physical adjustment, while keystone correction is digital.
Advantages and Limitations of Lens Shift

Lens shift offers significant advantages by allowing you to reposition the projected image without moving the entire projector, which helps maintain a stable setup and reduces setup time. This feature makes projection alignment easier, especially in fixed locations. However, it does have limitations. Not all projectors support extensive lens shift, which can restrict your placement options. Additionally, while lens shift minimizes image distortion, excessive adjustments may still cause slight skewing if not used carefully. Keep in mind that larger lens shifts often come at a higher cost and may require more precise calibration. Understanding relationship dynamics can also help you determine the best projector setup for your space. Here’s a quick comparison:
| Advantage | Limitation | Best For |
|---|---|---|
| Easy projection alignment | Limited shift range | Fixed or semi-permanent setups |
| No image distortion with proper use | Costly in some models | Home theaters, classrooms |
| Maintains stable setup | Not suitable for all placements | Professional presentations |
When to Use Keystone Correction for Your Projector Setup
You should use keystone correction when your projector isn’t perfectly aligned with the screen, causing the image to look trapezoidal. Look for signs like skewed edges or uneven focus, which indicate misalignment. Applying keystone correction can quickly fix these issues and improve your viewing experience. It’s important to avoid overusing digital correction, as it can sometimes lead to a decrease in image quality or clarity, especially if your projector has adjustable lens capabilities.
When to Adjust Keystone
Keystone correction is useful when your projector isn’t perfectly aligned with the screen, causing a trapezoidal image. You should consider adjusting keystone when your mounting height or screen placement isn’t ideal, making the image skewed. Use keystone correction if:
- The projector is mounted too high or low relative to the screen
- The projector can’t be moved closer or further from the screen
- You’re unable to reposition your projector for better alignment
- The image appears wider at the top or bottom due to angle issues
- Adjusting the projector’s position isn’t feasible without disrupting your setup
- When wall organization or aesthetic wall solutions are limited, keystone correction can be a quick fix to improve image geometry.
Applying keystone correction helps fix these distortions quickly. However, try to minimize its use for the best image quality, especially when your mounting height or screen placement can be adjusted physically.
Signs of Misaligned Projector
When your projected image doesn’t look right, it’s a clear sign that your projector might be misaligned. Poor projection angles can cause skewed images or uneven borders, making the picture appear distorted. If the edges of your image are stretched, compressed, or asymmetrical, it’s a sign you need to think about your setup. You may notice that the image isn’t square or centered, indicating that the projector isn’t aligned properly with the screen. These issues often result from incorrect placement or angle, leading to significant image distortion. When you see these signs, it’s time to consider keystone correction or repositioning your projector. Addressing misalignment early helps maintain a sharp, proportionate picture and prevents further projection problems.
Practical Tips for Using Lens Shift and Keystone Correction Effectively
To get the most from lens shift and keystone correction, mastering how to apply them effectively in different setup scenarios is crucial. Proper use ensures optimal image quality and setup convenience. Here are practical tips to help you make the most of these features:
- Use lens shift for minor adjustments, preserving image quality.
- Limit keystone correction to small corrections to avoid distortion.
- Combine both features carefully to maintain image clarity.
- Position your projector at the correct height and angle initially.
- Regularly check alignment to prevent unnecessary corrections.
- Be aware of cookie usage and privacy considerations when adjusting settings or using smart features on your projector or connected devices.
Choosing the Right Feature for Your Space and Needs
Choosing the right feature depends on your specific space and how you plan to use your projector. If your setup involves flexible projector placement, lens shift can be a game-changer, allowing you to adjust the image vertically or horizontally without moving the projector. This minimizes the risk of image distortion and keeps your setup neat. On the other hand, keystone correction offers quick adjustments for uneven surfaces or off-center placement, but it can introduce some image distortion if overused. Consider your room’s layout and how much you can move or align your projector. If you have a fixed position, lens shift might be preferable. For occasional misalignments, keystone correction provides a convenient fix. Additionally, understanding the essential oils for image quality, such as those that help reduce stress and improve focus, can enhance your overall viewing experience. Choose based on your space’s specific demands and the level of image quality you need.
Frequently Asked Questions
Can Lens Shift and Keystone Correction Be Used Simultaneously?
Yes, you can use lens shift and keystone correction together, but it’s not ideal. Combining both can lead to image distortion and reduce alignment accuracy. Lens shift physically moves the lens for perfect alignment without distortion, while keystone correction digitally adjusts the image, which may cause a slight loss in clarity. For the best results, use lens shift first and rely on keystone correction sparingly.
Are There Specific Projectors Better Suited for Lens Shift?
Think of a projector with lens shift as a flexible gymnast, able to stretch and move without losing balance. These projectors offer superior mounting flexibility, allowing you to adjust the image vertically or horizontally without causing image distortion. Look for models designed specifically with lens shift capabilities, as they’re better suited for precise positioning. This guarantees your setup remains stable and your image stays perfectly aligned, no matter where you mount it.
How Does Ambient Lighting Affect Lens Shift Adjustments?
Ambient light can impact your lens shift adjustments by making it harder to see the projected image clearly, potentially affecting your ability to fine-tune the position. Excessive ambient light reduces contrast and projection quality, so you might need to tweak lens shift more carefully or use additional lighting control measures. To maintain the best projection quality, limit ambient light in your viewing area and adjust lens shift settings in a darker environment.
What Are the Long-Term Impacts of Frequent Keystone Correction?
Frequent keystone correction might seem harmless, but it’s like playing a constant game of image distortion roulette. Over time, it strains your projector’s components, potentially shortening its lifespan, and warps your picture quality. You’ll end up chasing perfect images while risking long-term damage. So, unless you enjoy replacing projectors or living with skewed visuals, it’s smarter to use lens shift or proper placement instead of relying on constant keystone adjustments.
Is Professional Installation Recommended for Optimal Setup?
Yes, professional setup is highly recommended for peak results. A professional installation guarantees your projector is correctly aligned, maximizing image quality and minimizing the need for frequent adjustments. The installation benefits include precise calibration, secure mounting, and reduced risk of damage. With expert help, you can enjoy a seamless viewing experience, long-term durability, and peace of mind knowing your setup is tailored for your space and usage.
Conclusion
Now that you know the ins and outs of lens shift and keystone correction, you’ll be unstoppable in creating perfect projections. With these features, your setup can be as flawless as a professional cinema, no matter your space. Just remember, mastering these tools is like wielding a superpower—giving you the ability to transform any room into a stunning visual masterpiece. So go ahead, get creative, and enjoy your crystal-clear, perfectly aligned images!