To use a projector for home automation integration, start by ensuring it supports RS232 connectivity. Use a device like the Global Cache GC-100-6 to convert Ethernet to RS232 for easy control. Create custom command scripts to manage the projector, making it part of your smart home system. Incorporate power monitoring solutions to track energy use and automate tasks. It's essential to verify local IP addresses and plan device compatibility for smooth operation. By following these steps, you can enhance your viewing experience effortlessly and discover techniques to optimize your setup further.
Key Takeaways
- Utilize the Global Cache GC-100-6 for converting Ethernet commands to RS-232, enabling seamless projector control within your home automation system.
- Implement custom scripts, like gc232.php, to facilitate efficient command execution over IP, ensuring reliable projector operation.
- Integrate power monitoring solutions to automate projector activation based on energy consumption, enhancing overall device management and efficiency.
- Coordinate motion sensors to disable during projector use, preventing interruptions and ensuring a smooth viewing experience.
- Select compatible motorized projector screens for easy control and integration with smart home systems like SmartThings and Amazon Echo.
![[Built-in Apps/4K Support] Smart Outdoor Projector with WiFi and Bluetooth, Movie Projector, DoIby Audio with Dual Speaker, Auto Focus w/ YouTube&PrimeVideo Proyector, Upgrad P62 Pro](https://m.media-amazon.com/images/I/51yAGv8VI7L._SL500_.jpg)
[Built-in Apps/4K Support] Smart Outdoor Projector with WiFi and Bluetooth, Movie Projector, DoIby Audio with Dual Speaker, Auto Focus w/ YouTube&PrimeVideo Proyector, Upgrad P62 Pro
[Upgraded Classic – P62 Pro Movie Projector] Building on the reliability and low return rate of the classic...
As an affiliate, we earn on qualifying purchases.
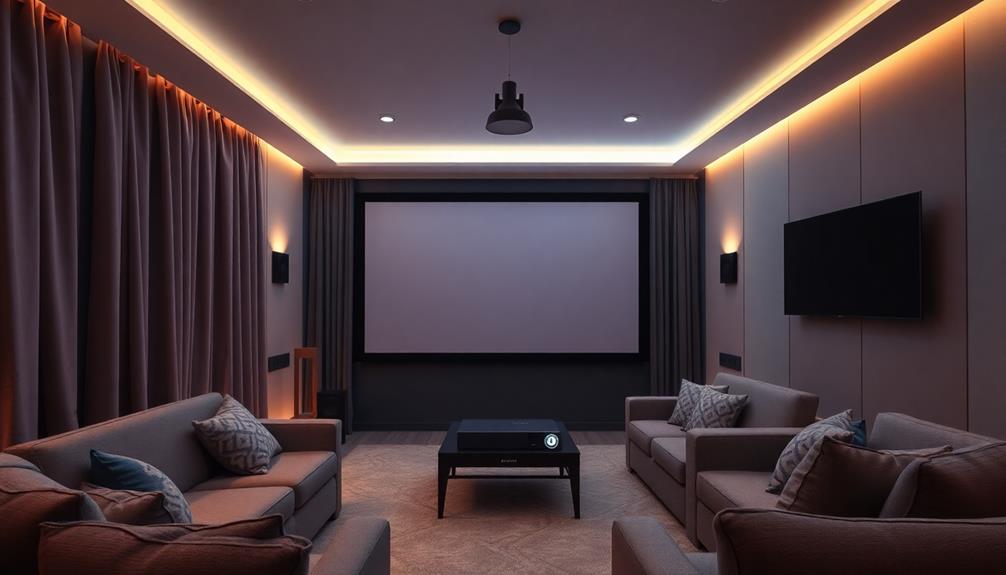
Equipment Overview
When setting up a home automation system, understanding your equipment is essential, and the BenQ TH-670 projector is a solid choice. This projector supports RS232 connectivity, which means you can easily integrate it with your home automation system. By using a projector remote that follows the structured RS232 protocol, you can control the projector efficiently. For instance, the basic ON command is *pow=on#, allowing for seamless activation.
Additionally, incorporating energy-efficient devices, such as this projector, can contribute to overall energy management in your home automation system.
To guarantee network compatibility, you'll need to assign a local IP address and use a specified flex port of 4999 for communication. This setup enhances the functionality of your projector, enabling automated activation and deactivation based on the states of other devices in your system.
If you want to simplify the connection process, consider using devices like the Global Cache GC-100-6. This device facilitates Ethernet to RS-232 conversion, making it easier to integrate the BenQ TH-670 with your home automation setup.
With the right equipment and understanding, you'll be able to maximize your projector's capabilities and enjoy a smoother home automation experience.

4K Projector with Built-in Apps, 1500ANSI Auto Focus&6D Keystone Dolby Audio Kogata Smart Projector with WiFi 6 Bluetooth Outdoor Movie Proyector for Home Theater HDR10+ UPGRADE
【UPGRADE Version】Unlimited Streaming –Compatible with Netflix & Dolby Audio& DTS Audio: The Kogata GC357 home projector comes with...
As an affiliate, we earn on qualifying purchases.
Integration Challenges

Integrating a projector into your home automation system can be tricky due to several challenges. One major hurdle is the need for RS232 to IP conversion. Without this, communication between your devices can falter, making it difficult to use your remote control effectively.
Inconsistent command structures might lead to communication failures, which means you'll need a reliable setup to guarantee your projector responds correctly to commands.
You may also face compatibility issues, especially if you're using older Global Cache models. These older devices often struggle with multiple connections, which can impact the overall reliability of your integration.
Additionally, confirming the correct local IP address and flex port configuration is vital for seamless communication with your projector through the automation system.
The complexity of this setup often requires careful planning and troubleshooting. If you don't take the time to address these challenges, you might find that your projector doesn't operate as intended, leading to frustration.
HAPPRUN Native 1080P Projector, Bluetooth Home Theater Movie Projector with Built-in Speaker, Compatible with Smartphone, HDMI, Fire Stick, PS5, Indoor & Outdoor Use - Without Google TV System
[ Native 1080P Full HD Resolution ] - Enjoy crystal-clear visuals with HAPPRUN H1's native 1920x1080 resolution, delivering...
As an affiliate, we earn on qualifying purchases.
Suggested Solutions
To effectively integrate your projector into your home automation system, consider RS232 connectivity solutions for reliable control.
You can also explore power monitoring options to automate the projector's activation and manage other devices.
Additionally, remote control integration will enhance your overall experience, making it easier to manage everything from one platform.
RS232 Connectivity Solutions
Utilizing RS232 connectivity can greatly enhance your home automation setup, providing reliable remote control of your projector. This technology allows you to send commands, like *pow=on#, to turn your projector on or off seamlessly.
To integrate RS232 devices into your network, consider using an Ethernet to RS232 converter, such as the Global Cache GC-100-6. This device offers multiple connection options, enabling smooth communication between your home automation system and projector.
For greater control, you can implement custom scripts like gc232.php, which facilitate command execution over IP. However, it's vital to verify your projector's local IP address and ascertain that your command structure adheres to the RS232 protocol for successful integration.
Proper configuration of PHP scripts on servers like ReadyNAS is important to executing commands effectively. This guarantees your projector responds correctly to automation triggers, enhancing your overall home automation experience.
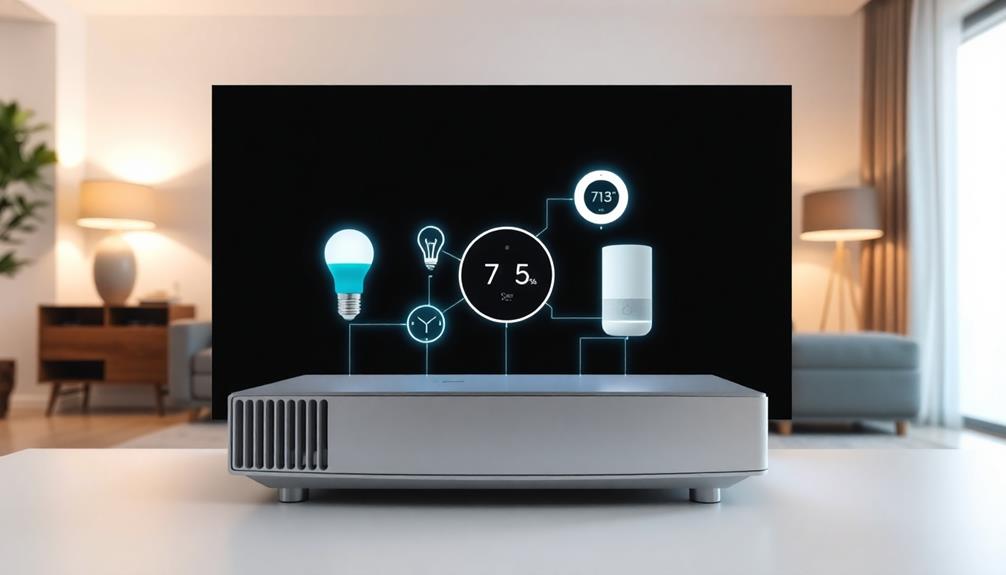
Power Monitoring Options
Power monitoring options can considerably enhance your home automation experience by tracking energy consumption and enabling smarter device interactions. Integrating power monitoring plugs with your projector allows you to automate actions based on power usage, such as turning off lights when the projector's in use.
Here's a quick comparison of some popular power monitoring solutions:
| Brand | Connection Type | Key Features |
|---|---|---|
| Sengled | Zigbee | Reliable, positive reviews |
| Shelly | WiFi | Easy integration, minimal strain |
| TP-Link | WiFi | User-friendly app, scheduling |
| Wemo | WiFi | Voice control compatible |
| Eve | HomeKit | Energy monitoring, automation |
WiFi power monitoring plugs are typically preferred over Zigbee or Z-Wave options, mainly because they reduce strain on mesh networks. Adjusting reporting thresholds can help you avoid data overload, ensuring efficient operation of your smart home setup. When you combine a power monitoring plug with a remote control, you can create seamless automation rules that allow your projector to manage other connected devices effectively. So, choose the right solution and start optimizing your home automation today!
Remote Control Integration
Integrating remote control solutions with your projector can greatly enhance your home automation experience. You can achieve this by using devices like the Global Cache GC-100-6, which converts Ethernet to RS-232, allowing you to control your projector over your network.
With simple command scripts, such as gc232.php, you can easily send commands like *pow=on# to power on your projector.
Consider using smart home hubs, like Homewizard or Hubitat, to create automation rules that manage your projector states. For instance, you can program your system to lower the projector screen and turn on the projector when you start a movie night.
A power monitoring plug can help you check the projector's status, making it easier to disable motion sensors when the projector is on and re-enable them when it's off.
To guarantee everything runs smoothly, you may need to debug your PHP scripts and double-check the URL syntax for triggering commands accurately.
![[Officially-Licensed App & Auto Focus]White Smart Mini Projector with WiFi and Bluetooth, XuanPad 4K Support Movie Projector, Portable Native 1080P Outdoor Projector with 360° Stand](https://m.media-amazon.com/images/I/51I8uy-U8bL._SL500_.jpg)
[Officially-Licensed App & Auto Focus]White Smart Mini Projector with WiFi and Bluetooth, XuanPad 4K Support Movie Projector, Portable Native 1080P Outdoor Projector with 360° Stand
Exciting Moments Begin - The XuanPad mini projector compatible with Netflix for the ultimate viewing experience.No extra devices...
As an affiliate, we earn on qualifying purchases.
Script Troubleshooting
Effective script troubleshooting is vital for seamless projector control in home automation. When integrating your home theater system, you must guarantee your PHP script is correctly configured on the server. Incorrect configurations can cause the script to display as text instead of executing.
Next, double-check the URL format used to trigger the PHP commands; discrepancies can lead to command execution failures. Look out for any extra characters, like carriage returns, in the command string, as these can disrupt proper execution.
Utilizing debugging tools like iTest.exe is essential. This way, you can confirm that your RS232 commands work correctly before integrating them into your automation scripts. Additionally, regularly reviewing server logs for error messages related to PHP execution will help you identify and troubleshoot any potential issues.
Here's a quick reference table for troubleshooting:
| Issue | Solution | Notes |
|---|---|---|
| Script displays as text | Check server configuration settings | Guarantee PHP is installed |
| URL format is incorrect | Verify URL syntax | Pay attention to parameters |
| Extra characters present | Clean command string | Use a simple text editor |
Automation Requirements
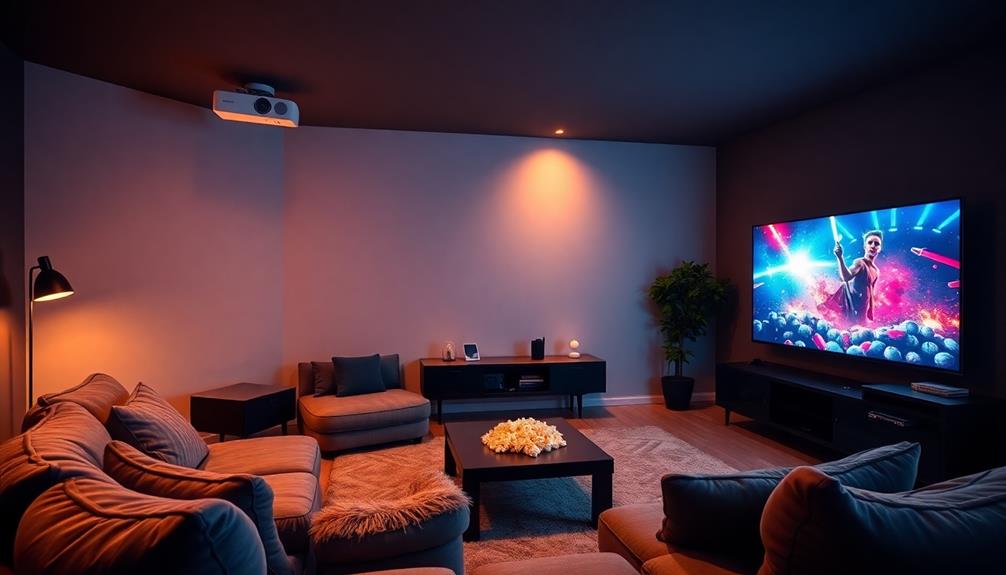
When setting up automation for your projector, you'll need to coordinate motion sensors to prevent unwanted light activation during your movie nights.
It's also essential to integrate light control, so they turn on automatically when you finish using the projector.
This way, you can create a seamless shift that enhances your viewing experience without interruptions.
Motion Sensor Coordination
Coordinating your motion sensor with a projector can greatly enhance your home automation experience. By integrating these devices, you can automate the control of your projector and eliminate unnecessary interruptions.
For instance, when your projector is in use, you can set up a rule in your Home Assistant system to disable the motion sensor. This way, you won't have lights turning on or off while you're trying to enjoy a movie.
Once you turn off the projector, the system can trigger the motion sensor to activate the basement lights, making sure the area is well-lit without having to fumble for switches in the dark.
Proper configuration is key; you'll want to make certain that the motion sensor only reactivates once the projector is no longer in use. This setup not only enhances your viewing experience but also maintains a seamless flow in your home automation.
With smart home rules, you can create the perfect environment tailored to your preferences.
Light Control Integration
Integrating light control with your projector setup enhances the overall home automation experience, ensuring that your environment adapts seamlessly to your viewing needs.
To achieve this, you'll want to disable motion detection sensors while the projector is active. This prevents unwanted light activation during your movie nights. Once you shut down the projector, the system should reactivate the lights automatically, creating a smooth change back to regular lighting.
Implementing power monitoring solutions, like a power monitoring plug, plays an important role. It helps track your projector's status, triggering appropriate light controls based on whether the projector's on or off.
You can set up rules within your home automation system to maintain this balance, ensuring that lights stay off when the projector's in use and only turn back on afterward.
For an even smarter setup, consider remote control integration with platforms like Hubitat. This allows the projector's status to dictate the state of your connected lighting, optimizing your viewing experience.
Power Monitoring Options
Power monitoring options play an essential role in enhancing your home automation experience with projectors. By integrating power monitoring plugs, you can track your projector's energy consumption and automate actions based on its power status. This allows for seamless control within your home automation system.
Incorporating energy-efficient solutions, such as geothermal heat pumps, can further contribute to reducing overall energy use in your home, making your automation setup even more sustainable.
When selecting power monitoring solutions, make certain you choose WiFi plugs over Zigbee or Z-Wave options to avoid overwhelming your mesh network with too many devices. Reliable brands like Sengled Zigbee plugs have received positive user feedback, proving their performance in various setups.
Setting appropriate reporting thresholds on your power monitoring devices is essential. This step guarantees you avoid excessive data reporting, which can lead to inefficiencies in your system's performance.
With a well-configured power monitoring solution, you can create automation rules that turn off lights when your projector is active and switch them back on when it shuts down. This level of control not only enhances your viewing experience but also contributes to energy efficiency in your home.
Projector Screen Specs
When setting up your home theater, choosing the right projector screen is just as important as selecting the projector itself. You need to study the specifications to guarantee you get the best viewing experience. A great option is the Draper Matt White motorized screen, which has a diagonal measurement of 106 inches. This size fits a variety of setups, making it versatile for different home environments.
Here's a quick overview of key specs to take into account:
| Feature | Details |
|---|---|
| Screen Size | 106 inches diagonal |
| Motorized Functionality | Yes, remote control included |
| Smart Home Compatibility | Works with SmartThings hub and Amazon Echo |
| Installation | Proper setup required |
| Convenience | Easy retractable design |
The motorized design not only enhances convenience but also integrates seamlessly with your smart home systems, allowing you to control it with your voice. Just remember, proper installation and configuration are essential to make sure everything runs smoothly. By paying attention to these projector screen specs, you'll elevate your home theater experience considerably.
Community Support
How can you guarantee your projector integrates smoothly with your home automation system? One of the best ways is to tap into community support. Online forums are treasure troves of shared experiences and troubleshooting tips that can make your integration process much easier.
Users often gather on platforms like Reddit and specialized home automation forums to discuss their configurations and solutions. Additionally, understanding the role of contrast ratio in projector image quality can help you select the best settings for your home theater setup.
Here are some benefits of engaging with the community:
- Troubleshooting Resources: Learn from others' challenges and successes to avoid common pitfalls.
- Device Compatibility: Get recommendations on devices that work well with your projector, like the Global Cache GC-100-6.
- Command Structure Insights: Understand command structures and scripts that enhance communication between your projector and automation system.
- Best Practices: Discover optimization techniques for seamless integration within your smart home ecosystem.
Frequently Asked Questions
How to Use a Projector Instead of a TV?
You can use a projector instead of a TV by choosing one with high resolution for sharp images, setting it up for larger screen sizes, and utilizing motorized screens for added convenience and flexibility in your space.
How to Use a Projector in a Home?
You can use a projector in your home by setting it up in a dedicated space, connecting it to your devices, and enjoying movies or presentations on a larger screen while optimizing the viewing experience for comfort.
How to Use a Projector With a Laptop?
Did you know 75% of presentations fail due to technical issues? To connect your projector to a laptop, use an HDMI cable, adjust display settings, and make certain the projector's input source is set correctly.
How Can I Use My Phone as a Projector Remote?
To use your phone as a projector remote, download the manufacturer's app, connect to the projector's network, and enable network control in the projector's settings. That'll give you convenient remote access anywhere!
Conclusion
Incorporating a projector into your home automation can transform your space and elevate your entertainment experience. While challenges may arise, remember that where there's a will, there's a way. By leveraging the right equipment and community support, you'll create a seamless integration that enhances your lifestyle. So, plunge into and embrace the journey—your home deserves it! With a little patience and creativity, you'll turn your living area into a smart, cinematic haven.