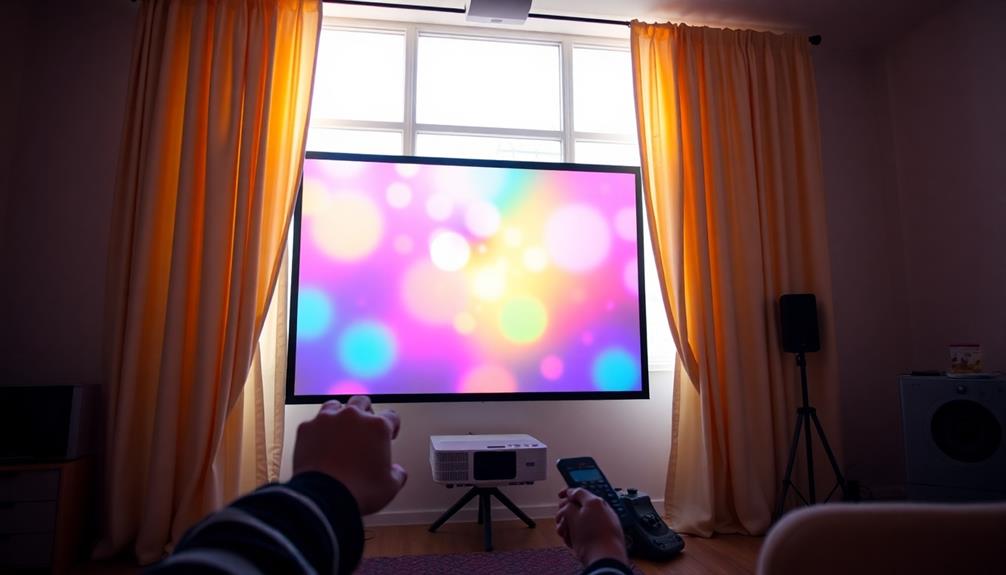
To calibrate your projector for ideal daytime viewing, start by adjusting brightness and contrast settings using built-in test patterns. Aim for a minimum brightness rating of 3,000 lumens to guarantee clarity in bright rooms. Incorporate a colorimeter for precise measurements and use calibration software for fine-tuning color accuracy. Maintaining the projector's lens and filters is vital for consistent image quality, so clean them regularly. Position your projector away from direct sunlight and consider using blackout curtains to minimize ambient light interference. You'll discover even more tips to enhance your viewing experience further.
Key Takeaways
- Use a colorimeter for accurate measurements of brightness and color accuracy during calibration for optimal daytime viewing.
- Adjust brightness and contrast settings using built-in test patterns to improve image clarity in well-lit environments.
- Choose a high-gain projector screen (at least 1.5) to enhance brightness and maintain color fidelity in daylight conditions.
- Regularly clean the projector lens and filters to prevent image degradation and ensure consistent performance over time.
- Recalibrate your projector every six months or after significant environmental changes to maintain optimal viewing quality.
Understanding Projector Calibration
Understanding projector calibration is essential to releasing the full potential of your home theater system. This systematic process involves adjusting settings like brightness, contrast, color accuracy, and sharpness to enhance image quality.
With proper projector calibration, you can guarantee that the colors and details in your content are displayed as intended, which is especially important when you're viewing in environments with varying ambient light.
To achieve ideal results, you'll need essential tools, including software for digital adjustments and hardware for precise measurements. Built-in test patterns can help facilitate the initial setup and optimization process.
Regular recalibration is vital, especially after significant changes like relocating your projector or replacing the lamp, as these factors can affect image quality over time.
Custom calibration settings allow you to tailor your experience, giving you the flexibility to adjust based on specific content types or personal preferences.
By taking the time to calibrate your projector, you'll experience improved color fidelity and clarity, transforming your viewing sessions into truly immersive experiences that go beyond factory settings.
Benefits of Proper Calibration
Calibrating your projector brings a world of benefits that greatly elevate your viewing experience. Proper calibration considerably enhances image quality, improving color accuracy and detail clarity, which is essential when you're watching in brightly lit environments.
By fine-tuning your projector settings, you guarantee consistent image quality across different devices, allowing for a uniform viewing experience regardless of the ambient light. Additionally, just as air purifiers with HEPA filtration effectively improve air quality, precise calibration can optimize the clarity of your visuals, making sure that colors pop and images remain sharp even in challenging lighting conditions.
Moreover, regular calibration can extend your projector's lifespan by reducing wear and tear on the hardware, making it a cost-efficient choice for long-term use. It also optimizes brightness and contrast settings, enabling clearer images during daytime viewing. This is particularly important, as ambient light can easily wash out projected visuals.
Tailoring your projector settings through calibration allows for a personalized viewing experience, accommodating your individual preferences and enhancing overall satisfaction, especially when the sun is shining.
With these benefits, investing time in proper calibration not only improves your immediate viewing experience but also guarantees the longevity and performance of your projector. So, take the time to calibrate your projector; you'll be glad you did!
Essential Calibration Tools
To get the best picture quality from your projector, you'll need the right calibration tools.
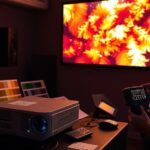
Hardware devices like colorimeters and software tools such as Calman can help you measure and adjust settings precisely.
Additionally, utilizing test patterns can assist in making those essential initial adjustments for ideal viewing.
Software Calibration Tools
Effective software calibration tools are fundamental for achieving the best possible projection quality in both bright and dim environments. These tools help you make precise adjustments to your projector settings, enhancing color accuracy, brightness, and contrast, which are essential for ideal daytime viewing.
Many calibration software programs come with built-in test patterns that guide you through optimizing brightness and color settings based on the ambient lighting in your room. Some advanced tools even allow for real-time adjustments and measurements, giving you the flexibility to fine-tune your projector's output interactively.
This adaptability is critical, especially in environments where light conditions change frequently. Additionally, using calibration software can help guarantee compliance with industry standards like THX or ISF, assuring high-quality visuals at any time of day.
For the best results, consider using computer calibration software alongside a colorimeter or spectrophotometer. This combination is particularly effective in bright rooms, where ambient light can greatly impact picture quality.
Hardware Calibration Devices
Achieving ideal projector performance goes beyond just software calibration; incorporating hardware calibration devices greatly improves your setup. These tools, like colorimeters and spectroradiometers, measure color accuracy, brightness, and contrast with precision, crucial for optimal projector performance. They help you guarantee that what you see on screen matches the source material as closely as possible.
Using hardware calibration devices allows you to make real-time adjustments, enabling you to see the immediate impact of your changes on the projected image. This is especially important during daytime viewing when ambient light can markedly affect visibility and image quality. Certain devices can even measure ambient light levels, guiding you to adjust projector settings effectively based on varying daylight conditions.
Regularly using these hardware calibration devices is essential, especially after making considerable changes to your projector setup or environment. Consistent calibration guarantees that you maintain high image quality, even as lighting conditions shift throughout the day.
Test Patterns Utilization
Test patterns are your projector's best friends when it comes to calibration. They provide essential visual references that help you adjust brightness, contrast, and color accuracy for ideal viewing.
By utilizing built-in test patterns or calibration discs, you can effectively assess the black level, ensuring that dark details are visible without losing the integrity of bright areas. This balance is vital for daytime viewing, where ambient light can be challenging.
Color test patterns play a significant role too. They enable you to tweak color accuracy, ensuring natural skin tones and preventing over-saturation. This way, your images remain vibrant yet realistic.
Additionally, sharpness test patterns are invaluable for fine-tuning clarity, helping you avoid jagged edges while maintaining detail integrity.
Regularly using these test patterns during calibration keeps your projector performing at its best, especially in varying light conditions.
By paying attention to both black and white levels, you'll achieve a well-rounded image that enhances your viewing experience.
Calibration Process Overview
Calibrating your projector can greatly enhance your viewing experience, so it's essential to approach the process methodically.
Start by setting up your projector in a room with controlled ambient light. This helps guarantee accurate calibration results, as excessive brightness can wash out the image.
Next, use the built-in calibration test patterns to adjust the brightness and contrast. Aim for a balance that reveals detail in both dark and bright areas of the image, making sure you don't lose vital information in shadows or highlights.
After that, refine your color settings. Focus on achieving natural skin tones and adjusting the color temperature to create a realistic appearance, avoiding any over-saturation.
Remember to regularly recalibrate your projector after significant changes in your environment, like moving it or altering the room's lighting conditions. This helps maintain ideal performance.
Maintenance and Recalibration Tips
To keep your projector performing at its best, regular maintenance and recalibration are key.
It's recommended you recalibrate your projector every six months, especially after any notable changes in your environment or setup. This guarantees peak performance for daytime viewing.
Adjust the ambient light settings according to your room's lighting conditions. Bright environments can greatly affect perceived brightness and contrast, so make sure these settings are tailored for daylight.
Utilize built-in calibration tools or software to achieve accurate adjustments for brightness, contrast, and color accuracy.
Don't forget to clean the projector lens regularly. Dust and smudges can markedly diminish image clarity and brightness, especially in well-lit spaces. A clean lens is essential for maintaining the quality of your visuals.
When it's time to recalibrate for daytime use, consider using test patterns that include both bright and dark scenes. This helps you balance brightness and black levels effectively, enhancing visibility and overall picture quality.
Common Projector Issues
Projectors can encounter a variety of common issues that affect their performance and image quality. One major problem is blurry images, often caused by incorrect focus settings or misalignment. To fix this, you should regularly adjust the focus to guarantee a clear picture.
Additionally, you might notice color distortion, which can indicate a need for recalibration or signal potential hardware malfunctions. This issue can greatly impact your viewing experience, so addressing it promptly is vital.
Lagging issues may also arise, commonly stemming from poor connectivity or outdated software. These can hinder your projector's performance during presentations or gaming, leading to frustration.
Overheating is another frequent problem; it can result in performance drops. Make sure your projector has proper ventilation to avoid this.
To combat these issues, regular maintenance checks, ideally every six months, can help prevent many common projector problems. By confirming that your picture settings are optimized and by performing routine checks, you can maintain consistent performance and image quality, making your projector a reliable tool for all your viewing needs.
Choosing the Right Projector Screen
When you're selecting a projector screen, the material and gain play essential roles in your viewing experience.
You'll want to take into account the screen size that best fits your space while also ensuring it can handle the ambient light in your room.
Choosing the right combination will help you achieve the clearest, most vibrant images possible.
Screen Material Selection
Choosing the right projector screen material can greatly affect your viewing experience, especially in varying lighting conditions. The right screen material can enhance brightness and contrast, guaranteeing you get the most out of your projector.
Here are some options to take into account during your screen material selection:
- High-Gain Screens: If you're in a well-lit environment, these screens can boost brightness, with gain values ranging from 1.1 to 2.5. They're perfect for outdoor or brightly lit rooms.
- Matte White Screens: These offer a neutral color balance and work well in most lighting. However, they might require a higher lumen projector to maintain brightness in daylight.
- Ambient Light Rejecting (ALR) Screens: Designed to minimize the impact of ambient light, ALR screens enhance contrast and color accuracy, making them ideal for daytime viewing.
- Screen Size and Material: Verify your screen size aligns with your projector's capabilities. A larger screen may need a high-gain material to keep brightness levels up.
With these options, you can tailor your screen choice to fit your specific viewing environment, guaranteeing peak performance.
Optimal Screen Gain
Selecting the right screen gain is essential for maximizing your projector's performance in relation to your viewing environment. The gain rating affects how well your projector screen handles ambient light. For instance, a screen with a gain above 1.0 enhances brightness but may limit viewing angles. Conversely, a gain below 1.0 is better suited for wider viewing angles in well-lit conditions.
Here's a quick comparison of screen gain options:
| Gain Rating | Best For | Viewing Angle |
|---|---|---|
| 1.5+ | High ambient light | Narrow viewing |
| 1.0 | Balanced environments | Moderate viewing |
| <1.0 | Wide viewing angles | Wide viewing |
If you're aiming for ideal screen gain for daytime viewing, consider a screen rated at 1.5 or higher, especially if your room has significant ambient light. However, remember that this may limit how many people can comfortably view the projection at once. Choosing between white and gray screens can also affect your image quality, with gray enhancing contrast in brighter rooms while white boosts brightness in darker settings.
Screen Size Considerations
Finding the right screen size is essential for creating an enjoyable viewing experience.
It's not just about making a big impression; you need to balance size with your room dimensions and projector capabilities.
Here are four key considerations for choosing the right projector screen:
- Room Dimensions: Measure your space to determine how large your screen can be without overwhelming the room.
- Throw Distance: Confirm your projector's throw distance can accommodate the screen size. Too large a screen can lead to poor image quality.
- Ambient Light: Opt for a screen with a higher gain (1.0 or above) to combat ambient light and enhance brightness.
- Screen Material: A white projector screen is preferable for color accuracy.
Consider a high-quality matte white screen to minimize ambient light reflection.
Additional Viewing Considerations
When it comes to refining your viewing experience, several key factors beyond just projector specifications come into play. First, guarantee your projector boasts a brightness rating of at least 3,000 to 5,000 lumens. This level of brightness is fundamental to combat ambient light effectively during the day.
Additionally, consider projectors with high refresh rates and low input lag if gaming will be part of your viewing activities, as these features can greatly enhance the experience. Next, consider using a high-gain projector screen, as a screen with a gain of 1.5 or higher can greatly enhance image visibility in brighter environments.
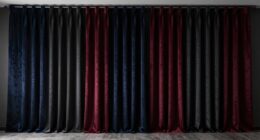
Placement is another important aspect; position your projector away from direct sunlight and utilize blackout curtains or blinds to improve your viewing experience. Adjusting the projector's brightness and contrast settings based on the ambient light conditions is essential, aiming for a contrast ratio of at least 2000:1 to maintain image clarity.
For ideal image quality, you might also want to explore the role of contrast ratio in projector performance.
Lastly, don't forget to regularly check and clean the projector lens. Dust and smudges can diminish image quality, especially in well-lit spaces.
Frequently Asked Questions
What Is the Best Projector Settings for Daytime?
To achieve the best projector settings for daytime, increase brightness above 3,000 lumens, use a high-gain screen, adjust contrast higher, and set color temperature to around 6500K for vibrant, clear images.
How to Professionally Calibrate a Projector?
"Measure twice, cut once." To professionally calibrate your projector, adjust brightness and contrast for clarity, fine-tune color settings for accuracy, and regularly check sharpness. Save your settings for easy access and maintain peak performance.
How Do I Get My Projector to Work in Daytime?
To get your projector working in daytime, choose a bright model, ideally over 3,000 lumens. Use a high-gain screen, adjust settings, and control ambient light to enhance visibility and image quality effectively.
What Is the Best Picture Setting for a Projector?
Like adjusting a camera for perfect focus, you'll want to set your projector's brightness high, use a "Bright" mode, and calibrate the color temperature to around 6500K for vivid, clear images in any setting.
Conclusion
To sum up, calibrating your projector for daytime viewing can transform your experience. Did you know that properly calibrated projectors can improve brightness and contrast by up to 30%? By investing a little time in calibration, you'll see clearer images and vibrant colors, making your viewing sessions much more enjoyable. Don't forget to maintain your projector and consider the screen you're using. With the right setup, you'll love every moment spent in front of your projector!
