Connect with us

Home Cinema

Budget-Friendly Home Cinema: Creating a Great Experience Without Breaking the Bank

You won’t believe how easy it is to create a stunning home cinema experience on a budget—discover the secrets to elevate your movie nights!

Published

on

affordable home theater setup

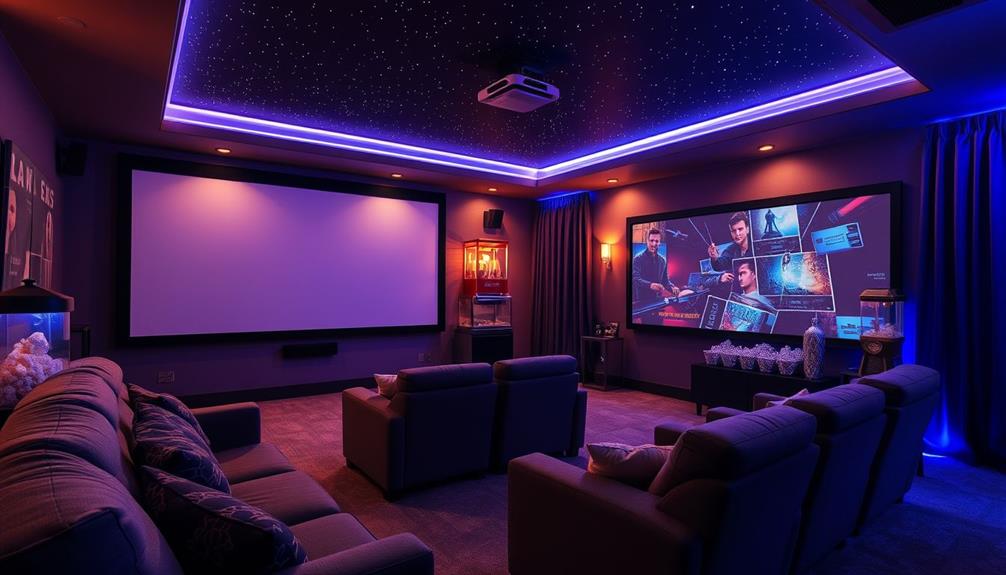
You can create an impressive home cinema experience on a budget by choosing the right space and selecting quality equipment without overspending. Opt for a dimly lit room with comfortable seating, like bean bags or recliners, to enhance your movie nights. For visuals, a 4K TV or a quality projector like the Epson Home Cinema 4010 provides great value. Invest in a soundbar for immersive audio and use acoustic treatments, like rugs and curtains, to improve sound quality. With the right setup, your home cinema will feel luxurious. Stick around to uncover more tips for an amazing experience!

Key Takeaways

  • Choose a room with minimal natural light and a rectangular layout for optimal viewing conditions and effective equipment setup.
  • Select a high-resolution display like the TCL 65 Q6 QLED TV or Epson Home Cinema 4010 projector based on your budget and space.
  • Enhance audio quality with affordable sound solutions such as soundbars or in-wall speakers, and consider refurbished equipment for savings.
  • Implement dimmable lighting and blackout curtains to create an immersive ambiance that complements your movie-watching experience.

Choosing the Right Space

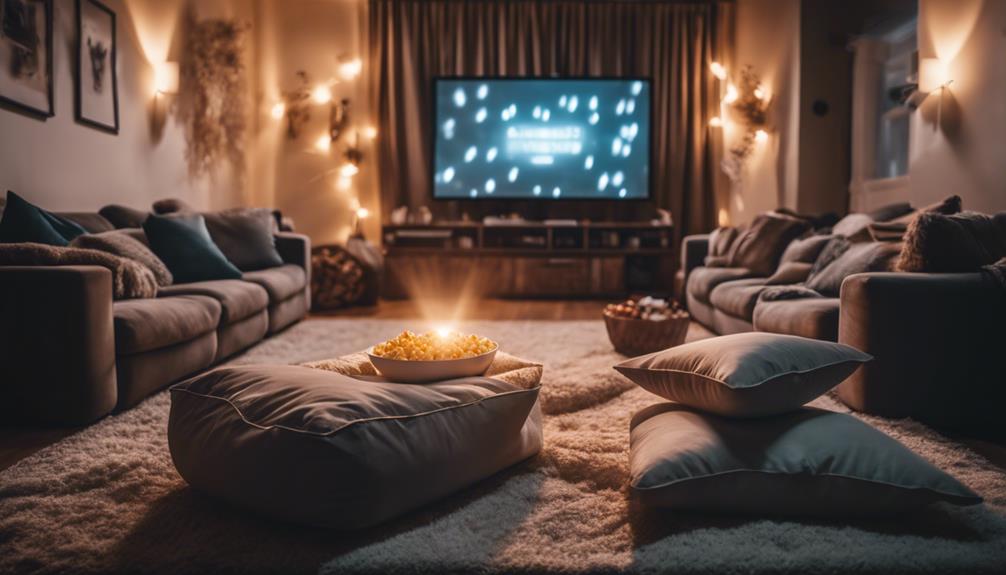
When choosing the right space for your home cinema, look for a room with minimal natural light to enhance your viewing experience and eliminate screen glare. A basement or an interior room works great for this purpose.

You'll want to verify there's ample wall space for projector placement or a large screen setup, as this is essential for achieving that cinematic feel.

Consider the size and layout of the room. A rectangular space allows for effective room setup and unobstructed sightlines, guaranteeing everyone has a great view of the screen.

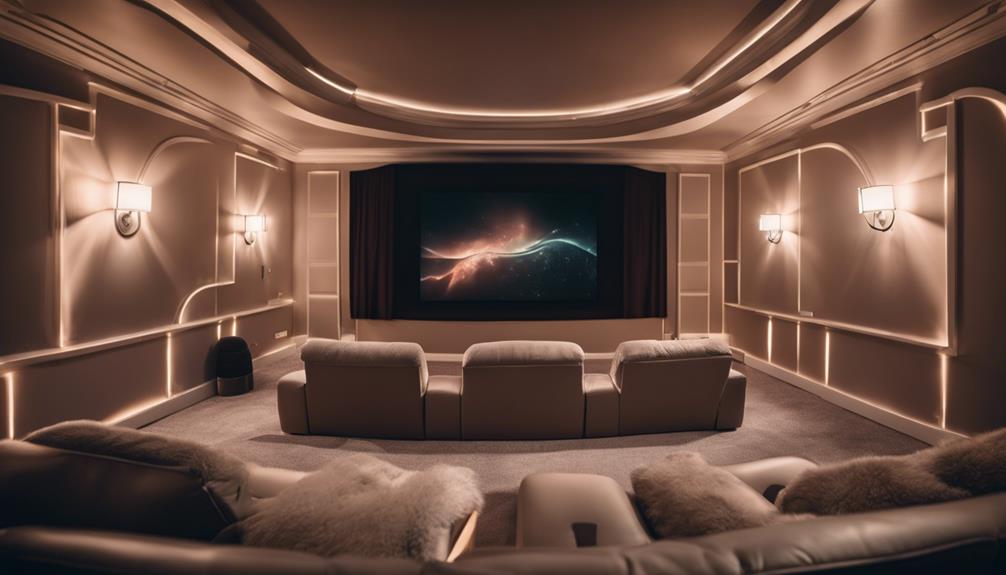
When it comes to seating, opt for comfortable options like recliners or bean bags that fit well within the room size and provide ideal viewing angles.

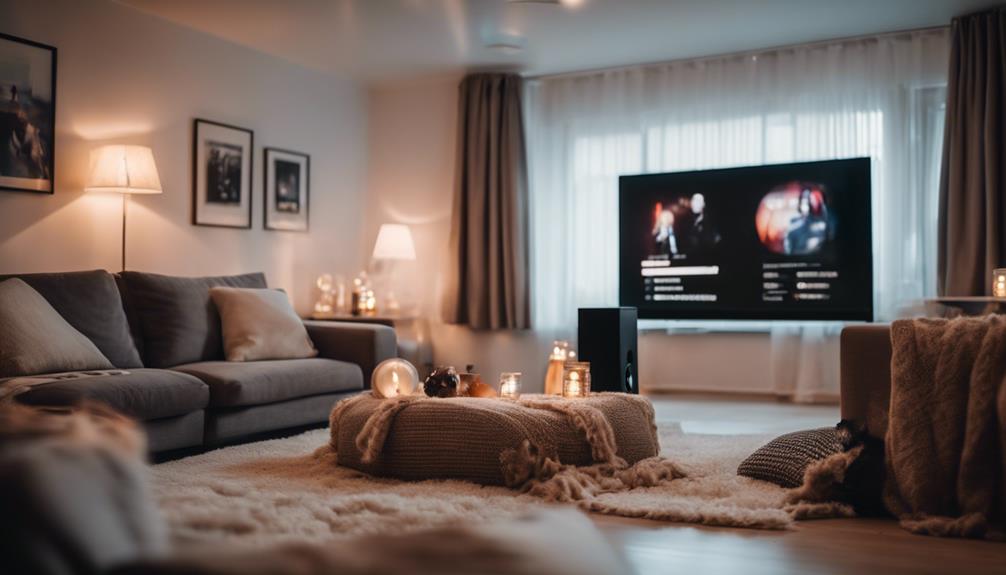
To further enhance the ambiance, incorporate blackout curtains to block out any residual light. Dimmable LED lights are also a fantastic addition, allowing you to control the atmosphere during your movie nights.

Advertisement

Essential Equipment Selection

critical gear selection process

When setting up your budget home cinema, picking the right display, sound solutions, and accessories is key.

To enhance your audio experience, consider investing in best headphone amplifiers of 2024 to boost sound quality without overspending.

You'll want to balance quality with affordability to create an immersive experience.

Let's explore how to make smart choices for each essential component.

Choosing the Right Display

Selecting the right display is essential for creating a budget-friendly home cinema that delivers an impressive viewing experience. You have a couple of great options: a high-resolution 4K UHD TV or a projector. For an excellent value, consider the TCL 65 Q6 QLED 4K TV at around $499. If you prefer a projector, look at options like the Epson Home Cinema 4010, which offers a cinematic experience but requires attention to the throw ratio for ideal screen size.

Here's a quick comparison to help you decide:

Advertisement
Display Type Price Range
High-Resolution 4K UHD TV ~$499 (TCL 65 Q6 QLED)
Projector (Epson 4010) ~$2,000
Affordable Mini Projectors $300 – $2,000
Screen Size (Elite Screens) 150-inch diagonal
Ideal Brightness 2800 ANSI lumens for well-lit spaces

When choosing your display, consider the ambient light in your space. Brighter projectors perform better in well-lit environments, ensuring you enjoy vivid images during your movie nights.

Affordable Sound Solutions

Finding affordable sound solutions can elevate your home cinema experience without straining your budget. Start with soundbars, like the TCL Q Class 5.1 Channel model priced at $249, which includes a subwoofer and surround speakers. These budget-friendly options deliver high-quality sound, providing an immersive audio experience without the need for expensive equipment.

If you're on a tighter budget, consider external sound systems that start around $400. They offer a significant upgrade from built-in TV speakers without breaking the bank. Investing in high-quality speakers, such as the Polk Audio RC85i In-Wall speakers, can enhance sound quality while remaining budget-friendly, typically priced at around $150 per pair.

Don't overlook refurbished audio equipment; it can save you money while still providing reliable performance. Additionally, using acoustic panels, which you can create from affordable materials, can greatly improve sound quality in your home theater.

This approach allows for a significant enhancement in your audio setup, ensuring you get the immersive experience you desire without overspending. By choosing these budget-friendly audio solutions, you can achieve a satisfying home cinema environment that rivals more expensive setups.

Advertisement

Essential Accessories and Features

To create an impressive home cinema on a budget, you should focus on essential accessories and features that enhance both the visual and auditory experience. A well-thought-out home theater setup includes selecting the right audio equipment, a reliable streaming device, and some thoughtful enhancements.

Here's a quick overview of some essential items:

Essential Accessory Description
TV TCL 65 Q6 QLED 4K TV – $499 for quality visuals
Soundbar TCL Q Class 5.1 Channel – $249 for immersive audio
Lighting Govee Dreamview Backlights – $90 for ambiance
Streaming Device Roku Express/Amazon Fire Stick – $30-$50

Investing in a solid surround sound system, like the TCL soundbar, will greatly improve your movie-watching experience. Additionally, using sound-absorbing materials such as rugs and curtains can enhance acoustics, creating a more inviting atmosphere. If you're considering a projector screen, remember that it can elevate your visual experience as well. By prioritizing these budget-friendly essentials, you'll transform your home cinema into a delightful retreat for all movie nights.

Affordable Audio Solutions

budget friendly sound options

Affordable audio solutions can transform your home cinema experience without breaking the bank. You don't need to invest in a pricey sound system to enjoy high-quality audio. Here are some budget-friendly options that deliver immersive sound:

  1. Soundbars: Consider the TCL Q Class 5.1 Channel soundbar for $249. It includes built-in surround speakers and a subwoofer, providing a complete audio experience.
  2. Bookshelf Speakers: Opt for budget-friendly bookshelf speakers or a simple 2.1 or 3.1 speaker system. They're easy to set up and offer a significant upgrade over your TV's built-in speakers.
  3. In-wall Speakers: Brands like Polk Audio offer affordable in-wall speakers, such as the RC85i, which maintain a clean aesthetic without sacrificing sound quality.
  4. Deals on Audio Equipment: Regularly check for deals on audio equipment, including refurbished items. You can save money while still achieving a great home theater experience.

With these affordable audio solutions, you can create an incredible sound environment that enhances your movie nights without emptying your wallet.

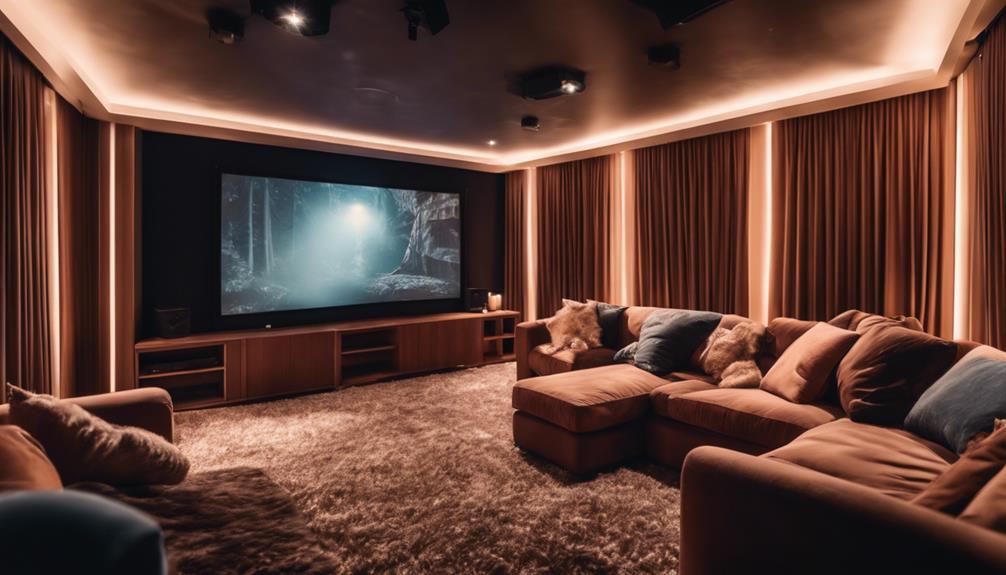
Optimizing Visual Display

enhancing visual presentation techniques

Upgrading your visual display can greatly enhance your home cinema, complementing the immersive audio solutions you've already considered. For ideal image clarity, choose a projector with at least 1080p resolution, but if your budget allows, consider a 4K projector for a more vivid experience. The Epson Home Cinema 4010 4K PRO-UHD projector is an excellent choice at around $2,000 for budget-conscious cinephiles.

Pair your projector with a quality screen like the Elite Screens Sable Frame AcousticPro1080P3, which boasts a 150-inch diagonal size and sound transparency for stunning visuals. Don't forget to verify adequate throw distance by checking the projector's throw ratio to fit your room size without distortion.

If space is a concern, you might opt for a high-quality LED TV, such as the TCL 65 Q6 QLED 4K TV, priced at $499. It delivers impressive visuals while being budget-friendly and space-efficient.

Advertisement
Feature Recommendation
Projector Epson Home Cinema 4010 4K
Screen Elite Screens AcousticPro1080P3
Image Clarity 4K Preferred
Space Requirement TCL 65 Q6 QLED 4K TV

Lighting for Atmosphere

creating ambiance with illumination

To set the right mood for your home cinema, you need to focus on dimmable lighting solutions that allow you to adjust brightness as needed.

Choosing the right color temperature can make a huge difference, with warmer tones enhancing the cinematic experience.

Additionally, controlling ambient light will help you create a comfortable and immersive viewing environment.

Dimmable Lighting Solutions

How can dimmable lighting transform your home theater into an enchanting cinematic experience? By setting the right ambiance, you'll elevate your movie nights to a whole new level. Here are some budget-friendly ideas to achieve that perfect atmosphere:

  1. Install Lutron Caseta Dimmers: This allows for easy lighting control, letting you adjust brightness based on the mood or type of film.
  2. Add Monroe Sconces: These fixtures provide vertical light without glare, enhancing your home theater decor while keeping the focus on the screen.
  3. Incorporate LED Strip Lights: Dimmable LED strip lights not only create a cinematic effect but also promote energy efficiency and longevity.
  4. Use Color-Changing Capabilities: With Commercial Electric LED Ultra Slim lights, you can match your lighting to the film theme, adding a dynamic flair to your viewing experience.

Color Temperature Importance

The color temperature of your lighting plays an essential role in creating the perfect atmosphere for your home theater, influencing everything from mood to comfort during movie nights. Warmer tones around 2700K can establish a cozy atmosphere, making your cinematic experience more enjoyable.

To optimize your lighting setup, consider using the following elements:

Lighting Type Benefits
Dimmable Lights Control brightness for comfort
LED Lights Adjustable color temperatures
Ambient Lighting Enhances aesthetics, reduces glare
Dimensional Lights Provides depth and visual interest

Ambient Light Control

Controlling ambient light is essential for crafting an immersive atmosphere in your home cinema, ensuring that distractions fade away as the film begins. To achieve effective ambient light control, consider these key elements:

Advertisement
  1. Blackout curtains: Install these to block out external light, creating a darker environment that enhances your cinematic experience.
  2. Dimmable LED lights: Use 2700K temperature bulbs to set a warm, inviting atmosphere during movie viewing. Their adjustable brightness helps you control the mood effortlessly.
  3. Vertical lighting: Incorporate Monroe Sconces for soft, glare-free illumination. This adds depth and a cozy ambiance without overpowering the screen.
  4. Smart lighting systems: These allow remote control and programmable settings, enabling you to adjust lighting based on the movie genre or occasion.

DIY Design Tips

creative home project ideas

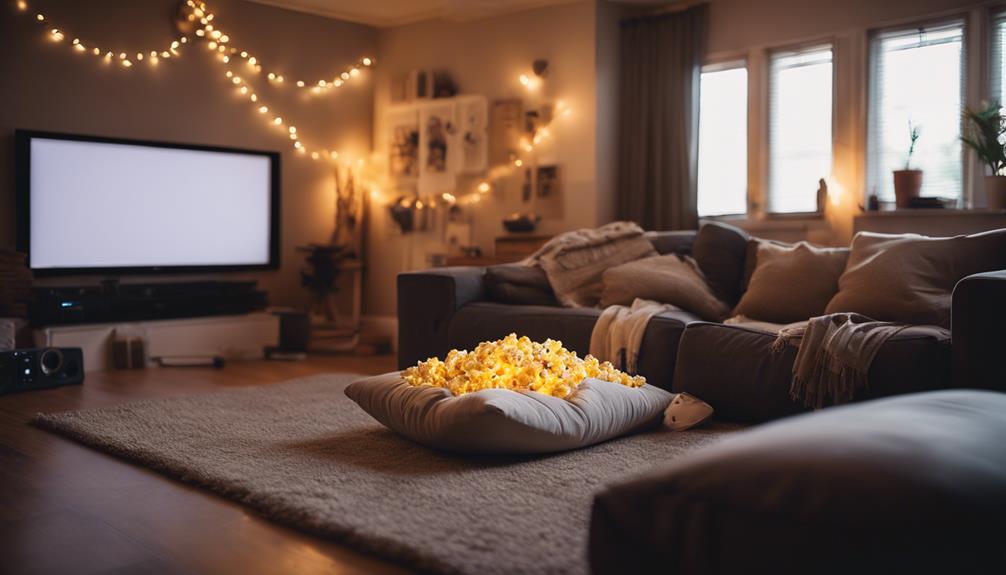
Transform your space into a cozy home cinema with simple DIY design tips that enhance both comfort and ambiance.

Start by choosing comfortable seating options like repurposed furniture or bean bags, ensuring everyone can relax during movie marathons.

Consider adding some best window treatments to enhance the overall aesthetics and privacy of your cinema experience.

For an impressive sound experience, consider adding acoustic panels or soft furnishings like rugs and thick curtains to absorb sound and improve audio quality.

Next, focus on lighting. Use smart lighting solutions, such as dimmable LED lights with a warm color temperature of 2700K, to create a cinematic ambiance that enhances your viewing experience.

You can also incorporate products like Govee Dreamview TV Backlights to complement the on-screen action without breaking the bank.

Advertisement

Acoustics and Soundproofing

noise control and acoustics

Enhancing your home cinema's acoustics and soundproofing can elevate your movie-watching experience, making every dialogue crisp and every sound effect immersive. You don't need to spend a fortune to achieve great audio quality. Here are some budget-friendly tips to improve the sound in your home theater:

  1. Use Rugs and Heavy Curtains: These materials help dampen sound and minimize echo, creating a richer audio environment.
  2. Install Acoustic Panels: Placing these on your walls can greatly reduce sound reflections, enhancing clarity for dialogue and effects.
  3. Seal Gaps: Prevent sound leakage by sealing gaps in doors and windows. This way, external noises won't disrupt your cinematic experience.
  4. Optimize Furniture Arrangement: Position your seating at least 1.5 to 2 times the distance of your screen size. This arrangement enhances sound distribution and immersion.

Enhancing Your Experience

improving user interaction quality

Creating the right atmosphere for your home cinema often involves careful attention to lighting and sound, ensuring you fully enjoy every cinematic moment.

Start by installing dimmable LED lights to create an adjustable ambiance. Aim for warm lighting around 2700K, enhancing the overall cinema experience. Blackout curtains can also eliminate external light interference, allowing for a more immersive viewing environment.

When it comes to audio, consider a budget-friendly home theater system. A soundbar or a 5.1 surround sound system, starting at around $249, can provide excellent audio without breaking the bank. This setup will deliver rich audio quality that brings your films to life. Pair your audio with a projector and screen that offer at least 1080p resolution. The Epson Home Cinema 4010 4K PRO-UHD projector is a solid choice, though there are more affordable options available.

Don't forget about acoustic treatments. Simple additions like rugs and curtains can greatly improve sound quality and reduce noise, creating a more enjoyable viewing experience.

With these enhancements, you're well on your way to a fantastic home cinema, all while staying budget-friendly.

Frequently Asked Questions

How to Make a Movie Theater Experience at Home?

To create a movie theater experience at home, invest in a quality projector and sound system, use dimmable LED lights, add blackout curtains, and arrange comfortable seating for an immersive viewing environment you'll love.

Advertisement

How Do You Make a Perfect Home Cinema?

To create the perfect home cinema, think of it as crafting a cozy nest. Choose a dark room, invest in a great projector, set up quality audio, and control the lighting for an immersive experience. Enjoy!

How Do Independent Theaters Make Money?

Independent theaters make money through ticket sales, concessions, and special events. They boost revenue with membership programs and loyalty cards, plus collaborate with local businesses for promotions, enhancing community support and profitability.

How Much Does a Home Theatre Room Cost?

Setting up a home theater room can feel like you're building a spaceship! Depending on your choices, costs typically range from $1,000 to $5,000. You can create a fantastic space without emptying your wallet!

Conclusion

So, you thought creating a budget-friendly home cinema was impossible, huh? Surprise!

With just a little creativity and smart choices, you can enjoy movie nights without a Hollywood budget.

Advertisement

By transforming your space and picking the right gear, you'll be amazed at how quickly you can elevate your viewing experience.

Who knew saving money could feel so luxurious?

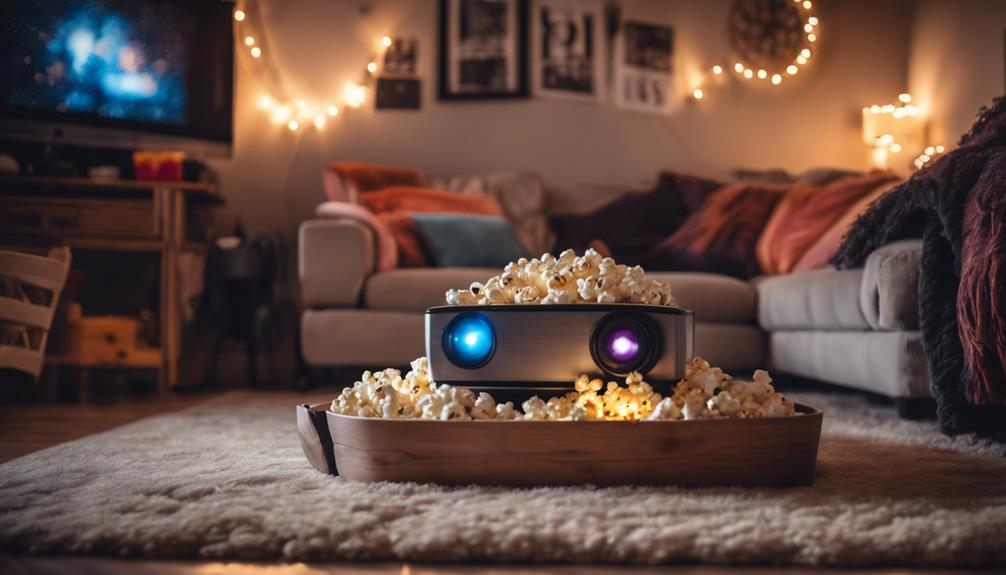
Now, grab that popcorn and settle into your new cinematic paradise—who needs a fancy theater anyway?

Tom is the Editor-in-Chief of 1home Theatre Projector, a website that provides news and reviews on the best home cinema experiences. With over 10 years of experience in the industry, Tom knows what makes a great home theatre projector and wants to make it easy for everyone to build the perfect setup for their needs. When he's not busy writing or testing projectors, Tom enjoys watching classic films and spending time with his family.

Continue Reading
Advertisement

Home Cinema

Creating the Ultimate Gaming Setup With a Projector

Incorporate stunning visuals and immersive sound into your gaming setup with a projector, but discover the essential tips that will take your experience to the next level.

Published

on

ultimate gaming setup projector

You can transform your gaming experience by creating the ultimate setup with a projector that offers stunning visuals and immersive sound. Start by measuring your space to choose the right screen size, and make sure your wall's smooth for installation. Select a projector with at least 1080p resolution, low input lag, and high brightness above 2500 lumens for peak clarity in various lighting. Connect your consoles using high-speed HDMI cables, and consider a sound system to enhance audio quality. With the right equipment and arrangement, you'll elevate your gaming. Keep going to uncover additional tips for the best results!

Key Takeaways

  • Measure your wall dimensions to select an appropriate screen size and ensure a smooth, unobstructed surface for projection.
  • Choose a projector with a minimum resolution of 1080p, low input lag under 20 ms, and at least 2500 lumens brightness for optimal gaming performance.
  • Use High-Speed or Ultra High-Speed HDMI cables for connecting consoles, ensuring support for 4K resolutions and advanced audio formats.
  • Implement an audio system with HDMI ARC or eARC for seamless audio integration and consider external speakers for enhanced sound quality.
  • Organize cables and apply acoustic treatments to minimize echoes, ensuring a clean setup and improved audio experience during gameplay.

Evaluating Room Space

assessing available room space

When setting up your gaming space with a projector, it's crucial to size up your room effectively. Start by measuring your wall dimensions to guarantee compatibility with your desired screen size. For instance, a 100-inch screen requires a width of 221 cm, while a 120-inch screen needs 265 cm.

Additionally, you might want to take into account the layout of your space, including any furniture arrangements that could obstruct viewing angles, much like how regional water parks optimize their designs for visitor experiences. Make sure the wall surface is smooth and free of protruding outlets or hardware to facilitate an easy projector screen installation.

Next, take into account the ambient light in the room. The placement of windows and the use of curtains will greatly influence your projector's brightness requirements.

If you can't control the room lighting effectively, opt for a projector with higher brightness to guarantee you can see the images clearly during gaming sessions.

Projector Placement Options

optimal projector positioning choices

After evaluating your room space, it's time to contemplate where to place your projector for the best gaming experience. Understanding projector placement options can considerably enhance your setup. Here are some considerations to keep in mind:

  • Ultra Short Throw projectors: These are perfect for placement on a TV stand, allowing you to enjoy large images from less than one meter away, which is especially beneficial for top 5 projectors for gaming enthusiasts.
  • Throw ratio: Calculate this by dividing the distance from your projector to the screen by the screen width. It's crucial for achieving your desired image size.
  • Ceiling-mounted projectors: If you go this route, install them at the right height, typically aligning with the center of the screen for ideal viewing angles.
  • Side projection: When opting for side projection, watch out for potential obstructions that could distort the image and obstruct visibility.
  • Recalibrating settings: If your projector hasn't been used in a while, it's essential to recalibrate the image settings for restored quality and alignment.

With these tips, you'll set up your projector in a way that maximizes your gaming experience.

Connecting Consoles and Audio

audio console integration guide

To get your gaming setup right, start by choosing the right HDMI cables, like High-Speed or Ultra High-Speed, to connect your console for the best performance.

With advancements in technology, you may also consider utilizing projectors with higher brightness levels (at least 3000 lumens) to guarantee clear visibility during intense gaming sessions, especially in various lighting conditions.

Advertisement

Next, integrate your audio system using the ARC feature on your HDMI cables for seamless sound transmission.

For a truly immersive experience, remember to explore the potential of 8K resolution and beyond to enhance your visuals further.

HDMI Cable Selection

Choosing the right HDMI cables is essential for connecting your gaming consoles and audio systems effectively. The type of HDMI cable you select can greatly impact your gaming experience, especially with gaming projectors. Here are a few points to keep in mind:

  • Use High-Speed HDMI cables for consoles like the PS5 and Xbox Series to guarantee compatibility with resolutions up to 4K at 60Hz with HDR support.
  • Consider Ultra High-Speed HDMI cables if you're aiming for high refresh rates, as they can handle 4K at 120Hz.
  • Look for HDMI ARC (Audio Return Channel) support to simplify your setup and reduce cable clutter while sending audio back to your sound system.
  • Confirm your external audio systems support eARC (enhanced Audio Return Channel) for advanced audio formats like Dolby Atmos.
  • Always check that your HDMI cables meet the specific requirements you need, such as 1080p at 120Hz or 4K at 60Hz, to avoid compatibility issues.

Audio System Integration

Integrating your audio system with gaming consoles can greatly enhance your overall gaming experience. To achieve ideal audio system integration, use High-Speed or Ultra High-Speed HDMI cables when connecting your PS5 or Xbox Series. This guarantees you support resolutions up to 4K at 60Hz with HDR for stunning visuals alongside high-quality sound.

Implement HDMI ARC (Audio Return Channel) or eARC (enhanced Audio Return Channel) to streamline audio transmission from your projector to external sound systems. This setup allows for seamless interaction and guarantees you enjoy superior sound quality.

Make certain your audio system supports multi-dimensional audio formats like Dolby Atmos, which elevates your immersive gaming experience.

Advertisement

After connecting everything, adjust the audio settings on your consoles to match your sound system's capabilities. This fine-tuning helps enhance clear dialogue and rich sound effects, keeping you engaged in the gameplay.

Optimal Audio Settings

Achieving ideal audio settings is essential for enhancing your gaming experience.

To maximize audio quality when connecting your gaming consoles to a gaming projector, follow these steps:

  • Use High-Speed or Ultra High-Speed HDMI cables for 4K at 60Hz with HDR support.
  • Implement HDMI ARC (Audio Return Channel) to simplify audio transmission to your sound systems.
  • Adjust the audio settings on your console to output best sound formats, like multi-dimensional audio.
  • Test the audio output after setup to confirm clarity and balance.
  • Consider external speakers or soundbars, either via HDMI or Bluetooth, for superior audio quality.

Selecting Projector Features

choosing projector specifications wisely

When you're choosing a gaming projector, focus on features that enhance your gaming experience.

Look for a minimum resolution of 1080p, low input lag, and high refresh rates to guarantee smooth, responsive gameplay.

Additionally, consider brightness levels and connectivity options to make your setup as versatile as possible.

Advertisement

Essential Features Overview

Choosing the right projector for your gaming setup can greatly enhance your overall experience.

When selecting projectors, it's vital to take into account several key features that will elevate your gameplay.

Here's what to look for:

  • Resolution: Aim for at least 1080p or 4K to guarantee clear, detailed visuals.
  • Input Lag: Look for projectors with low input lag, ideally under 20 ms, for real-time responsiveness.
  • Refresh Rate: A high refresh rate of 120Hz or more minimizes stutter and guarantees smooth motion.
  • Brightness Level: A minimum brightness level of 2500 lumens is important for visibility in various lighting conditions, especially with a projection screen.
  • Connectivity: Make sure the projector has multiple HDMI ports for easy connectivity with gaming consoles and PCs.

Gaming Performance Factors

The right projector features can greatly impact your gaming performance, making it vital to understand what to prioritize. One of the key gaming performance factors is input lag. Aim for a projector with an input lag of under 20ms to guarantee your controller actions are reflected in real-time. This is essential for competitive gaming, where every millisecond counts.

Next, consider refresh rates. Opt for a projector that supports 120Hz or higher, which helps deliver smooth gameplay and reduces motion blur during fast-paced action. This can make a significant difference in your experience, especially in fast-moving titles.

Brightness is another important factor. Look for a minimum brightness of 2500 lumens, allowing you to enjoy clear images even in well-lit environments. This is particularly beneficial if you plan on gaming during the day.

Advertisement

Lastly, don't overlook the contrast ratio; a high contrast ratio of 2000:1 or more will enhance image depth and detail on your projection screen. Additionally, having multiple HDMI ports will guarantee compatibility with various gaming consoles and keep your setup future-proof.

Prioritize these features to elevate your gaming experience!

Screen Types and Considerations

types and considerations overview

What factors should you consider when selecting a screen for your gaming setup? Choosing the right projection screen can greatly enhance your gaming experience. Here are some key considerations:

  • Screen Types: Decide between fixed frame screens, portable screens, or even motorized options.
  • Fixed Frame Screens: These provide a professional appearance with excellent image quality, making them perfect for permanent setups.
  • Portable Screens: If you plan to game on the go or outdoors, portable screens offer versatility, though they may compromise a bit on image quality.
  • Aspect Ratio: The standard aspect ratio for gaming is 16:9, but if you want a more cinematic feel, consider a 21:9 screen for compatible games.
  • DIY Options: If you're on a budget, painted walls with special projection paint can serve as a cost-effective solution.

Enhancing Audio Experience

improving sound quality techniques

An immersive gaming experience goes beyond visuals; your audio setup plays a crucial role in pulling you into the action. Incorporating a surround sound system can elevate your audio experience, delivering immersive soundscapes that enhance gameplay. You'll feel every explosion and hear the subtle footsteps of enemies approaching, making you feel right in the middle of the action.

If space is tight, consider soundbars as a compact solution. They often feature advanced technology that improves sound quality, giving you clear dialogue and rich audio without the bulk of traditional speaker systems.

To further improve clarity, using acoustic treatments like sound-absorbing panels can minimize echoes, resulting in a more enjoyable and focused gaming experience.

Don't forget about wireless audio options, such as Bluetooth speakers. They offer seamless connectivity, allowing you to eliminate cable clutter and keep your gaming area neat and organized.

Advertisement

Setup Tips and Best Practices

effective setup strategies recommended

Creating an ideal gaming setup with a projector requires careful planning and attention to detail. To guarantee you achieve smooth gameplay and a stunning visual experience, follow these key tips:

  • Choose the right wall size: Aim for a minimum width of 221 cm for a 100-inch screen or 265 cm for a 120-inch screen.
  • Select a bright projector: Look for one with at least 2500 lumens to maintain clear images, even in well-lit rooms.
  • Position the projector correctly: Calculate the projector's throw ratio to find the best distance from your projection screen, preventing distortion.
  • Invest in a high-quality projection screen: A smooth wall surface or dedicated screen enhances clarity and color accuracy, elevating your gaming experience.
  • Keep your cables organized: Guarantee proper ventilation for your projector to avoid overheating and consider acoustic treatments to improve sound quality.

Frequently Asked Questions

Can a Projector Be Good for Gaming?

Yes, a projector can be great for gaming if it has at least 1080p resolution, low input lag, and high brightness. Proper setup and sound can enhance your overall gaming experience considerably.

Can You Hook up a Game System to a Projector?

Absolutely, you can connect your game system to a projector! Just imagine your favorite games sprawling across a giant screen. Make certain you've got the right cables and specs for an epic gaming experience.

Are Projector Screens Good for Gaming?

Yes, projector screens are great for gaming. They enhance image quality, reduce distortion, and improve color accuracy, ensuring a vibrant experience. Choosing the right screen type and aspect ratio maximizes your immersion during gameplay.

How Do You Make an Ultimate Gaming Setup?

Did you know that 83% of gamers report better experiences with immersive setups? To create your ultimate gaming setup, focus on high-quality screens, surround sound, comfortable seating, and ideal lighting for an unforgettable gaming experience.

Conclusion

With the right setup, your gaming experience can feel like a grand adventure, akin to stepping into the world of your favorite epic saga. By carefully evaluating your space, choosing the right projector, and enhancing audio, you'll create an enchanting atmosphere that pulls you in. Remember, every detail matters—like the hero's journey, it's about the journey as much as the destination. So, set up your ultimate gaming haven and let the quests begin!

Advertisement
Continue Reading

Home Cinema

How to Create a Budget-Friendly Home Theater With a Projector

Join us to discover how to create a budget-friendly home theater with a projector, and unlock the secrets to an unforgettable cinematic experience!

Published

on

budget home theater projector setup

You can create a budget-friendly home theater with a projector by focusing on essential equipment and smart choices. Start with an affordable projector like the Optoma HD28HDR for stunning visuals at about $649. Pair it with an 80-inch pull-down screen for just $72 and a Roku Streambar for sound at $100. Don't forget necessary accessories like an HDMI cable and cable concealers to keep things organized. With a setup cost around $963, you'll enjoy a great cinematic experience at home while saving money. Want tips on maximizing your setup? There's plenty more to explore!

Key Takeaways

  • Choose an affordable projector like the Optoma HD28HDR, priced at $649, for high-quality visuals and 4K input compatibility.
  • Invest in an 80-inch pull-down screen for $72 to create a larger viewing area than standard TVs.
  • Enhance audio with a Roku Streambar for $100, eliminating the need for more expensive sound systems.
  • Utilize essential accessories such as a 25-foot HDMI cable, switcher, and cable concealer for a tidy setup at minimal cost.
  • Optimize your room's lighting with dimmable sconces and blackout curtains to enhance the viewing experience.

Equipment and Setup Guide

setup and equipment instructions

When setting up a budget-friendly home theater, choosing the right equipment is essential for an immersive experience. Start with a high-quality projector like the Optoma HD28HDR, which offers 4K input compatibility while projecting at 1080p resolution. Priced at $649, this projector guarantees vibrant visuals that elevate your home theater setup.

To make certain your home is also secure while enjoying your new theater, consider the cost of home security systems, which can be budget-friendly with various options available. Next, invest in an 80-inch pull-down projector screen for $72 from Amazon. Make sure to follow the installation process carefully, using toggle bolts for secure mounting and alignment.

To enhance your audio quality, integrate a Roku Streambar priced at $100. This audio equipment boosts sound over built-in projector speakers and provides options for adding a wireless subwoofer and speakers later.

For mounting your projector, utilize a universal mount like the Optoma OCM818W-RU for $59, keeping in mind that you might face alignment challenges and drywall maintenance during the installation.

Don't forget about effective wire management! Use an HDMI cable for $15, an HDMI switcher for $12, and a cable concealer for $17 to keep your setup tidy and organized. With these components, you'll achieve an impressive home theater experience without breaking the bank.

Advertisement

Budget Breakdown and Cost Efficiency

cost efficiency budget analysis

When you're setting up a budget-friendly home theater, understanding the cost breakdown is vital.

You'll see how smart choices on equipment and accessories can lead to significant long-term savings.

Let's explore the essential components and affordable options that can enhance your cinematic experience without breaking the bank.

Equipment Cost Overview

Setting up a budget-friendly home theater doesn't have to break the bank. You can create an impressive home theater setup for as low as $963, which is well under your $1,000 budget. Here's a quick overview of essential equipment costs:

Equipment Item Cost
Projector Optoma HD28HDR $649
Sound System Roku Streambar $100
Screen DIY or budget screen $100
Accessories HDMI Cable $15
HDMI Switcher $12
Cable Concealer $17

When choosing your projector and sound system, prioritize quality to enhance your cinematic experience. The Optoma HD28HDR delivers stunning visuals, while the Roku Streambar guarantees excellent audio. Don't forget the accessories—they're vital for effective wire management and can be quite affordable. With this equipment, you can enjoy a fantastic home theater experience without overspending.

Long-term Savings Potential

Investing in a budget-friendly home theater can lead to substantial long-term savings, transforming your entertainment experience while keeping costs down. By spending around $963 on a complete setup, including a projector and screen, you circumvent the need for expensive large-screen TVs.

Advertisement

For instance, the Optoma HD28HDR projector, priced at $649, delivers a stunning 1080p viewing experience without breaking the bank. Additionally, one can consider features like various toilet types that enhance the comfort and functionality of your home, making it a more enjoyable place for movie nights.

Moreover, enhancing your setup with a Roku Streambar for just $100 provides high-quality sound, eliminating the need for costly separate audio systems. This smart allocation of funds allows you to create an all-encompassing home theater system that doesn't sacrifice quality.

Additionally, investing in an HDMI switcher and cable concealer for about $29 keeps your setup tidy and saves you from professional installation fees.

With a budget-friendly home theater, you can enjoy regular family movie nights without the expense of frequent trips to the cinema. Over time, these savings accumulate, making your home theater a financially savvy choice. Embrace the convenience and enjoyment of a home theater while reaping the long-term savings it offers.

Affordable Accessory Recommendations

How can you enhance your budget-friendly home theater setup without overspending? Start by investing in essential accessories that won't break the bank.

Advertisement

An HDMI cable, like the Amazon Basics version for just $15, guarantees high-quality video and audio from your devices to the projector. Additionally, consider the convenience of using a robot vacuum to keep your home theater area clean and inviting, making certain you can enjoy your movie nights without distractions.

Next, consider adding an HDMI switcher, such as the Techole model for $12. This handy device lets you switch easily between multiple input sources, boosting the functionality of your setup.

To keep your space tidy, use a cable concealer like the UMTELE option for $17. It'll help you manage and hide those pesky cables, creating a clean and organized atmosphere for your movie nights.

When you add these affordable accessory recommendations together, you'll find the total cost is around $44—well under the $50 mark.

Enhancing the Viewing Experience

improving audience engagement techniques

To elevate your home theater experience, consider a few key upgrades that can make a world of difference. Start by investing in an 80-inch pull-down screen for just $72. This upgrade enhances the viewing experience by providing a larger, clearer image compared to standard TVs. Pair it with the Optoma HD28HDR projector, which offers 4K input and projects at 1080p resolution with a 120Hz refresh rate, ensuring your image quality remains bright and sharp for movies and gaming.

Creating a cozy atmosphere also plays an essential role. Use dimmable wall sconces and blackout curtains to minimize outside light interference, improving immersion. Don't forget about sound; a Roku Streambar at $100 greatly enhances audio quality, offering a richer sound experience than built-in projector speakers.

Advertisement

Here's a quick overview of your key upgrades:

Upgrade Price Benefit
80-inch Pull-Down Screen $72 Larger, clearer image
Optoma HD28HDR Projector $XX Bright, sharp visuals
Dimmable Wall Sconces $XX Minimize light interference
Cable Concealers $17 Tidy setup, no clutter
Roku Streambar $100 Enhanced audio experience

Setup Considerations and Tips

effective setup strategies summary

When setting up your home theater, projector placement is essential for the best viewing experience.

You'll also want to manage your cables effectively to keep everything neat and tidy.

Don't forget to take into account room lighting, as it can greatly impact your picture quality and overall enjoyment.

Projector Placement Strategies

Finding the right spot for your projector is essential for achieving the best viewing experience. Start by calculating the throw distance, which is typically 1.5 to 2.5 times the screen width. This guarantees a clear image without distortion.

For ideal projector placement, consider using a ceiling mount or a sturdy shelf to keep the projector stable. Position the lens at the same height as the top of the screen for the best viewing angle.

Advertisement

Don't forget about ventilation; your projector needs enough airflow to prevent overheating, especially during long movie marathons. Make sure there's space around it for air circulation.

Next, take into account the room's ambient light. Place the projector away from direct sunlight, or use blackout curtains to improve picture quality dramatically.

Cable Management Solutions

After setting up your projector for best viewing, it's time to tackle cable management to keep your home theater looking sharp. A clean setup not only enhances aesthetics but also prevents issues like signal loss. Start by using a 25-foot HDMI cable for long distances between your HD projector and source devices. This guarantees your signals remain strong, especially in larger rooms.

Invest in a cable concealer, such as the UMTELE model, to hide and manage your cables neatly along walls or baseboards. Here's a quick guide to help you:

Tip Benefit
Use extension cords Accommodates multiple devices
Plan cable routing Avoids tangling
Label each cable Simplifies troubleshooting

Consider incorporating power strips with surge protection to maintain safety while minimizing clutter. Planning your cable layout before installation can make future adjustments easier, giving you more control over your home theater room. With these cable management strategies, you'll achieve a sleek, organized space that enhances your movie-watching experience.

Advertisement

Room Lighting Considerations

Creating the perfect ambiance in your home theater is essential for an immersive experience. When tackling room lighting considerations, focus on soft dimmable lighting that enhances your viewing while minimizing glare on the screen. Wall sconces provide an elegant option for ambient lighting control, setting the mood without overpowering the cinematic atmosphere.

Avoid bright overhead lights that can disrupt your cozy environment. Instead, choose energy-efficient LED lights with adjustable brightness and a warm color temperature. These options create a welcoming atmosphere and keep the focus where it belongs: on the screen.

Incorporating blackout curtains or thick velvet drapes will block natural light from windows, ensuring a darker space that boosts picture quality during daytime viewing.

You can also enhance the overall ambiance by using LED strip lights around the screen or behind furniture, adding a subtle glow without distracting from your movie or game.

Make sure to position lighting controls within easy reach, allowing for quick adjustments. This way, you can create the perfect atmosphere for movie nights or gaming sessions without interrupting your entertainment flow.

Advertisement

Future Enhancements and Upgrades

upcoming improvements and developments

As your home theater evolves, consider a few enhancements that can elevate your viewing experience. Investing in a 4K projector can greatly enhance picture quality, creating a more cinematic feel. With prices dropping, it's an achievable upgrade that will impress guests and family alike.

A wireless subwoofer is another smart addition that improves sound depth without the hassle of tangled wires. This flexibility allows you to rearrange your space effortlessly. Moreover, incorporating acoustic panels can dramatically reduce echoes, enhancing audio clarity and making your home theater sound like a professional setup.

To create a enthralling atmosphere, think about adding LED strip lighting around the screen or along the walls. This feature not only adds visual appeal but also immerses you deeper into your movie-watching experience. Finally, curating a personal library of films and streaming services guarantees your home theater remains a versatile entertainment hub.

Here's a helpful table summarizing these enhancements:

Enhancement Description
4K Projector Upgrade resolution for a cinematic experience.
Wireless Subwoofer Enhances sound depth without cumbersome wires.
Acoustic Panels Reduces echoes, improving overall audio quality.
LED Strip Lighting Creates an immersive atmosphere for movie nights.
Personal Library Expands viewing options for varied entertainment.

Home Theater Design and Layout

custom home theater setup

To achieve an ideal home theater experience, you should carefully consider the design and layout of your space. Start with a rectangular room shape and include a 10-inch riser for back row seating. This guarantees every guest has a clear view of the screen.

For your home theater design, opt for a dark, inviting color scheme like Iron Ore from Sherwin Williams, but be certain to choose a lighter carpet to avoid a dungeon-like feel.

Position your projector 7-10 feet from the screen for best viewing distance. Make sure it's securely mounted to prevent any damage during installation.

Advertisement

To enhance the viewing experience, incorporate dimmable wall sconces. These will allow you to control the lighting elegantly, creating an ambiance that complements your film without causing glare on the screen.

Frequently Asked Questions

How to Set up a Budget Home Theater?

To set up a budget home theater, start with a quality projector, invest in a decent screen, enhance audio with good speakers, and manage cables neatly. Keep your total costs under $1,000 for the best experience.

How to Connect Home Theatre With Projector?

To connect your home theater with a projector, use an HDMI cable from the projector to the AV receiver. Check compatibility, and if needed, add an HDMI switcher for multiple devices. Guarantee proper power access, too.

How to Create a Cinema Room on a Budget?

Imagine a cozy cinema room, complete with plush seating and dim lighting. You'll want budget-friendly essentials like a projector, screen, soundbar, and smart cable management to transform your space into an inviting movie haven.

How to Make a Home Theater DIY?

To make a home theater DIY, start with a projector and an appropriate screen. Add sound equipment, manage your cables for a clean look, and guarantee comfortable seating for an enjoyable viewing experience.

Advertisement

Conclusion

Creating a budget-friendly home theater with a projector is totally doable and can bring the cinema experience right into your living room. Imagine transforming your spare room into a cozy movie haven with just a few smart purchases. For instance, you could snag a high-quality projector for under $300 and build a DIY screen using a simple white sheet. With some comfy seating and dim lighting, you'll be ready for movie nights without breaking the bank!

Continue Reading

Home Cinema

Troubleshooting Guide: Fixing White Dots on Your Projector Screen

Be prepared to tackle those frustrating white dots on your projector screen with our troubleshooting guide that reveals crucial steps for a clearer viewing experience.

Published

on

fixing projector screen dots

If you're seeing white dots on your projector screen, don't worry—many issues can lead to this. Start by checking for dust on the lens and filters, as cleaning them may solve the problem. Next, inspect your input sources to verify the issue isn't coming from the devices you're using. If the dots persist, it could be pixel issues, so observe a uniform screen to identify dead or stuck pixels. Regular maintenance, including cleaning filters and components, can help you avoid this problem in the future. Want to explore more tips to tackle those pesky white dots?

Key Takeaways

  • Check different input sources to determine if white dots persist across all devices, indicating an internal issue.
  • Inspect the projector lens and filters for dust; clean them regularly to maintain image quality.
  • Use a uniform background to identify dead or stuck pixels by observing the projector output.
  • Ensure all cables are securely connected and free from visible damage to prevent signal issues.
  • Consider professional repair for persistent pixel issues or internal component cleaning, especially for DMD chip problems.

Understanding White Dots

interpreting white dot patterns

When it comes to white dots on your projector screen, pinpointing the cause can help you tackle the issue effectively. These white dots can often stem from dust or debris that accumulates on the optical components or lens.

Regular maintenance, similar to the care needed for robot vacuum cleaners, can prevent dust buildup that exacerbates white dot problems. When light scatters off these particles, it creates those noticeable patches you see.

In the case of DLP projectors, white dots may indicate problems with the DMD chip, where dead or stuck pixels fail to display correctly due to heat or damage.

You'll notice that these white dots persist across different input sources, which suggests there's an internal issue rather than a problem with your image feed. Regular maintenance is essential; cleaning filters and internal components can prevent dust buildup that exacerbates white dot problems.

If you find yourself struggling with persistent white dots, it's often best to seek professional help. They can assist in identifying and replacing malfunctioning DMD chips or conduct a thorough internal cleaning to restore your projector to its best performance.

Advertisement

Understanding the nature of these white dots is your first step toward a clearer, more enjoyable viewing experience.

Common Causes of White Dots

white dots causes explained

White dots on your projector screen can be frustrating, and understanding their common causes is vital to fixing the issue. One major culprit is dust and debris accumulation on internal components. When these particles scatter light, they create visible white dots during projection.

Regular maintenance, similar to the upkeep of heat pumps, can prevent dust buildup and enhance overall performance efficient energy use.

Another common cause is dead pixels, which are pixels that fail to display correctly and often result in stationary white dots. Stuck pixels can also appear as white patches because they remain in the "on" position.

Additionally, unclean filters can distort images and contribute to white patches. Regular maintenance and cleaning are important to prevent these problems.

Hardware malfunctions, including issues with the projector's internal components, may also create white dots, signaling potential failures that require professional attention.

Advertisement

Finally, connection problems, such as faulty cables or loose connections, can lead to image abnormalities like white spots. It's essential to inspect all cables and ports to guarantee everything's functioning properly.

Initial Troubleshooting Steps

start with basic checks

Start by checking your input sources to see if the white dots appear across all of them; this helps pinpoint whether the issue is with the signal.

If the issue persists, consider how the projector's performance can be affected by factors such as budget management or the quality of your cables.

Next, inspect the projector for any dust on the lens and filters, as even a small amount can scatter light and create those annoying white patches.

Taking these initial steps can save you time and lead you toward a solution more quickly.

Check Input Sources

To tackle the issue of white dots on your projector screen, begin by checking all input sources. This initial step is essential in pinpointing whether the problem lies within the projector or a specific device.

Advertisement

Follow these steps to effectively troubleshoot:

  1. Test Different Devices: Connect a different input source, like a laptop or DVD player, to see if the white dots persist.
  2. Check Connections: Verify all cables connecting the projector to the input sources are secure and undamaged. Faulty connections can lead to image issues.
  3. Use a Blue Screen: Display a blue or blank screen to better visualize those pesky white dots. They're usually easier to spot against a uniform background.
  4. Isolate the Problem: If the white dots only appear with one device, test that source on another display to rule out any issues with it.

Inspect for Dust

Dust buildup on your projector can greatly impact image quality, often leading to the appearance of white dots on the screen.

Start by examining the projector's lens for any visible dust or smudges. Even minor contaminants can scatter light, affecting the clarity of your images. Use a microfiber cloth to gently wipe the lens, ensuring it's free from dust and debris that could interfere with your viewing experience.

Next, check the air intake and exhaust vents for dust buildup. Blocked airflow can cause overheating and exacerbate internal dust issues, which might also contribute to those pesky dots on the screen.

Regularly clean or replace the filters according to the manufacturer's guidelines—usually every 100 hours of use—to prevent dust accumulation and maintain peak performance.

Cleaning Techniques for Projectors

projector maintenance cleaning methods

Cleaning your projector regularly is crucial for maintaining its performance and image quality. Neglecting this task can lead to unsightly white dots on your projector screen and diminish your viewing experience.

Here are some effective cleaning techniques to keep your projector in top shape:

Advertisement
  1. Clean the lens: Use a microfiber cloth with a few drops of glass cleaner or degreaser. This helps remove smudges and enhances clarity.
  2. Check air filters: Clean or replace the air filters every 100 hours to prevent dust buildup, which is a common culprit for those pesky white dots.
  3. Use compressed air: Blow dust out of vents and inaccessible areas without disassembling your projector. This quick step can greatly reduce dust accumulation.
  4. Consider professional help: If you're facing complex issues, don't hesitate to hire a professional service. They can guarantee thorough cleaning and maintenance of your projector's internal components.

Inspecting for Pixel Malfunctions

identifying pixel defects issues

Even with regular maintenance and cleaning, you might still encounter white dots on your projector screen. These dots can often be attributed to dead pixels on the DMD chip. Dead pixels fail to display correctly and remain unresponsive, while stuck pixels continuously show as white, creating visible disturbances.

To diagnose the issue, observe the projector's output against a uniform color background. This simple test can help you distinguish between dead pixels and potential dust or dirt interference.

Issue Type Description
Dead Pixels Unresponsive pixels that don't display at all.
Stuck Pixels Continuous white display, creating stationary dots.
Dust/Dirt Interference Moving dots suggest external contaminants.

If you identify dead pixels, professional replacement of the DMD chip may be your best option, as repairing individual pixels isn't feasible. Regular monitoring for pixel malfunctions is essential to prolong your projector's lifespan and maintain peak image quality. Keep an eye out for any changes, and address issues promptly to enjoy the best viewing experience possible.

Checking Optical Components

inspecting optical equipment thoroughly

A thorough inspection of the optical components is crucial for resolving white dots on your projector screen.

These white spots can often be traced back to issues within the projector's lens and other optical parts. Here's what you should check:

  1. Projector Lens: Inspect for dust or smudges. Cleaning with a microfiber cloth can greatly improve image quality.
  2. Filters: Look for dust accumulation. Regularly cleaning or replacing filters every 100 hours is necessary to maintain peak performance.
  3. Physical Damage: Examine the optical components, including the light path and lens. Any damage or misalignment could distort images and create those pesky white patches.
  4. Component Connections: Verify all optical elements are properly seated and connected. Loose components can lead to inconsistent light transmission and image quality.

Evaluating Hardware Connections

assessing device linkages efficiency

Properly evaluating hardware connections is essential for identifying and resolving issues like white dots on your projector screen. Start by ensuring that all cables connecting your projector to external devices are securely plugged in. Loose connections can lead to image abnormalities, including those pesky white dots.

Next, inspect the cables and ports for any visible damage, as faulty hardware connections can disrupt signal transmission, causing display issues. It's also important to use high-quality, compatible cables to minimize the risk of connection problems that contribute to white dots or other image artifacts.

Take a moment to check your projector's input source settings, ensuring they're correctly configured. Incorrect settings can sometimes mimic hardware connection issues, leading you to think there's a more significant problem.

Advertisement

If you're using adapters or converters, verify that they're functioning properly, as these can introduce connectivity problems that affect image quality. By thoroughly examining these aspects of your hardware connections, you can often pinpoint the cause of the white dots and take the necessary steps to fix them.

Professional Repair Options

expert restoration services available

When dealing with persistent white dots on your projector screen, seeking professional repair options is often the best course of action.

These experts can accurately diagnose whether the issue stems from dust accumulation or a failing DMD chip, guaranteeing you get the right fix.

Here are four reasons to evaluate professional repair services:

  1. Expert Diagnosis: Technicians can pinpoint the exact cause of the problem, saving you time and frustration.
  2. Thorough Cleaning: Professionals guarantee internal components are cleaned properly, reducing the risk of further issues.
  3. Cost-Effective: Repairing or replacing a DMD chip typically costs between $200 and $300, which is worthwhile given your projector may be worth around $1000.
  4. Support Access: Many brands, like Casio, offer dedicated customer support lines, helping you navigate your repair options.

Engaging local technicians who specialize in projector repairs can lead to detailed quotes and insights into necessary maintenance or replacements.

Preventative Maintenance Tips

essential maintenance best practices

To keep your projector in top shape, establish a regular cleaning schedule for its filters and internal components.

Make sure to maintain an ideal environment by reducing dust around the projector, which can minimize potential image distortion.

Regular Cleaning Schedule

Regularly cleaning your projector is essential for maintaining its performance and image quality. A solid cleaning schedule not only helps prevent projector white dots but also extends the life of your device.

Advertisement

Here's how to keep your projector in prime shape:

  1. Clean filters every 100 hours of use to prevent dust accumulation that can affect image clarity.
  2. Use compressed air to blow out dust from vents and internal components—it's effective without needing disassembly.
  3. Wipe the projector lens with a microfiber cloth to avoid scratches and guarantee peak light transmission.
  4. Inspect air intake and exhaust vents regularly to maintain proper airflow, as blocked vents can lead to overheating.

If you're in a high-dust environment, consider cleaning filters every 50 hours instead.

By sticking to this cleaning schedule, you'll not only enhance your projector's performance but also minimize the chances of encountering those pesky white dots on your screen.

Your projector deserves this care, so don't let dust ruin your viewing experience!

Optimal Environment Settings

Creating an ideal environment for your projector is crucial for preventing issues like white dots on the screen. By focusing on the best environment settings, you can greatly reduce the risk of damage to critical components like the DMD chip.

Here are some key tips to maintain a projector-friendly environment:

Advertisement
Tip Description Benefits
Regular Cleaning Dust and vacuum regularly to minimize dust accumulation. Reduces chances of internal dust.
Proper Ventilation Maintain a few inches of space around the projector. Prevents overheating and damage.
Use Air Purifiers Employ air purifiers to lower airborne particles. Keeps lens and internals clean.
Avoid Direct Sunlight Position the projector away from direct sunlight. Protects components from UV damage.

Maintaining a clean environment, guaranteeing adequate airflow, and protecting your projector from sunlight can help preserve its lifespan and performance. Regularly checking and cleaning filters every 100 hours will further enhance your projector's functionality, keeping those pesky white dots at bay.

Proper Filter Maintenance

Maintaining the filters of your projector is just as important as guaranteeing a clean environment. Neglecting them can lead to dust accumulation, resulting in those pesky white dots on your screen.

Here are some essential tips for proper filter maintenance:

  1. Clean or replace filters every 100 hours of use. This simple step prevents image quality degradation.
  2. Use the right filters. Confirm compatibility with your projector model to maintain peak performance and airflow.
  3. Gently vacuum the filters to remove dust without causing damage. Alternatively, use compressed air to blow out dust from the vents.
  4. Inspect for wear and tear. If your filters look excessively dirty or torn, replace them to guarantee your projector runs smoothly.

Community Resources and Support

local assistance and guidance

Finding reliable community resources and support can greatly ease the troubleshooting process for projector issues like white dots. One excellent place to start is AVForums, where you'll find an engaged community discussing projector problems. With over 60,700 views on related threads, you can tap into a wealth of shared experiences and advice.

Look for dedicated threads tagged "white dots" to uncover insights and troubleshooting tips from users who've faced similar challenges.

Another valuable resource is the JustAnswer platform, which provides 24/7 access to verified experts. You can get quick responses and expert guidance on projector maintenance and repair, ensuring you have the right information at your fingertips.

Advertisement

Engaging with online forums and communities not only offers real-time support but also gives you diverse perspectives on troubleshooting your projector.

Don't overlook YouTube channels that focus on projector repair. These can enhance your understanding of maintenance techniques and provide DIY solutions tailored to your specific issue.

Frequently Asked Questions

Why Is My Projector Showing White Spots?

Your projector's showing white spots likely due to dust on internal components or dead pixels. Regular cleaning and maintenance can help prevent this issue, but persistent spots may require professional assessment for potential damage.

What Causes White Pixels on Projector?

White pixels on your projector can stem from dead or stuck pixels, dust accumulation, or a failing DMD chip. Overheating and neglecting maintenance can worsen these issues, leading to an unsatisfactory viewing experience.

What Are the Speckles on My Projector?

Those speckles on your projector could be dust on the lens or inside components. They might also indicate dead pixels on the DMD chip. Regular cleaning can help you maintain clear image quality and minimize distractions.

Advertisement

How to Fix Dead Pixels on a Projector?

When you notice those pesky little stars on your projector, it's time to act. First, test with a solid color. If they persist, consider replacing the DMD chip or seek professional help for a smoother viewing experience.

Conclusion

To sum up, tackling those pesky white dots on your projector screen doesn't have to feel like climbing a mountain. By following the troubleshooting steps and staying proactive with maintenance, you can restore your viewing experience to its former glory. Remember, a little care goes a long way; much like a garden needs tending to flourish, your projector requires attention to keep its brilliance alive. Don't hesitate to seek help if needed—your screen deserves the best!

Continue Reading
Advertisement

Affiliate disclaimer

As an affiliate, we may earn a commission from qualifying purchases. We get commissions for purchases made through links on this website from Amazon and other third parties.

Advertisement

Vetted

top electrostatic headphones 2024 top electrostatic headphones 2024
Vetted2 months ago

The 10 Best Electrostatic Headphones of 2024 – Ultimate Sound Experience Unveiled

Unlock the ultimate sound experience with the top electrostatic headphones of 2024—discover which models will elevate your audio journey to...

concert earplugs for hearing protection concert earplugs for hearing protection
Vetted2 months ago

15 Best Earplugs for Concerts: Protect Your Hearing Without Missing the Music

Check out the 15 best earplugs for concerts that protect your hearing while enhancing your music experience—discover which ones are...

comfortable earbuds for small ears comfortable earbuds for small ears
Vetted2 months ago

14 Best Earbuds for Small Ears That Offer Comfort and Sound Quality

Mysterious and comfortable, discover the 14 best earbuds for small ears that elevate your sound experience like never before!

best earbuds for calls best earbuds for calls
Vetted2 months ago

14 Best Earbuds for Phone Calls in 2024 – Crystal Clear Sound and Comfort

Discover the crystal-clear sound and comfort of the 14 best earbuds for phone calls in 2024, and find out which...

kid friendly safe earbuds kid friendly safe earbuds
Vetted2 months ago

15 Best Earbuds for Kids: Safe, Durable, and Perfect for Little Ears

Attention parents: Discover the 15 best earbuds for kids that prioritize safety and fun, but which one will be the...

top dynamic mics 2024 top dynamic mics 2024
Vetted2 months ago

15 Best Dynamic Microphones for Every Sound Engineer in 2024

Achieve the perfect sound with our top 15 dynamic microphones of 2024, tailored for every sound engineer's needs—discover your ideal...

top drum mics 2024 top drum mics 2024
Vetted2 months ago

15 Best Drum Mics of 2024 – Elevate Your Sound With These Top Picks

The ultimate guide to the 15 best drum mics of 2024 reveals top picks that will transform your sound—find out...

ultimate sound quality headphones ultimate sound quality headphones
Vetted2 months ago

15 Best Drum Headphones for Ultimate Sound Quality and Comfort

Browse our top 15 drum headphones for superior sound quality and comfort—discover which pair will elevate your drumming experience to...

ski helmet audio accessories ski helmet audio accessories
Vetted2 months ago

15 Best Ski Helmet Headphones to Enhance Your Slopes Experience

Immerse yourself in the slopes with the 15 best ski helmet headphones that promise unmatched sound quality and comfort—discover which...

top dj headphones 2024 top dj headphones 2024
Vetted2 months ago

15 Best DJ Headphones of 2024 – Ultimate Sound Quality and Comfort

Discover the top 15 DJ headphones of 2024 that promise unmatched sound quality and comfort—find out which models made the...

Trending