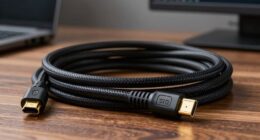

Are you looking to add new speakers to your setup but unsure about how to connect the speaker wire? Perhaps you’ve noticed connectors on your speaker wire but aren’t sure how to use them? This blog post is here to help! We’ll guide you through the steps of connecting your speaker wire and explain the purpose of each connector.
First, you’ll need to strip the insulation off of the speaker wire. To do this, simply use a pair of wire strippers and strip about an inch (or two centimeters) of insulation off of each end of the wire. Once the insulation is stripped, you should see four small wires inside – two black and two red. These wires are the positive and negative leads, and they need to be connected to the appropriate terminals on your speakers.
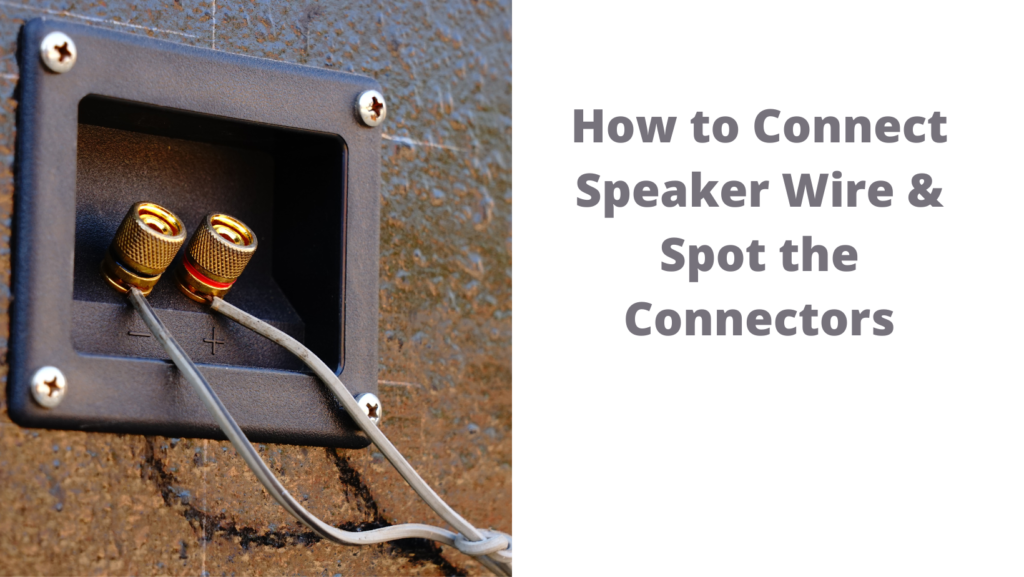
Next, take a look at your speaker wire connectors. You might see two types of connectors: banana plugs and spade terminals. Banana plugs are the easiest to use; they simply plug into the binding posts on your speakers. Spade terminals, on the other hand, need to be screwed or clamped onto the binding posts.
Once you have determined which type of connector you will use, simply connect the wires to the appropriate terminals. Make sure that you connect the red wire (positive) to the red terminal (or “+”) on your speaker, and connect the black wire (negative) to the black terminal (or “-“).
And that’s all there is to it! Connecting speaker wire is a simple process, and once you know how to do it, you’ll be able to install your speakers in no time.
Do you have an older, more Exotic or Legacy Connector
If you have an older, more exotic or legacy connector, you will need to connect the speaker wire to the appropriate terminals using a pair of pliers. First, strip the insulation off of the speaker wire and twist the exposed wires together. Then, use the pliers to crimp a connector onto the twisted wires. Make sure that you connect the red wire (positive) to the red terminal (or “+”) on your speaker, and connect the black wire (negative) to the black terminal (or “-“).
Whether you are building your stereo system or just want to learn more about the different connectors, this guide can help you choose the correct speaker wire. If you’re unsure of what color wire to use, we’ll cover standard connectors, including TRS, XLR, and Spade. You can also learn about bind posts and Binding post connectors.

2000 ANSI 4K Decoding Projector with WiFi and Bluetooth, HAPPRUN Movie Home Theater with Auto Focus, 300'' Display for Indoor/Outdoor, Smart Proyector Compatible with Phone/TV Stick/PC/PS5
[EASIER OPERATION: AI Smart Screen Adjustment] HAPPRUN projector comes with auto focus and 6D auto-keystone technology, enjoy a...
As an affiliate, we earn on qualifying purchases.
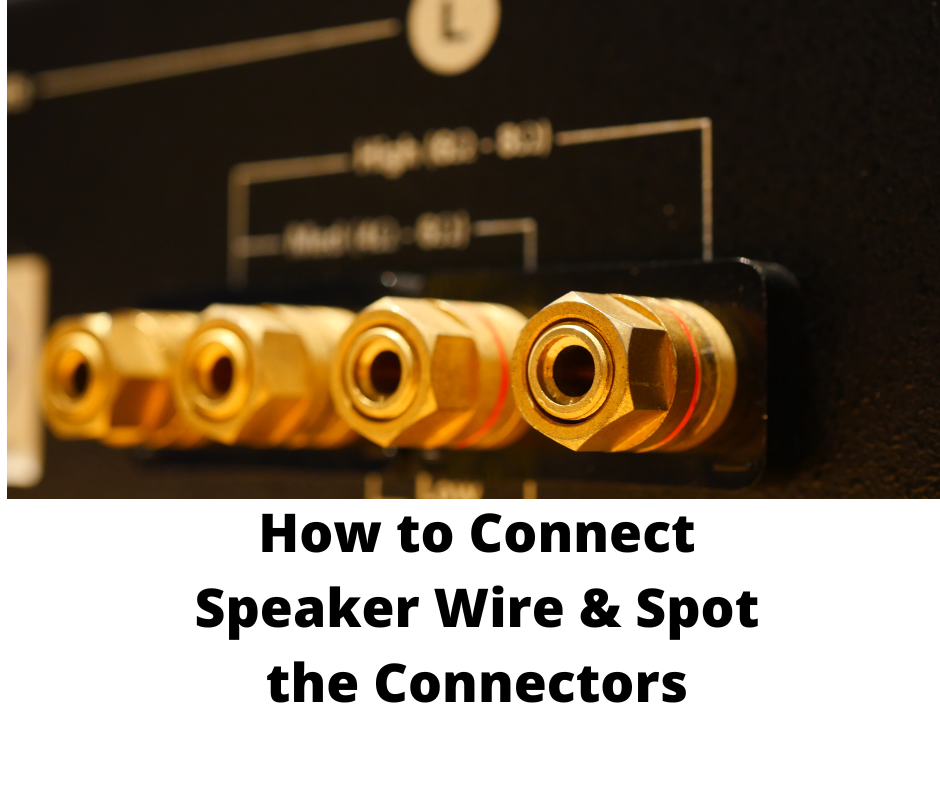
How to Connect Speaker Wire & Spot the Connectors
You can identify spade connectors on speaker wire by their shape. These connectors are often angled, although you can also find them straight. They look like forked metal connectors and are sold in sets. They connect the wire to the speaker by crimping or soldering, or you can use a screw connection. A spade connection is ideal if you want to place speakers near walls since spade connectors can be easily soldered.
If you try connecting a speaker wire to another speaker, you’ll want to look for a spade crimping tool. Spade lugs are typically easier to connect, but you can still try crimping with pliers. Choosing spade connectors over crimps can be tricky, but it’s important to note that this method is safer than leaving the wire bare and unconnected.

Official Licensed Google TV Smart Projector, HAPPRUN 4K UHD Home Theater with Dolby Sound, Wi-Fi & Bluetooth, Built-in Streaming Apps, Compatible with Games Consoles & Smartphone, Indoor & Outdoor Use
[ Built-in Official Licensed Google TV ] - Without additional equipment, the smart projector can directly access Netflix,...
As an affiliate, we earn on qualifying purchases.
TRS
There are many differences between the two types of speaker wire. The TRS connector has three contact points, while the TS only has two. The main difference is the type of signal they carry. TRS cables carry a balanced signal, while TS cables carry an unbalanced signal. Both types are designed to carry stereo audio, and there are many uses for each cable type. Here is a quick guide to each type of speaker wire.
A monophonic phone is usually plugged into a 3.5 mm stereo jack. The plug is then plugged into the device, with the tip connecting to the signal path. However, some equipment uses standard phone connectors. These can be used with varying degrees of success, but they cannot be relied on unless they have extra strength to prevent accidental mechanical movement of the inserted plug.
Speaker wires may also be connected using banana plugs. These are most common with less expensive speaker and amplifier models and are often found on inexpensive all-in-one systems. Even though they’re easier to connect, banana plugs require that you buy separate connectors for each speaker wire. You can also use banana plugs to connect two speakers to an amplifier. Whether you’re using banana plugs or bare wires, make sure you connect them securely to prevent further issues.
To connect speaker wires, you need to identify which type is right for you. In general, a spade connector requires that you remove the insulation from the wire first. Then, you should choose between straight and angled spade connectors. The spade connectors are easier to fit to speakers and are better for connecting speakers to walls. If you’re using banana plugs, you’ll also probably need a banana plug.

Epson Home Cinema 980 3-Chip 3LCD 1080p Projector 4,000 Lumens Color and White Brightness, Streaming/Gaming/ Media Room, Built-In Speaker, Auto Picture Skew, 16000:1 Contrast, 2 HDMI Ports
Exceptional Picture Quality — Provides stunning, detailed 1080p images and fast data processing that’s optimized for fast-action sports,...
As an affiliate, we earn on qualifying purchases.
Spade connectors
Another thing to look for when connecting speakers is a spade connector. These are bigger than banana plugs and will not stick out of the jack when inserted. However, a spade lug should have insulated ends to prevent short circuits. Banana plugs are more convenient if you connect speakers to amplifiers. However, before making the connection, you must ensure that your amplifier and speakers are compatible with spade connectors.
While binding posts are the most common type of speaker wire connection, spade connectors are also available in banana plugs. Unlike banana plugs, spade connectors don’t have a hole in the middle. Instead, they are held in place by a threaded post. If you’re looking for a speaker wire connector, a spade connector is located at the base of the post.

【2200ANSI & Officially-Licensed APP】Smart 4K Projector with WiFi and Bluetooth, VISSPL 3D Dolby Audio and Auto Focus Portable Outdoor Projector, Movie Home Theater Proyector with 360° Adjustable Stand
[ Compatible with Netflix - No Extra Devices Needed ] - VISSPL Smart Projector: Hollywood in the palm...
As an affiliate, we earn on qualifying purchases.
XLR
First, you must be familiar with the speaker wires. They are typically bare, but there are certain things you should know to connect them correctly. Make sure the speaker wires have printed markings that tell you which end is the positive and which is negative. Some wires have printed labels, while others don’t. You can use an AA or AAA battery to test whether a speaker wire is connected correctly. Always use a wire stripper when stripping bare speaker wire. Twist each section of the speaker wire together to create a neat single twisted wire.
The speaker wires can be terminated with banana plugs, spades, and pins. You may need to use a bi-wire if your amplifier uses double connectors. Otherwise, you can use bare speaker wires. These wires are the least expensive and easiest way to connect speakers. Once you know the wire gauge, you can spot the speaker wire connectors. If you are an expert, you can extend the wires by using banana plug extenders.
When selecting the right speaker wires, you can identify polarity and find the correct connector. Some wires have spring clips that hold the speaker wire in place. To use a spring clip, push the wire into the clip. In some cases, wires are too thick for this connector, so you should use bare wires. The next type of speaker wire connector is a spade connector. This type of connector fits into the connector hole and is easier to use.
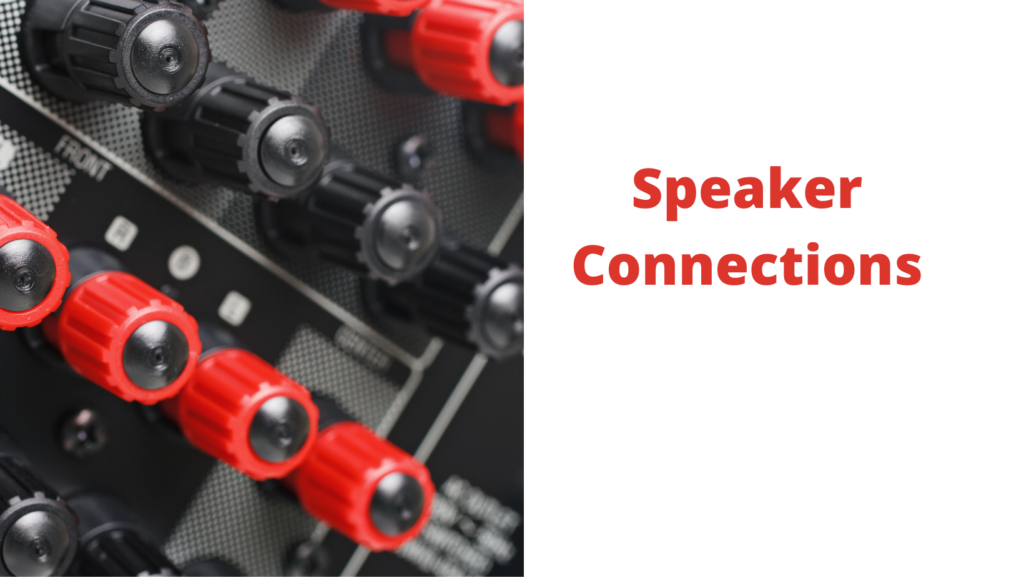
Most speaker wires have a red or black arrow. Red indicates the positive terminal, while black is the negative one. Some equipment is bi-wired, which means that it has two paired inputs. You can use either one if you prefer. However, most inexpensive speakers and receivers use a four-way binding post. This type of connector is the most common and most straightforward to use.
Binding post
There are many different speaker wires, but knowing how to connect your cables is crucial to creating quality sound. When using cable, ensure all the wires are colored, to avoid a mismatch in phase. Using crimping tools is highly recommended, as using pliers will often result in a poor connection. You should also use a spade crimping tool, which will help you to create a secure join.
One of the most common ways to connect speaker wire is through binding posts. These use banana plugs or bare wire and work with any 10-gauge speaker cable. The main advantage of these connectors is that they allow you to choose how long your wire should be, which is helpful when connecting multiple speakers. You can connect the banana plug’s positive end to the amplifier’s or receiver’s positive terminal. The negative end should be connected to the speaker’s negative terminal.
Some connections are standard and are used on all types of speakers. Binding posts are also known as banana plugs used on various audio equipment. They are commonly found on amplifiers, speakers, and headphones. A banana plug is another common connection type and can be attached to the speaker wire by unscrewing the plastic cap over the end and inserting the speaker wire. Using spades for bare wire is also possible, but this is not recommended.
Speaker wires are often colored red or black. To ensure you’re using the correct wire, look for the label on the wire. The labels will usually be printed with either positive or negative (+) symbols and text. Remove the tape from the speaker wire if the tag is missing. If the connection is correct, test it by plugging an AAA or AA battery into one end. If it’s not, it’s best to use a wire stripper.
Spring clip
When installing speaker wire, you must know which type of connector you will use. Banana plugs, spades, and pin connectors will require you to strip the insulation from the wire before connecting them. Spring clips, however, are simple and require only a small amount of bare wire. Once you have your bare wire, just insert it into the appropriate hole and push the clip down.
When connecting speaker wires, it is essential to know how to attach each strand to the proper speaker terminal. Speaker wires are typically marked with colors indicating which strand is positive or negative. When determining the polarity of speaker wire, be sure to look for a red or black label. You should also look for a spring clip or binding post with a small opening for the bare wire. You can use tape over the labels if you cannot find a spring clip or binding post. Once your speaker wires are connected, you can test them by plugging in an AA or AAA battery. Consider using a color-coded wire or a twisted cable to ensure your speaker wires are in phase.
A speaker may have several connectors, and a spring clip is the most common type. Its spring-loaded mechanism makes it easy to work with and accepts bare wire, banana plugs, pin connectors, and spade connectors. Binding posts are more sturdy and have a hole for banana plugs. A spring clip should fit a speaker’s wires snugly. If you don’t know which type to use, check out our speaker wire guide to help you make the best choice for your specific setup.