Home Cinema
Projector Vs. Tv: Which Is Better for Your Home Entertainment?
Make an informed choice between projectors and TVs for your home entertainment setup—discover the key factors that could tip the scales in your favor!
When you're deciding between a projector and a TV for your home entertainment, think about your room's lighting and budget. Projectors can save you up to 40% per screen inch, making them more affordable for larger sizes. However, they shine in dark rooms and struggle with brightness in well-lit spaces. TVs are easier to set up, offer superior image quality, and work well in various lighting conditions. If you want clarity without hassle, a TV might be the way to go. Stick around to explore what fits your specific needs best and the latest trends in home entertainment.
Key Takeaways
- Projectors are cost-effective for large screen sizes, offering lower prices per inch compared to TVs.
- TVs provide superior brightness, contrast, and color accuracy, making them ideal for well-lit rooms.
- Projectors perform best in dark environments, while TVs maintain clarity in various lighting conditions.
- Installation and maintenance for TVs are simpler, whereas projectors require more setup and ambient light control.
Price and Performance Analysis
When weighing the price and performance of projectors versus TVs, you'll find that high-quality projectors often match the cost of a decent 75-inch TV, making larger screen sizes equally accessible. While this might seem appealing, you should consider the performance differences.
TVs generally excel in brightness and contrast, making them a better choice for well-lit rooms. If you plan on watching during the day, a TV might serve you better.
On the flip side, projectors can provide a more economical cost per screen inch, with average prices being about 40% lower than large TVs. This makes them a budget-friendly option for those wanting a cinematic feel at home. However, keep in mind that high-end projectors can get pricey, so you'll need to weigh that against your budget.
Moreover, projectors often require additional costs for screens and mounting, potentially affecting the overall cost.
Image Quality Comparison
Considering the price and performance factors, it's important to examine how image quality varies between projectors and TVs. When it comes to delivering a superior viewing experience, OLED TVs stand out with exceptional color accuracy and contrast. Projectors, while improving with technology, often struggle in brightness and overall performance.
Here's a quick comparison:
Feature | Projectors | TVs |
---|---|---|
Brightness | Generally lower than TVs | High brightness levels |
Contrast | Often lacks necessary ratios | Superior contrast ratios |
Color Accuracy | Can achieve wide color gamut | Exceptional color accuracy |
High Dynamic Range | Limited performance in HDR | Excellent HDR support |
In well-lit environments, projectors may not provide the vibrant images you'd expect. They typically excel in dark rooms but can't match the clarity of TVs under various lighting conditions. While high-end projectors can enhance color accuracy, they still lag behind TVs in brightness and contrast, making them less ideal for daytime viewing. Overall, if image quality is your priority, TVs generally offer a more reliable and superior performance.
Viewing Environment Considerations
To guarantee the best viewing experience, it's important to evaluate the lighting conditions and room setup before deciding between a projector and a TV. Your viewing environment plays a vital role in determining which option performs better.
Consider these factors when making your choice:
- Ambient light: Projectors thrive in dark rooms, while TVs excel in bright settings.
- Brightness: Projectors need at least 3,000 lumens for clear images in well-lit spaces.
- Room dimensions: The size and layout can affect how well either option performs.
If you're leaning towards a projector, remember it performs best in dark rooms, where ambient light is minimal. On the other hand, TVs provide consistent clarity regardless of lighting conditions, making them versatile for home entertainment.
If your space has significant ambient light, you might find that a TV offers a more satisfying viewing experience with clear images.
Ultimately, understanding your specific room dimensions and lighting scenarios will help you make the right choice for your home entertainment setup.
User Preferences and Trends
As you weigh your options between projectors and TVs, it's clear that user preferences have evolved, leaning heavily towards the convenience and quality that modern TVs offer.
With superior image quality and lower maintenance requirements, TVs have become the go-to choice for many home theater enthusiasts. The market is booming for larger screen sizes, and prices have dropped considerably, making these TVs accessible to a wider audience.
While a projector can provide an immersive experience, it often requires specific conditions to shine—like a dark room—limiting its versatility.
Many consumers are unaware of the incredible potential a projector holds, leading them to favor the user-friendly, familiar nature of TVs.
As brightness improves and display technology advances, projectors may regain traction, but for now, consumer preferences lean heavily towards TVs.
They offer the versatility you need for various viewing options, whether it's binge-watching your favorite series or enjoying a movie night with friends.
Ultimately, the ease of use and quality of modern TVs make them a compelling choice in today's entertainment landscape.
Setup and Maintenance Factors
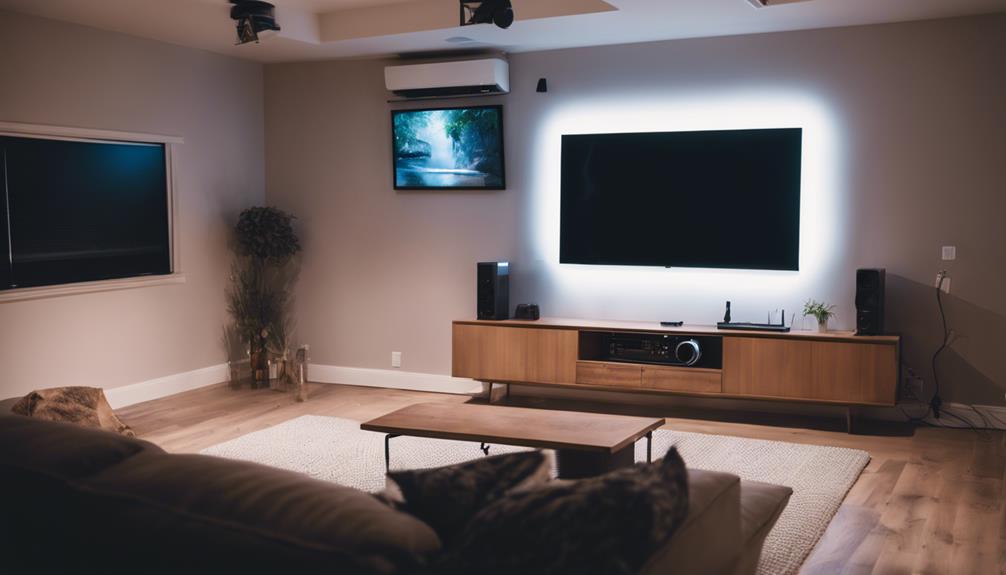
Setting up a projector can be more complex than simply placing a TV on a stand, often requiring careful planning and additional equipment. You'll need to take into account factors like screen placement, ceiling mounts, and the layout of your room. Here are some setup elements to keep in mind:
- Screen type and size: Choosing the right screen can enhance your viewing experience.
- Installation location: Projectors work best in dark environments, so find a suitable spot.
- Ambient light control: You may need blackout curtains for ideal performance.
In contrast, TVs offer straightforward installation. You can place them on a stand or mount them on a wall with minimal effort.
Maintenance also differs considerably. Projectors often require upkeep like bulb replacements and cleaning projection surfaces, which can add to long-term costs. TVs generally have lower maintenance needs and longer lifespans without these requirements.
Frequently Asked Questions
Is a Home Projector Better Than a Tv?
Whether a home projector's better than a TV depends on your preferences. If you love big screens and dark rooms, projectors shine. But for bright spaces and convenience, TVs usually outperform projectors in everyday use.
Is It Smart to Use a Projector as an Everyday Tv?
Using a projector as your everyday TV isn't always smart. You'll need dark rooms for ideal viewing, might invest in better audio, and face more setup hassle compared to the convenience of a regular TV.
What Is Better for Your Eyes, TV or Projector?
When considering what's better for your eyes, projectors typically emit less blue light and provide a gentler illumination. You'll likely experience reduced eye strain and fatigue during longer viewing sessions with a projector compared to a TV.
Is a Projector or TV Better for a Dark Room?
In a dark room, a projector's larger image and enhanced detail create an immersive experience you won't get from a TV. Just make sure you control ambient light for peak performance and enjoy movie nights like never before.
Conclusion
In the battle of projector vs. TV, it often comes down to your unique needs and space.
If you crave a cinematic experience and have the room, a projector can transform movie night.
But if you want convenience and vibrant colors in a smaller setup, a TV might be your best bet.
Funny enough, your choice could hinge on something as simple as your living room layout.
So, what'll it be—big screen thrills or cozy comfort?
Hello, I’m Art, and I’m excited to be a part of the 1Home Theatre Projector team. As a writer, I’m here to contribute my knowledge and insights to help you achieve the ultimate home cinema experience. I understand that making decisions in the world of home entertainment can be complex, and I’m here to simplify the process for you.
Home Cinema
Projector Lens Options: Fixed vs. Zoom Lenses
Jump into the world of projector lens options and discover whether fixed or zoom lenses are the key to enhancing your projection experience.
When choosing between fixed and zoom projector lenses, think about your setup and needs. Fixed lenses provide a consistent focal length, making them perfect for permanent installations, delivering sharper images with minimal distortion. On the other hand, zoom lenses offer flexibility, allowing you to adjust image size without moving the projector, which is great for dynamic environments. However, zoom lenses can vary in brightness and sharpness depending on their settings. Understanding these differences helps you make an informed choice for your specific application. There's even more to explore on how lens options impact your overall projection experience.
Key Takeaways
- Fixed lenses provide sharper images with minimal distortion, ideal for static installations where projector position remains unchanged.
- Zoom lenses offer flexibility with adjustable focal lengths, making them suitable for dynamic environments where image size needs frequent adjustments.
- Brightness can vary significantly with zoom lenses, often dropping by over 30% depending on the zoom setting and lens design.
- Choosing between fixed and zoom lenses impacts overall presentation quality, with fixed lenses generally providing better sharpness and clarity.
- Consider application environment and compatibility with projector specifications when selecting a lens type to ensure optimal performance.
Understanding Projection Lenses
When choosing a projector lens, you'll encounter two main types: fixed (prime) lenses and zoom lenses. Fixed lenses have a single focal length, providing excellent optical sharpness and image quality. They're perfect for static setups where the projector's position won't change.
However, if you need flexibility, zoom lenses might be your best bet. With a zoom range that allows you to adjust the focal length, these lenses can adapt to different environments without physically moving the projector.
The throw ratio is also essential in your decision. It defines the distance from the lens to the screen compared to the screen width, helping you determine which lens fits your installation needs.
While fixed lenses generally outperform zoom lenses regarding clarity and performance, the latter's adaptability makes them ideal for dynamic environments.
Both lens types have quality factors like optical coatings and construction that influence brightness and clarity in projection systems.
Whether you opt for fixed lenses or zoom lenses, understanding these elements will help you make an informed choice tailored to your specific projection needs.
Fixed Lenses: Characteristics and Uses
What makes fixed lenses a preferred choice for many projection setups? Fixed lenses offer a consistent focal length, which means you don't have to worry about adjusting the projector to change the image size. Their simpler optical design results in sharper images, enhancing your viewing experience. If you're setting up a permanent installation, fixed lenses are often ideal since they excel in environments where the projector's position remains unchanged.
Here's a quick comparison to illustrate their advantages:
Characteristic | Fixed Lenses |
---|---|
Focal Length | Single, unchangeable |
Image Size | Requires physical adjustment |
Brightness Consistency | High, stable performance |
Installation Complexity | Easier, lighter, less complex |
With fixed lenses, you typically enjoy better brightness consistency, avoiding the variability that sometimes comes with zoom lenses. Their performance in delivering high-quality images makes them a dependable choice for many users. If you're looking for a straightforward, effective solution for your projector needs, fixed lenses might just be the way to go!
Zoom Lenses: Flexibility and Advantages
Zoom lenses offer exceptional flexibility, allowing you to adjust the focal length and change image size without moving the projector. This flexibility is vital for settings like classrooms and conference rooms, where adjusting to different image sizes can be essential. With typical zoom ratios ranging from 1.2x to 1.6x, you can easily optimize the image placement to suit your audience's needs.
Wide-angle zoom lenses are particularly advantageous, as they can produce higher brightness levels. By positioning the projector closer to the screen, you often get more lumens, ensuring your presentation stands out even in well-lit environments. This benefit, combined with the adjustable nature of zoom lenses, makes them ideal for scenarios where quick changes are necessary.
Additionally, the convenience of zoom lenses means you won't need multiple fixed lenses for various situations. This not only saves time but also enhances portability, allowing you to use the same projector across different locations without hassle.
Ultimately, zoom lenses provide the versatility and adaptability significant for any professional who frequently presents in diverse environments.
Comparison of Image Quality
Image quality is an essential factor to take into account when choosing a projector lens, as it directly impacts your audience's viewing experience. When comparing fixed focal length lenses and zoom lenses, the differences in optical performance are significant. Fixed lenses typically excel in sharpness and minimize distortion and aberrations due to their simpler construction. This makes them the go-to choice for professional work where image fidelity is critical.
On the other hand, zoom lenses offer versatility that can be advantageous in dynamic settings. However, their complexity can lead to reduced sharpness, especially at the extremes of their zoom range. While premium zoom lenses can approach the quality of fixed lenses, they often come at a higher price and may still lack the uniform focus that fixed lenses provide.
Here's a quick comparison of the two types of lenses:
Lens Type | Image Quality | Ideal Use |
---|---|---|
Fixed Focal Length | Superior sharpness | Professional work |
Zoom Lens | Variable sharpness | Dynamic environments |
Premium Zoom Lens | High but not consistent | Mixed use |
Non-Premium Zoom | Lower sharpness | Casual viewing |
Choosing the right lens can vastly enhance your presentations.
Impact of Zoom on Brightness
When you adjust the zoom on your projector, you might notice a significant shift in brightness, sometimes by over 30%.
The zoom ratio you choose can greatly affect how much light the projector outputs, which is essential for your viewing experience.
Understanding how brightness varies with different zoom settings will help you make informed decisions about your projector setup.
Brightness Variability Explained
Brightness variability in projectors can be considerably influenced by lens position and zoom settings. When using zoom lenses, you might notice that your projected image doesn't always maintain the same brightness. For example, a projector can produce over 30% variance in light output depending on the zoom ratio and lens design.
In wide-angle mode, projectors deliver higher lumens, especially when placed closer. If you're mounting a projector at 10.5 feet, expect more brightness than if it's at 21 feet.
Here are some things to reflect upon:
- A dimmer image can ruin your viewing experience.
- Compromised brightness consistency can lead to frustration during presentations.
- Missing vibrant colors and details can diminish the impact of your content.
DLP projectors typically have narrow zoom ranges, between 1.1:1 to 1.3:1, which can further affect brightness consistency across various settings.
Manufacturers often test brightness output at the midpoint of the zoom range, so if they misrepresent maximum lumens, you could end up with a disappointing projected image.
Understanding these factors will help you choose the right lens and optimize your projector for the best experience.
Zoom Ratio Effects
Understanding how zoom ratios affect projector performance is important for achieving the best viewing experience. When you adjust the zoom on your projector lens, you may notice significant changes in brightness. Typically, using zoom lenses can lead to a predictable decrease in light output.
For instance, switching from a longer focal length, like 75mm, to a shorter one, such as 50mm, can cause a dramatic 50% drop in brightness.
ANSI lumens ratings, which measure projector brightness, can fluctuate based on your zoom settings. Most manufacturers conduct brightness tests at the midpoint of the zoom range, potentially misrepresenting the maximum brightness capabilities of your projector.
It's essential to assess brightness at various zoom levels to get an accurate idea of performance. The design of a lens also plays a key role in brightness. A 2:1 zoom lens may exhibit variability in light output due to its optical configuration.
Consequently, when selecting a projector lens, consider how the zoom ratio will impact brightness to guarantee you achieve the best light output for your specific viewing environment.
Testing Brightness Methods
Although you might expect consistent brightness from your projector, the impact of zoom settings can lead to surprising fluctuations. When you adjust the focal length, you could see brightness drop by as much as 50%. Most manufacturers evaluate brightness at the midpoint of the zoom range, but that doesn't always reflect your actual experience.
Consider these factors when testing brightness:
- The type of lens can drastically change the light output.
- A lower f-stop number can mean brighter images, thanks to larger aperture sizes.
- Variability in brightness can exceed 30%, depending on lens design and placement.
Remember to check the ANSI lumens rating as it varies with the zoom ratio. This is vital for understanding how your projector will perform in different environments.
So, when you're evaluating your projector's suitability, consider how zoom settings influence brightness. The interplay between zoom, focal length, and light output affects the overall image quality you'll experience.
Applications of Each Lens Type
When choosing a projector lens, it's essential to take into account the specific applications of each type to confirm peak performance.
Fixed Lenses are ideal for static installations where the projector's position remains unchanged. They provide sharper images due to fewer optical elements and a consistent focal length.
On the other hand, Zoom Lenses excel in dynamic environments like classrooms or conference rooms, allowing you to adjust the image size without moving the projector, accommodating various screen sizes and distances.
For larger venues, you might consider Telephoto Zoom Lenses, which enable projection from significant distances while maintaining image clarity and detail.
If you're working in limited spaces, Short Focus Lenses are designed for home theaters or small rooms, allowing you to achieve excellent quality projections from close distances without sacrificing image quality.
Finally, if maximum image quality is vital, Prime Lenses are often utilized in professional settings, such as film production or photography, due to their superior optical performance compared to zoom lenses.
Understanding these applications confirms you select the right lens for your needs, optimizing your projection experience.
Choosing the Right Lens
Selecting the right projector lens is essential for achieving ideal image quality tailored to your specific needs. When you're choosing between fixed and zoom lenses, think about your application environment. Zoom lenses give you flexibility for varying projection distances, while fixed lenses excel in static setups with superior image quality.
Here are some key factors to evaluate:
- Your audience deserves the best viewing experience.
- A bright, clear image can transform any presentation.
- The right lens can elevate your event to the next level.
Evaluate the focal length and aperture size; these specifications greatly impact brightness and clarity. A lower f-stop number means a brighter image.
Additionally, determine the throw ratio required for your setup—short throw lenses allow for close installations, while standard throw lenses offer versatility.
Make sure to assess compatibility with your projector specifications, ensuring that the chosen lens fits your projector's mount and optical requirements to maintain image quality.
If you have unique projection needs, don't hesitate to explore customization options like anamorphic lenses or reflective lenses to achieve the best results.
Frequently Asked Questions
What Is the Difference Between a Fixed Lens and a Zoom Lens?
When you're choosing between a fixed lens and a zoom lens, remember that fixed lenses have a single focal length, while zoom lenses offer variable lengths, allowing you to quickly adjust image size without moving the projector.
Should You Use Zoom on Projector?
When you think of a zoom lens, imagine a painter adjusting their canvas. You should use zoom on your projector if flexibility and adaptability suit your needs, especially in dynamic environments where precision matters most.
What Are the Disadvantages of a Zoom Lens?
When considering zoom lenses, you'll find potential downsides like reduced image quality, increased weight, and mechanical complexity. Also, brightness can drop considerably while zooming, which might affect your overall viewing experience.
How to Choose a Projector Lens?
When choosing a projector lens, consider that a 20% increase in image brightness can enhance viewer experience. Assess the focal length, throw ratio, lens quality, aperture size, and installation type to guarantee peak performance.
Conclusion
When choosing between fixed and zoom projector lenses, consider your specific needs. Did you know that over 60% of educators report improved engagement when using the right lens? That's a significant impact! Whether you opt for the precision of a fixed lens or the versatility of a zoom lens, selecting the right one can transform your presentations and captivate your audience. Make an informed decision to elevate your projection experience and truly connect with viewers.
Hi, I’m Dominique. I love movies and want everyone to have the best home cinema experience possible. That’s why I started 1home Theatre Projector. We help people build their home cinema system using the latest technology and news on laser tv and all-around home entertainment.
We’re a small team of movie buffs (and experts) who are passionate about giving our readers the best advice and information possible. So whether you’re just starting out or you’re looking to upgrade your home cinema system, we’ve got you covered!
Home Cinema
How to Use a Projector for Classroom and Educational Settings
With the right setup and techniques, a projector can transform your classroom experience—discover how to maximize its potential for student engagement.
Using a projector in your classroom can really boost student engagement. Start by setting it up correctly; make sure to connect your device and adjust the display settings. You can enhance lessons with interactive features, like multimedia presentations and real-time collaboration tools. Don't forget to manage your classroom environment by controlling lighting and sound for the best visibility and clarity. Troubleshoot any issues on the spot—like blurry images or connection problems. With some practice, you can create a dynamic teaching experience that captivates your students. There's so much more to explore, so keep going for tips and techniques!
Key Takeaways
- Set up the projector by logging into the computer, turning it on, and adjusting display settings for Windows or Mac devices.
- Ensure devices are compatible and connected wirelessly, using the BenQ Smart Control App for enhanced management.
- Utilize interactive features for engaging presentations, allowing for annotations and digital content integration.
- Manage classroom environment with appropriate lighting, volume control, and microphone settings for optimal audio-visual experience.
- Troubleshoot common issues by checking power sources, display settings, and ensuring clear audio and image quality.
Setting Up the Projector
Setting up the projector is essential for a smooth classroom experience. Start by logging into the FIT computer, and if you encounter any issues, perform a hard reboot to guarantee everything's running smoothly.
Once you're logged in, head to the designated wall panel to turn on the projector. You should hear an audible beep, confirming it's activated. Allow the projector to warm up until it illuminates.
If you're using a Windows computer, press the Windows key + P to access display options. Choose "Duplicate" to mirror your screen or "Extend" for separate displays.
For Mac users, toggle your display settings by pressing Command key + F1 until you get the desired outcome, selecting either "Mirror" or "Extend Desktop" as needed.
After your class, make sure to power off the projector completely using the wall panel.
Finally, log off or restart the computer instead of performing a complete shutdown. This helps preserve your settings for next time.
Connecting Devices
Connecting devices to a projector can markedly enhance your classroom presentations.
Whether you're using a Windows laptop, a Mac, or even a mobile device, making the right connections is key to a smooth experience.
Here's how to connect your devices effectively:
- Windows Devices: Press the Windows key + P to choose display options like "Duplicate" or "Extend," maximizing your screen usage for presentations.
- Mac Devices: Use Command + F1 to toggle between display modes, allowing you to mirror or extend your desktop effortlessly.
- Wireless Connections: Verify the projector's wireless settings are configured properly. This enables devices such as MacBooks, Windows laptops, and mobile phones to connect seamlessly.
- BenQ Smart Control App: Utilize this app for enhanced remote control capabilities, allowing you to manage projections easily from your device.
Always be aware of compatibility issues; confirm your devices are set to the correct resolution and display settings.
This helps avoid connection problems and guarantees superior projection quality with your projectors, making your teaching more effective and engaging.
Adjusting Projector Settings
Once you've connected your device, it's time to adjust the projector settings for ideal viewing.
You'll want to explore display options to choose how your content appears, whether it's duplicating your screen or extending it.
Don't forget to tweak the brightness and contrast to enhance clarity and make sure everyone can see your presentation clearly.
Display Options Overview
When using a projector in the classroom, it's essential to adjust the display settings for best performance. Whether you're a Windows or Mac user, you'll find options that help tailor the projector to your needs.
Start by ensuring the projector is turned on and warmed up for peak display quality.
Here are some display options to take into account:
- Windows Users: Press 'Windows key + P' to choose from:
- Duplicate: Show the same content on both screens.
- Extend: Use the projector as an additional display.
- PC Screen only: Use only your computer screen.
- Second Screen only: Display content solely on the projector.
- Mac Users: Press 'Command key + F1' to toggle between:
- Mirror: Duplicate your Mac screen on the projector.
- Extend Desktop: Create a separate workspace on the projector.
- Use the Video Mute function on the projector to hide the image temporarily.
- Familiarize yourself with the remote or wall panel to adjust other display options for brightness and contrast as needed.
These adjustments will enhance your presentation experience.
Adjusting Brightness and Contrast
Adjusting brightness and contrast on a projector is essential for achieving a clear and vibrant image in your classroom. To get started, access the projector's menu using the remote control or touch panel interface, usually found under the "Picture" or "Display" options.
You'll find brightness settings that can be adjusted in percentage increments, allowing you to fine-tune based on the ambient light conditions around you.
Next, focus on contrast, which enhances the difference between light and dark areas of the image. Adjust this setting on a scale that varies by model, often ranging from 1 to 100.
Many projectors also provide preset modes tailored for specific environments, like "Presentation," "Movie," or "Bright Room," which automatically optimize brightness and contrast for the best viewing experience.
It's a good idea to regularly calibrate these settings, especially when the classroom lighting changes or when you switch between different types of content.
Utilizing Interactive Features
When you use interactive features in your projector, you can create engaging multimedia presentations that capture your students' attention.
Real-time collaboration tools allow everyone to participate actively, making learning more dynamic and enjoyable.
Engaging Multimedia Presentations
Engaging multimedia presentations can transform your classroom into an interactive learning environment that captures students' attention and fosters collaboration.
By utilizing interactive projectors, you can create dynamic lessons that cater to various learning styles and deepen understanding.
Here are four ways to enhance your multimedia presentations:
- Touch Capabilities: Use the touch features of interactive projectors to let students physically engage with the content, making learning more hands-on and memorable.
- Annotation Tools: Encourage active participation by allowing students to annotate directly on the screen. This feature promotes discussion and helps clarify complex topics.
- Digital Content Integration: Incorporate videos, simulations, and interactive activities into your lessons. These immersive experiences captivate students and improve information retention.
- Customizable Software: Utilize programs like SMART Learning Suite or ViewBoard 2.1 to streamline lesson preparation. Their customizable templates make it easy to design engaging and interactive presentations.
Real-Time Collaboration Tools
With interactive projectors in your classroom, real-time collaboration becomes an exciting reality for students. These projectors allow multiple users to annotate and manipulate projected content simultaneously, fostering a sense of teamwork and engagement.
You can utilize real-time collaboration tools like SMART Response 2, which lets you create quick quizzes and gather instant feedback from your students. This enhances participation and helps you gauge understanding during lessons.
Additionally, the integration of AI-Powered Virtual Reality in E-Learning can further elevate the collaborative experience by providing immersive learning scenarios for group projects.
Consider using Google Lit Trips with your interactive projector. This tool helps students explore the geographical contexts of literature, promoting collaborative discussions and deeper literary analysis through shared exploration.
The collaborative features of interactive projectors also enable wireless screen sharing, making it easy for students to engage in group activities and track contributions during projects, ensuring accountability.
Moreover, the integration of multimedia resources caters to diverse learning styles, allowing your students to work together on dynamic tasks that stimulate critical thinking and problem-solving.
Managing Classroom Environment
To create an ideal learning atmosphere, managing the classroom environment is crucial when using a projector. Proper adjustments can enhance visibility and guarantee that students stay focused on the presentation. Here are four key aspects to take into account:
1. Lighting Control: In smaller classrooms, use the Crestron touch panel or wall switch to adjust lighting for peak projector visibility.
In larger classrooms, the dedicated controls let you choose between "Projection High" or "Projection Low" settings.
2. Volume Management: Gradually adjust the audio output to prevent ear damage during presentations.
This guarantees that your students can hear clearly without discomfort.
3. Microphone Settings: Utilize the touch panel to manage individual microphone settings, guaranteeing peak audio clarity for both you and your students.
4. Screen Operation: In larger classrooms, automatic screen lowering simplifies setup, while manual operation in smaller spaces offers flexibility to adapt to different activities.
Troubleshooting Common Issues
When troubleshooting common issues with a classroom projector, it's vital to pinpoint the problem quickly so you can get back to teaching.
First, if the projector doesn't turn on, check that it's properly connected to a power source and look at the wall panel controls for activation.
For connectivity issues, verify you've selected the right display settings on your computer. Use "Duplicate" or "Extend" for Windows, or toggle display options on a Mac using Command + F1.
If the image appears blurry or isn't displaying correctly, adjust the focus and zoom settings.
Also, inspect the lens for any obstructions that could affect clarity.
If you see a "No Signal" message, confirm that the input source is selected correctly and that all cables are securely connected to both the computer and projector.
For audio problems, make sure the volume is turned up on the projector and the connected device, while also checking that the correct audio output is selected in system settings.
Projectors provide an effective way to enhance classroom learning, but resolving these common issues is necessary for seamless use.
Exploring Educational Software
Integrating educational software into your classroom can transform the learning experience for students. These tools not only engage learners but also streamline lesson delivery and assessment.
Here are four powerful educational software options to evaluate:
- SMART Learning Suite: This software includes SMART Notebook and SMART Response 2, enabling you to create interactive lessons and assess student understanding in real-time.
- ViewBoard 2.1 Software: Offering standard whiteboard functionalities, it allows you to enhance lessons with multimedia project creation, incorporating audio, video, and interactive elements.
- Google Lit Trips: This unique software uses Google Earth to connect literature studies with geographical contexts, fostering deeper discussions and engagement through interactive mapping of story locations.
- AMS (Account Management Service): With this tool, you can access personal cloud storage for multimedia files, making it easier to integrate digital resources into your presentations.
Using these educational software options not only enhances your teaching but also empowers students to engage actively in their learning journey.
With enhanced control features, you can manage classroom technology effectively, ensuring a smooth educational experience.
Frequently Asked Questions
How Can a Projector Be Used in Teaching and Learning?
You can use a projector to display engaging multimedia content, facilitate interactive lessons, and support diverse learning styles. It fosters collaboration among students, enhances discussions, and transforms your teaching approach into a more dynamic experience.
How to Operate a Projector in Class?
Imagine a wizard wielding a magical wand; you're that wizard in class. To operate the projector, press the "On" button, adjust lights and volume, choose display options, then power down properly when finished.
How Are Film Projectors Used in Education?
Film projectors enhance your educational experience by displaying documentaries and animations, simplifying complex topics. They encourage collaboration, allowing you and your classmates to engage in discussions, analyze content, and reflect on themes presented in the films.
How Do I Connect My School Computer to a Projector?
To connect your school computer to a projector, power on the projector, select the input source, and use the appropriate display options on your computer. Make certain any needed adapters are securely connected for peak performance.
Conclusion
In the classroom, your projector serves as a bridge, connecting students to a world of knowledge. By mastering its setup and features, you're not just illuminating a screen; you're lighting the path to understanding and engagement. Embrace technology as a tool to transform learning, creating an interactive environment where ideas blossom. As you troubleshoot and adapt, remember: each challenge is a stepping stone, leading your students to brighter horizons and a deeper appreciation for discovery.
Hi, I’m Dominique. I love movies and want everyone to have the best home cinema experience possible. That’s why I started 1home Theatre Projector. We help people build their home cinema system using the latest technology and news on laser tv and all-around home entertainment.
We’re a small team of movie buffs (and experts) who are passionate about giving our readers the best advice and information possible. So whether you’re just starting out or you’re looking to upgrade your home cinema system, we’ve got you covered!
Home Cinema
DIY Projector Dolly: Creating Smooth Camera Movements for Home Videos
With a simple DIY projector dolly, you can transform your home videos into cinematic masterpieces—discover how to achieve smooth camera movements today!
Creating a DIY projector dolly is a great way to achieve smooth camera movements for your home videos. Start with a sturdy one-meter base and equip it with longboard wheels to guarantee fluid motion. Experiment with weight distribution to find the right balance for stability. Incorporating nylon screws will reduce friction, enhancing performance. Don't forget to practice your panning and pushing techniques for seamless shifts. With time, you'll elevate your video's production quality, making it more engaging. As you explore dolly assembly and techniques, you'll discover even more tips to enhance your filming skills.
Key Takeaways
- Build a sturdy one by one meter base for stability during camera movements and to prevent wobbling.
- Use longboard wheels to ensure smooth gliding and minimize friction for fluid camera motion.
- Experiment with weight distribution to find the right balance for enhanced stability while filming.
- Incorporate a custom pushing bar tailored to your height for better ergonomics and control.
- Regularly practice and test your setup to achieve optimal smoothness and refine your filming techniques.
Understanding Dolly Techniques
When it comes to mastering dolly techniques, smooth and continuous motion is essential for achieving professional-looking shots. You'll want to practice regularly and pay close attention to how you operate the dolly.
Using paper marks for focus alignment at various points can help maintain sharpness throughout your dolly shots, especially when you're manually focusing. I'd say combining panning and pushing techniques can create dynamic shots that elevate your storytelling, making your videos more engaging.
For shorter shots, pushing from the base of the dolly provides stability, while an upright pushing position allows for better comfort during longer takes.
Experimenting with different weights and wheel types on your DIY dolly can greatly affect the smoothness and quality of your camera movements. Don't hesitate to make adjustments based on your specific needs and the environment you're filming in.
The right combination of these elements can take your dolly work to the next level. Remember, consistency is key, so keep refining your technique until you achieve that fluid motion you're after. With practice, you'll create visuals that truly captivate your audience.
Mastering Focus While Moving
Mastering focus while in motion is an essential skill that complements your dolly techniques. When you're panning and pushing, manual focusing becomes critical, especially with vintage lenses lacking autofocus. It requires a consistent rhythm and practice to nail those shots.
To enhance your focus accuracy, utilize focus peaking on your monitor. This feature lets you make real-time adjustments, which is imperative during dynamic dolly shots. However, pulling focus while executing a dolly push can be tricky. That's why rehearsing both the movement and focus pull beforehand can considerably improve your results.
Marking multiple focus points on your subject can streamline adjustments, allowing for smoother dolly movements. Here's a quick table to illustrate some effective strategies:
Technique | Description |
---|---|
Manual Focus | Requires practice for accuracy |
Focus Peaking | Real-time focus adjustments |
Rehearsal | Practice movements and focus pulls |
Marking Focus Points | Simplifies focus adjustments |
Experimenting with different techniques and setups will lead to satisfactory outcomes, enhancing the quality of your home video production. Remember, practice makes perfect!
Effective Pushing Techniques
When you're pushing the dolly, position yourself at the base for better stability, especially on shorter shots. This technique not only enhances control but also allows you to adjust your weight distribution effectively for smoother movements.
Incorporating elements like proper lighting control and screen placement can further elevate your filming setup, ensuring that your home videos have a professional touch, similar to the quality you'd find in the role of contrast ratio in projector image quality.
Optimal Pushing Position
Achieving ideal pushing position on your DIY projector dolly is essential for smooth and controlled camera movements. Start by pushing from the base of the dolly, as this provides greater stability and control, particularly for short shots. This technique guarantees that your movements are fluid and precise, minimizing any unwanted shakes.
Maintain an upright pushing position to enhance your comfort and improve your ability to manipulate the dolly. Good posture not only helps you push more effectively but also reduces fatigue during longer shoots. Understanding the physics at play—like weight distribution and the center of gravity—can considerably impact your pushing techniques.
Consider creating custom pushing bars tailored to your height and grip style. This small adjustment can lead to a more ergonomic and efficient pushing experience.
Regular practice is key; as you refine your pushing techniques, you'll develop a rhythm that supports consistent, smooth camera movements. The more comfortable you become with your dolly's operation, the more effective your shots will be, allowing you to focus on capturing stunning home videos without the hassle of shaky footage.
Stability Through Weight Adjustment
To enhance stability while using your DIY projector dolly, adjusting the weight distribution is key. Pushing from the base of the dolly gives you greater stability for short shots, minimizing vibrations and making your movements smoother.
When you adopt an upright pushing position, you'll find that it improves both comfort and control, allowing for more precise adjustments during operation.
Experimenting with added weights can greatly affect how your dolly behaves. It's crucial to find that sweet spot for ideal balance, ensuring the smoothest operation possible.
Additionally, consider using nylon nuts in your wheel assembly. They can reduce friction, leading to improved overall performance.
Customizing your pushing bars for ergonomic handling can also make a big difference. With better control and ease of use, especially during longer shooting sessions, you'll capture those perfect moments without the hassle of instability.
Wheel Mechanics and Weights
The dolly's wheel mechanics play an important role in ensuring smooth and controlled movements during your DIY projector setup. Utilizing nylon nuts in the wheel assembly can greatly enhance movement smoothness, so consider this when building your dolly.
Additionally, the weights you add directly affect how your dolly performs. Testing with various weights is vital to find that ideal balance. For instance, a nine-kilogram weight might create some squeaking, but it's generally manageable, showing how weight impacts overall performance.
Don't forget to experiment with different wheel types, as they can improve the dolly's functionality and ease of movement.
A recommended base size of one by one meter provides a stable foundation, which is critical for achieving those fluid camera movements you're aiming for.
Benefits of Smooth Dolly Shots
When you incorporate smooth dolly shots into your videos, you instantly elevate their production value, giving them a professional and cinematic quality. These techniques enhance your storytelling by allowing for dynamic angles and perspectives that truly engage your viewers. With well-executed dolly shots, you can capture emotions and actions in ways that static shots simply can't achieve.
Consistent practice with dolly techniques like panning and pushing is essential. It helps you master accurate focus and create smooth shifts between shots, keeping your audience immersed in the narrative. The right wheel mechanics, such as nylon nuts and longboard wheels, play a significant role in ensuring fluid motion. They minimize unwanted noise and improve stability, resulting in a polished final product.
Using a stable dolly base, ideally one by one meter, gives you the control needed for versatile camera movements. This allows you to experiment with different shot compositions while maintaining a professional look.
Ultimately, smooth dolly shots not only enhance the visual appeal of your videos but also enrich the overall viewing experience, making your content more memorable and impactful.
Materials for DIY Dolly Construction
When building your DIY dolly, you'll need to gather essential tools and select the right materials for peak performance.
Consider using longboard wheels for smooth movement and nylon screws to enhance stability.
Additionally, you might want to think about incorporating robot vacuum technology to guarantee your dolly has advanced features that improve navigation.
Let's explore some assembly tips and techniques to make sure your dolly operates seamlessly.
Essential Tools Required
Building a DIY projector dolly requires gathering essential materials to secure your project rolls smoothly. Having the right tools on hand will make your assembly process more efficient and enjoyable. Here's what you'll need:
- Sturdy base: Choose plywood or a longboard, about one meter square, for a solid foundation.
- Nylon screws and nuts: These are vital for wheel assembly, guaranteeing your dolly moves seamlessly.
- Longboard wheels: Opt for high-quality wheels that minimize friction and enhance glide.
- Weights: Incorporate around nine kilograms to optimize stability; feel free to experiment with different weights for the best results.
- Additional tools: Equip yourself with a drill, screws, and a level to aid in precise assembly and alignment.
Gathering these materials won't only secure your dolly functions effectively but also make your filming experience much more fulfilling.
Imagine gliding your camera smoothly across a scene, capturing every moment perfectly. This isn't just a project; it's a step towards creating stunning home videos you'll cherish for years to come.
Recommended Material Types
Choosing the right materials is key to constructing a reliable DIY projector dolly. For ideal smoothness and durability, you'll want to use nylon screws and longboard wheels. These components guarantee that your dolly moves freely without unnecessary friction.
A sturdy base measuring one by one meter is recommended to provide stability and prevent tipping during operation, which is vital for achieving those smooth camera movements.
When assembling the wheels, incorporating nylon nuts can greatly enhance the dolly's performance. They reduce friction, making your movements even smoother. Don't forget to experiment with different weights; while heavier weights can stabilize the dolly, they might introduce noise, so finding the right balance is essential.
Additionally, consider custom pushing bars that improve ergonomics and control during operation. These bars make it easier for you to execute smooth shots, allowing for better maneuverability.
Assembly Tips and Techniques
Assembling your DIY projector dolly involves a careful approach to ascertain everything fits together seamlessly. Start with a solid base, ideally one by one meter, to guarantee stability during movement.
When choosing wheels, longboard wheels are a fantastic option for enhancing smoothness, allowing your camera to glide effortlessly. Incorporate nylon screws and nuts; they'll help reduce friction and improve the overall dolly operation.
Don't forget to experiment with different weight configurations. Adding weights can stabilize your dolly, but be aware that heavier setups might lead to squeaking.
Also, consider creating custom pushing bars to improve ergonomics and control, making your filming experience more comfortable.
Here's a quick checklist for your assembly:
- Longboard wheels for fluid movement
- A 1×1 meter sturdy base
- Nylon screws and nuts to reduce friction
- Different weights for ideal stability
- Custom pushing bars for better control
With these tips, you'll find that each element contributes to a smoother, more professional-looking video. Happy building!
Setting Up Your Dolly Base
To guarantee your DIY projector dolly operates smoothly, it's essential to establish a sturdy base. Aim for a size of one by one meter; this will provide enough support and balance during movement. Using nylon screws for assembly is a smart choice, as they minimize friction and enhance the smoothness of your dolly's operation.
Incorporate longboard wheels into your design. These wheels offer better rolling capabilities and stability, ensuring your camera moves fluidly. When setting up your dolly, make sure the base is level and securely mounted. This step is important to prevent any wobbling or instability while shooting, which can compromise the quality of your footage.
Always double-check that everything is tightly secured and that the wheels are functioning properly. A well-constructed base won't only improve your dolly's performance but also enhance your overall filming experience.
Experimenting With Weights
When you're experimenting with weights on your DIY projector dolly, you'll quickly notice how it affects movement smoothness.
Finding the ideal weight can minimize vibrations and enhance your shots, but too much can lead to resistance.
It's all about balancing the load to achieve that perfect glide.
Optimal Weight Selection
Finding the right weight for your DIY projector dolly can make all the difference in your filming experience. Experimenting with various weights is essential for achieving that perfect balance between ease of handling and stability. Lighter weights allow for quick movements, while heavier weights can help keep your shots steady.
Here are a few things to take into account as you test different weights:
- Smooth Motion: A well-balanced dolly glides effortlessly, capturing every moment beautifully.
- Creative Freedom: Finding the right weight lets you focus on your vision, not on your equipment.
- Confidence Boost: Knowing your dolly performs reliably can elevate your filmmaking game.
- Quality Results: The right weight choice enhances the overall quality of your home videos.
- Personal Satisfaction: Mastering your dolly setup brings a sense of accomplishment and pride.
During tests, a nine-kilogram weight showed some squeaking, yet the movement remained manageable. This indicates that your wheel type, along with the weight, plays a vital role in performance.
Don't hesitate to mix and match weights and wheel types until you discover the ideal setup that best suits your filming needs.
Impact on Movement Smoothness
The weight you choose for your DIY projector dolly directly influences how smoothly your camera moves during filming. Experimenting with different weights can greatly improve stability, leading to smoother shots. For instance, using a nine-kilogram weight can enhance performance, even if it introduces some manageable squeaking.
However, it's essential to take into account the type of wheels you're using, as they can also impact movement smoothness. Pairing the right wheels with your chosen weight can make a noticeable difference, so don't hesitate to test various combinations.
Additionally, using nylon nuts for wheel assembly can further improve smoothness, especially when you achieve the right weight distribution.
Finding that ideal weight for your dolly setup is often a trial-and-error process. You'll need to balance stability and mobility to get the best shot quality.
Practice Makes Perfect
Mastering dolly operation demands consistent practice to guarantee you achieve that smooth, continuous motion vital for high-quality shots.
As you engage in your practice sessions, don't forget the importance of focus alignment. Use paper marks to pinpoint your focal areas, making it easier to hit your targets consistently. Incorporating manual focus techniques while panning and pushing will require a rhythmic approach, which becomes more natural with time and repetition.
Experiment with various pushing techniques, whether pushing from the base for stability or upright for comfort. This exploration helps you discover what feels right for you.
Regularly testing different weights and wheel types also plays an important role in finding your ideal setup.
Here's what you'll gain from putting in the effort:
- The thrill of nailing that perfect shot
- Confidence in your camera movements
- A sense of accomplishment as you improve
- The joy of creating visually stunning videos
- Enhanced storytelling through fluid motion
Creative Filming Techniques
When you incorporate creative filming techniques with your DIY projector dolly, you can elevate your video projects to new heights. Utilizing smooth, continuous camera movements enhances the visual quality of your home videos, making them more engaging.
Incorporating features like dynamic weather can inspire unique storytelling methods and visual effects. Try combining panning and pushing techniques; these dynamic shots add depth to your storytelling and keep your audience captivated.
While filming, practice manual focus. This is especially important if you're using vintage lenses that lack autofocus support. Sharper images will greatly improve your final product.
Additionally, experiment with different weights on your dolly setup. Starting with nine-kilogram weights can help you fine-tune the smoothness and stability of your shots.
Building your dolly with a one-by-one meter base, using durable materials like nylon screws and longboard wheels, guarantees a smoother operation during filming.
With a sturdy setup, you can focus on perfecting your creative techniques without worrying about the equipment. Don't hesitate to explore various angles and movements, as this experimentation will lead to unique results and enhance your filmmaking skills.
Get ready to impress with your newfound creativity!
Frequently Asked Questions
What Is Basic Camera Movement Dolly?
A basic camera movement dolly's a wheeled platform that helps you achieve smooth, controlled shots. It enhances your video quality by allowing panning and pushing techniques, making your storytelling more dynamic and visually appealing.
How to Do a Tracking Shot at Home?
To do a tracking shot at home, you'll want to use a dolly for smooth movement. Practice pushing techniques, focus alignment, and experiment with weights to find the perfect balance for your shots.
Conclusion
By incorporating a DIY projector dolly into your home videos, you can elevate your filmmaking game considerably. Did you know that smooth camera movements can increase viewer engagement by up to 70%? With practice and a bit of creativity, you'll master the art of dolly shots in no time. So, gather your materials, experiment with weights, and enjoy the process. Before you know it, your videos will have that professional touch you've always wanted!
Hi, I’m Dominique. I love movies and want everyone to have the best home cinema experience possible. That’s why I started 1home Theatre Projector. We help people build their home cinema system using the latest technology and news on laser tv and all-around home entertainment.
We’re a small team of movie buffs (and experts) who are passionate about giving our readers the best advice and information possible. So whether you’re just starting out or you’re looking to upgrade your home cinema system, we’ve got you covered!
-
Beginners Guides3 months ago
How to Use Surround Sound With Firestick
-
Beginners Guides3 months ago
How to Connect Speaker Wire & Spot the Connectors
-
Home Cinema3 months ago
What to Know when Buying a Home Theatre Projector
-
Beginners Guides3 months ago
Why Do Projector Bulbs Explode?
-
Beginners Guides3 months ago
How to Use Home Theater Speakers Without a DVD Player
-
Home Cinema3 months ago
Factors to Consider When Buying a Home Cinema and Music System
-
Beginners Guides3 months ago
How to Stop Echo Home Theater
-
Beginners Guides3 months ago
How to Connect Home Theatre to PlayStation 5