
TL;DR
Prime for Young Adults — start your free trial
Fast free delivery, streaming and member deals for eligible 18–24 year olds.
Try it freeAs an affiliate, we earn on qualifying purchases.
A 4K projector can create a giant, immersive image—far larger than most TVs. But picture quality depends on contrast, brightness, HDR, and setup, not resolution alone. Knowing these factors helps you pick the best model for your room and budget.
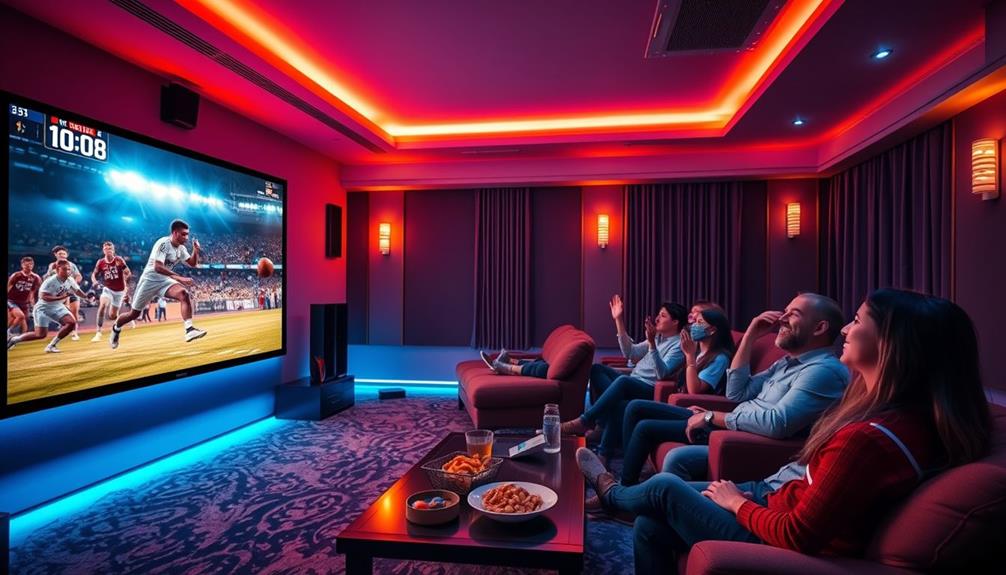
Imagine sitting in your darkened living room, a giant, crisp image filling your wall, the colors vibrant, blacks deep, shadows rich. That’s the promise of a 4K home theater projector. But behind the hype lies a maze of tech specs, room considerations, and setup tricks.
If you think resolution alone makes the difference, think again. The real magic happens in contrast, HDR, brightness, and how the projector fits into your space. This guide breaks down what you need to know to pick a 4K projector that actually transforms your movie nights.
Native 4K provides true resolution but is pricier; pixel-shifted 4K can match detail at a lower cost.
Contrast and black levels are more critical for realism than resolution or lumens alone.
Choose a projector rated with calibrated lumen measurements, not marketing claims.
Room environment and screen choice are just as vital as the projector for picture quality.
Focus on low latency and high refresh rates for gaming, not just resolution and brightness.
Native 4K vs. Pixel-Shifted 4K: Which One Looks Better?
Native 4K projectors have a panel with a full 3840 × 2160 pixel grid, delivering true, detailed images. Pixel-shifted models use a clever trick—rapidly shifting a lower-res image to simulate 4K. From a typical seating distance, both can look incredibly sharp.
For example, a native 4K projector might cost around $3,000, offering crisp detail perfect for close-up viewing or large screens. A pixel-shifter in the same price range can match that sharpness with good optics and contrast. The choice often comes down to budget and room conditions.
Remember: resolution isn’t everything. A pixel-shifter with excellent contrast and HDR might produce a more satisfying picture than a native 4K with weak blacks.
Projection Tech Showdown: DLP, LCD, or LCoS?
Projection technology shapes your image’s sharpness, contrast, and color. DLP projectors are compact, resistant to alignment issues, and deliver sharp images but sometimes show rainbow effects. LCDs tend to be brighter, with vibrant colors, yet may struggle with black levels. LCoS offers the deepest blacks and highest contrast but often comes at a higher price and bigger size.
Imagine a scene in a dark movie—LCoS might produce shadows so rich they feel almost tangible, while DLP offers razor-sharp clarity, and LCD shows punchy, bright colors.
Choosing between them depends on your room, budget, and how much you value contrast versus brightness.
Brightness Matters: How Much Lumens Do You Need?
Brightness isn’t just a marketing number. Real-world lumen measurements—like ANSI lumens—tell you how bright the image will be in your room. For example, a 100-inch screen in a dark room requires around 1500-2000 lumens for a vibrant picture. For rooms with ambient light, you’ll want 2500+ lumens.
Say your living room has large windows. You’ll need a projector rated for at least 3000 lumens to combat the daylight and keep the image lively. Conversely, in a dedicated home theater with blackout curtains, 1500 lumens might suffice.
Remember: manufacturers often exaggerate lumen specs. Look for independent, calibrated brightness measurements before buying.
Contrast and Blacks: Why They Truly Make or Break Your Image
Contrast ratio determines how deep and dimensional your blacks look. A dark scene in a movie—like a nighttime chase—depends on good contrast to look real. A projector with poor contrast makes blacks appear gray, flattening the scene’s depth. This impacts your viewing experience because contrast is fundamental to creating a sense of realism and immersion. When blacks are deep and shadows rich, images feel more lifelike and three-dimensional, drawing you into the story. Conversely, poor contrast can make scenes look flat and washed out, reducing emotional impact and detail.
For instance, a projector with a native contrast of 10,000:1 can produce richer shadows than one at 1,000:1. Independent tests often show that contrast performance varies wildly, even among models with similar specs. The key is understanding that native contrast ratios give a baseline, but actual perceived contrast also depends on how the projector handles tone mapping, ambient light, and screen material. So, investing in a model with higher native contrast and good dynamic range often results in images that are more engaging and realistic, especially in dark scenes. Think of contrast as the difference between a pitch-black night sky and an overcast day—more difference equals more immersion.
Deep contrast levels are crucial because they directly influence how immersive and true-to-life your images appear. A high contrast ratio allows subtle gradations in dark scenes, revealing details hidden in shadows. Conversely, poor contrast leads to washed-out blacks and grayish shadows, stripping scenes of depth and emotional impact. This tradeoff means you might prioritize contrast performance over resolution for a more cinematic experience. For example, investing in a projector with a high native contrast ratio and good tone mapping capabilities ensures dark scenes are rich and detailed, drawing you into the story rather than leaving you with a flat, lifeless image.
HDR: The Brightness Trick for Stunning Highlights
HDR on projectors is about more than just accepting a signal—it’s about how well the projector can handle bright highlights and dark shadows simultaneously. Since projectors rarely hit the brightness levels of TVs, good tone mapping becomes vital. Proper tone mapping ensures that bright elements like fireworks or reflections don’t wash out details in dark areas, preserving nuance across the brightness spectrum. This process involves dynamically adjusting how the projector displays different parts of the image, making highlights pop without sacrificing shadow detail. Imagine a fireworks scene—bright, sparkling bursts against a dark night sky. A good HDR projector uses tone mapping, HDR metadata, and contrast to make those fireworks pop without washing out nearby shadows. Look for models with scene-by-scene or frame-by-frame dynamic tone mapping for the best results. Remember: native brightness and contrast are still king for HDR impact, but effective tone mapping enhances the overall experience by balancing light and dark content seamlessly.
Deep understanding of HDR’s role reveals that it isn’t just about brighter images but about dynamic range—the ability to reproduce a wide spectrum of luminance. This wider range creates more realistic, vibrant images, especially in scenes with both bright and dark elements. The key is in how well the projector’s tone mapping algorithms adapt to different content—good tone mapping prevents highlights from clipping and shadows from crushing, maintaining detail and depth. For example, in a night scene with a bright moon, HDR ensures the moon gleams while the surrounding shadows retain their richness. This balance makes scenes more lifelike and immersive, elevating your viewing experience beyond standard SDR content.
Color Gamut and Accuracy: Making Colors Pop Without Clipping
Color is what makes your images lively and realistic. A projector’s ability to reproduce Rec.709 and DCI-P3 color gamuts affects how vivid or true-to-life your content looks. Wide color gamuts like DCI-P3 allow for more saturated, cinema-like colors, which can enhance immersive scenes such as sunsets or vibrant gaming environments. However, wide gamut alone isn’t enough; accurate color reproduction depends on the projector’s calibration and processing. If a wide color display isn’t properly calibrated, colors can appear oversaturated or unnatural, diminishing realism. For instance, a sunset scene with accurate color reproduction will show rich reds, oranges, and purples that feel true to life, enhancing immersion. Conversely, poorly calibrated wide-gamut projectors might oversaturate colors, making images look unnatural. If you’re into movies or gaming, look for models with color calibration controls and high color brightness to avoid dull or oversaturated images. Understanding the balance between wide color coverage and accurate reproduction helps ensure your images are both vibrant and true to the source material.
Colors are not just about vibrancy—they also influence the emotional tone and realism of your viewing experience. A wide color gamut can make scenes more spectacular, but only if the colors are accurate and well calibrated. Over-saturated colors can distract and diminish the cinematic feel, while accurate, well-managed color reproduction makes scenes feel genuine and immersive. For example, in a nature documentary, true-to-life greens, blues, and browns create a convincing environment, pulling you into the scene. Gaming and movies benefit from this balance because it enhances the sense of presence and emotional impact. Therefore, prioritizing models with precise color calibration and high color brightness ensures your images are vibrant without looking artificial, maintaining the integrity of the original content.
Room, Screen, and Setup Secrets for the Best Picture
Your room environment is as vital as the projector itself. Dark, matte walls and ceilings boost contrast. White or reflective surfaces bounce light, washing out blacks. A gray screen can deepen blacks but reduces overall brightness.
Imagine a small, bright room with white walls—adding ambient light ruins black levels. Conversely, a dedicated theater with blackout curtains and a high-gain screen creates a cinematic blackness that pulls you in. The room’s reflectivity and ambient light levels directly influence how well contrast and black levels perform. A room with reflective surfaces or lots of ambient light diminishes perceived contrast and makes blacks look gray, reducing the sense of depth and immersion. Conversely, a controlled environment with matte walls and controlled lighting enhances the projector’s ability to produce deep blacks and vibrant colors. Screen choice is equally critical; a high-gain screen can improve brightness but may introduce glare or hot-spotting, while a gray or neutral screen can help improve black levels without sacrificing too much luminance. Proper placement and mounting are also essential to avoid distortions or uneven focus, which can distract from the viewing experience. Think of your room as the canvas that shapes the final picture—optimizing it ensures you get the most out of your projector’s capabilities.
Understanding your room’s lighting, surface reflectivity, and screen type allows you to tailor your setup for optimal contrast, color, and clarity. For example, adding blackout curtains and using a neutral or gray screen can significantly improve image depth and contrast. Avoid reflective walls or bright surfaces that bounce ambient light into the room, washing out blacks. Proper placement of the projector—ideally centered and at the correct height—reduces keystone and focus issues, ensuring a sharp, evenly lit image. This attention to detail helps your projector perform at its best, delivering cinematic quality that rivals commercial theaters.
Size, Distance, and How Far You Should Sit
Choosing the right screen size involves more than just room size. A 100-inch screen, about 87 inches wide, offers immersive viewing without losing brightness. But bigger isn’t always better—your seating distance and the projector’s brightness matter.
For example, sitting 10 feet from a 120-inch screen often feels perfect if your projector is bright enough. Too close, and details blur; too far, and immersion drops. The optimal viewing distance balances image size with the viewer’s comfort and the projector’s luminance. Sitting too close to a large screen can cause eye strain and reveal pixel structure, diminishing the cinematic quality. Conversely, sitting too far reduces the sense of immersion and detail. Use the recommended viewing distance formulas—generally 1.5 to 2.5 times the diagonal size—to find your sweet spot. Remember, larger screens reduce luminance, so balance size with brightness to avoid a dim image that diminishes the cinematic experience. The goal is to position yourself where the image feels natural and enveloping, without sacrificing clarity or brightness.
Choosing the right size also involves considering your room’s dimensions and how much space you have available. Larger screens create a more cinematic feel but demand higher brightness levels to maintain image clarity. If your room is small or has ambient light, a smaller screen might deliver a better overall experience. Conversely, a dedicated dark room can handle larger screens with less compromise. Experimenting with different sizes and seating arrangements can help you find that perfect balance between immersion and image quality.
Installation Tips: Getting It Just Right
Before buying, check throw ratio, lens shift, and zoom to ensure your projector fits your room. A projector with good lens shift allows you to position it off-center without distorting the image.
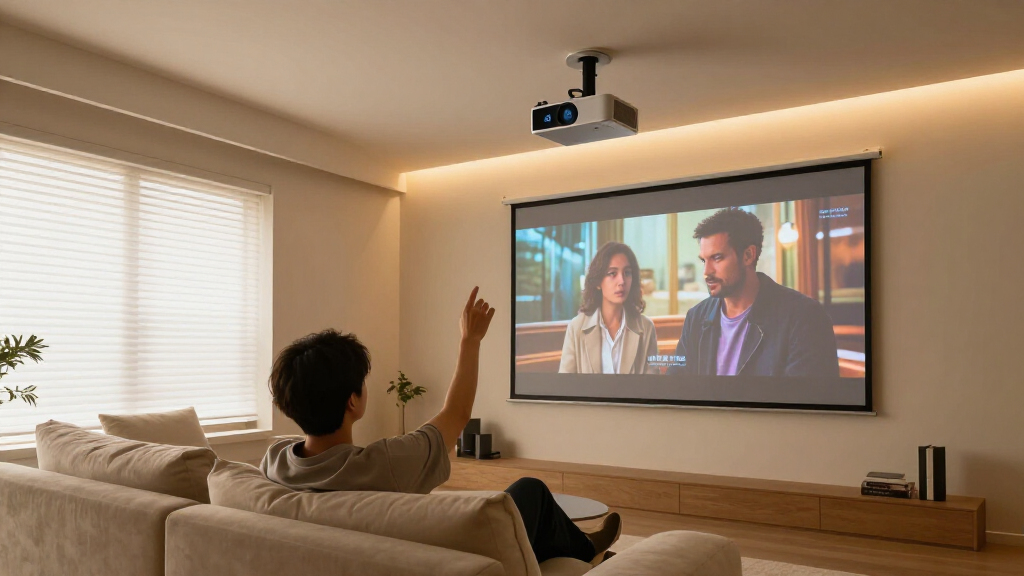
Imagine ceiling mounting a projector—if the lens isn’t adjustable or if you rely on digital keystone correction, you might lose detail or introduce distortions. Proper placement minimizes the need for digital correction, which can degrade image quality. Ensuring the projector is aligned with the screen reduces keystone effects, improves focus, and maintains sharpness across the image. Consider the room’s dimensions and plan for appropriate mounting points or furniture placement. Cable management and ventilation are also critical; poor ventilation can cause overheating, noise, or shutdowns, while tangled cables can be a tripping hazard. Using test patterns during setup helps verify geometric accuracy and focus, saving time and ensuring the final image is as intended. Proper installation isn’t just about convenience—it’s a crucial step to maximize picture quality, reduce maintenance, and ensure long-term reliability.
Pay attention to the throw distance—the space between the projector and screen—since it determines the size of the projected image. Use the manufacturer’s guidelines to select the right model for your room dimensions. Also, consider the placement height and angle to avoid shadows or distortions. Properly securing your projector and cable routing not only enhances safety but also prevents accidental shifts that can affect image alignment. Regularly check focus and keystone correction after installation, as environmental factors or vibrations can alter alignment over time. Investing time in precise setup ensures your projector performs at its best, delivering sharp, bright images with minimal fuss.
Gaming and Fast Action: What Matters Most
If gaming is your thing, low input lag and high refresh rates are non-negotiable. Look for projectors supporting 4K/120Hz and variable refresh rate (VRR). Some models offer auto low latency modes—crucial for competitive play.
Imagine playing a fast-paced shooter—every millisecond counts. A projector with 16ms lag at 4K/120Hz will feel more responsive than one with 50ms. The lower the latency, the more immediate the response feels, which can be the difference between winning and losing. High refresh rates reduce motion blur, making fast-moving scenes clearer and more natural. Variable refresh rate (VRR) technology synchronizes the projector’s frame rate with your gaming console or PC, eliminating tearing and stuttering. This synchronization creates smoother gameplay and reduces eye strain during extended sessions. Note: motion smoothing features can add latency. Turn them off for gaming, but they help for movies with fast motion. Always verify specs independently, as marketing often overstates performance in this area.
Understanding these features means recognizing that gaming performance depends heavily on how well the projector can keep up with rapid scene changes without lag or artifacts. A low latency, high refresh rate setup not only improves responsiveness but also reduces eye strain, making long gaming sessions more comfortable. The tradeoff might be that some high-performance gaming projectors are more expensive or have shorter lamp life, but the payoff in smooth, responsive gameplay is worth it for enthusiasts.
Connectivity and Extras: Making Your Setup Seamless
Look for HDMI 2.1 ports for 4K/120Hz support, eARC for high-quality audio, and reliable Wi-Fi or Ethernet. USB power can run streaming sticks, simplifying your setup.
Imagine streaming a 4K HDR movie directly from your projector—easy, right? Or connecting your gaming console with minimal fuss. Ensuring your projector supports the latest connectivity standards future-proofs your setup and allows seamless integration with other devices. HDMI 2.1 is especially important for high refresh rates and high bandwidth, enabling smooth gaming and video playback. eARC supports high-quality audio formats like Dolby Atmos, enhancing your surround sound experience. Built-in Wi-Fi and Ethernet provide flexible streaming options, reducing clutter and improving stability. USB power outputs allow you to power streaming devices without extra adapters, simplifying your installation. Compatibility with popular streaming apps and support for formats like Dolby Vision or HDR10+ ensures you can enjoy a wide range of content in the best quality possible. Good connectivity is the backbone of a hassle-free, high-performance home theater system.
Choosing a projector with versatile connectivity options means you won’t have to worry about upgrading cables or adapters later. Especially for high-quality audio and video, support for the latest standards ensures you get the most out of your content. For example, an HDMI 2.1 port allows you to enjoy 4K at 120Hz without compression, vital for gaming and high-frame-rate videos. Reliable Wi-Fi or Ethernet ensures smooth streaming and reduces lag, which is critical for live content or smart features. USB power options make it easy to keep streaming devices operational without cluttering your setup with extra power adapters. Carefully selecting these features ensures your home theater remains future-proof and hassle-free, so you can focus on enjoying your content rather than troubleshooting connectivity issues.
Noise, Heat, and Maintenance: Keep It Quiet & Cool
Some projectors can be loud—fans whirring during quiet scenes. Check decibel ratings, especially in eco or quiet modes. Positioning near seating can make noise distracting. Heat buildup can also affect performance and longevity. Proper ventilation and choosing models with efficient cooling systems help maintain optimal operation and reduce noise. Maintenance involves cleaning filters, replacing lamps, or managing dust buildup. Laser and LED models often need less upkeep but still require some care. Regular cleaning of filters and ensuring proper ventilation prevents overheating and prolongs the life of your projector. Long-term, consider warranty, firmware updates, and availability of replacement parts to keep your setup running smoothly. Quiet operation enhances the viewing experience, especially during late-night movies or in shared spaces. Efficient cooling and maintenance practices ensure your projector performs reliably over years of use.
Understanding the noise levels and heat output of your projector is essential because loud fans can ruin the experience, especially in quiet, immersive scenes. Excessive heat can lead to overheating, shutdowns, or reduced lifespan. Proper placement—away from direct airflow obstructions—and regular maintenance, like cleaning filters and dusting vents, help keep your projector running smoothly. Choosing models with energy-efficient cooling systems not only reduces noise but also lowers power consumption and heat generation. Long-term, staying on top of firmware updates and replacing lamps or components as needed ensures consistent performance. Quiet, cool operation is vital for maintaining focus and comfort during extended viewing sessions, making your home theater a true haven for cinematic immersion.
Frequently Asked Questions
Is native 4K worth the extra cost over pixel-shifted 4K?
Native 4K offers true pixel-perfect detail, especially useful for close seating or large screens. However, pixel-shifted 4K can look nearly identical from typical viewing distances and often costs less, making it a smart choice for many home setups.How many lumens do I really need for my room?
It depends on your screen size, ambient light, and content. For a dark room with a 100-inch screen, around 1500-2000 lumens suffices. Bright rooms with windows need 2500+ lumens. Always check independent lumen measurements before buying.Can a projector perform well during daytime?
Yes, if you have good control over ambient light and a projector rated for high lumens. Use blackout curtains and a high-gain screen. But for consistent bright daytime viewing, a large TV might be more practical.What’s more important: contrast or resolution?
Contrast has a bigger impact on picture depth and realism. A high-contrast projector with deep blacks makes dark scenes pop, while resolution alone doesn’t guarantee a cinematic feel.Do I need HDMI 2.1 for 4K/120Hz gaming?
Yes, HDMI 2.1 supports 4K at 120Hz, VRR, and ALLM. But check if your projector explicitly lists these features, as not all HDMI 2.1 ports support every high-refresh-rate signal.Conclusion
Pick a projector that balances contrast, brightness, and room conditions. The best 4K home theater projector doesn’t just show 4K—it creates a cinematic world. Investing in proper setup and realistic expectations turns your space into a true home theater.
Remember: details like contrast, HDR, and environment matter more than resolution alone. When you finally see that perfect picture, all your planning pays off. Now, go find your giant, immersive screen—the room’s waiting for its blockbuster debut.
Fall yard work Picks
leaf blowers
As an affiliate, we earn on qualifying purchases.