
To master frameless versus fixed frame enclosures in a weekend, start by understanding their main differences: frameless offers a sleek, modern look with minimal hardware, while fixed frames provide durability with visible support and hardware. Gather your tools, measure carefully, and follow step-by-step installation guides for each type. Focus on proper sealing and hardware placement. With attention to details and some practice, you’ll quickly become confident—continue exploring more tips to refine your skills.
Key Takeaways
- Understand structural differences: fixed frames offer durability with visible hardware; frameless enclosures prioritize sleek, minimal hardware and advanced sealing.
- Learn installation basics: measure accurately, select compatible hardware, and follow specific steps for hinges, seals, and frame attachment.
- Compare materials: choose glass thickness (3/8 or 1/2 inch) and durable hardware finishes like chrome or matte black for longevity and style.
- Recognize maintenance needs: regularly clean with non-abrasive cleaners, inspect seals and hardware, and apply protective coatings to extend lifespan.
- Practice troubleshooting: identify and fix leaks, misalignments, or hardware issues quickly to master effective installation and upkeep techniques.
Top picks for "master frameles frame"
Open Amazon search results for this keyword.
As an affiliate, we earn on qualifying purchases.
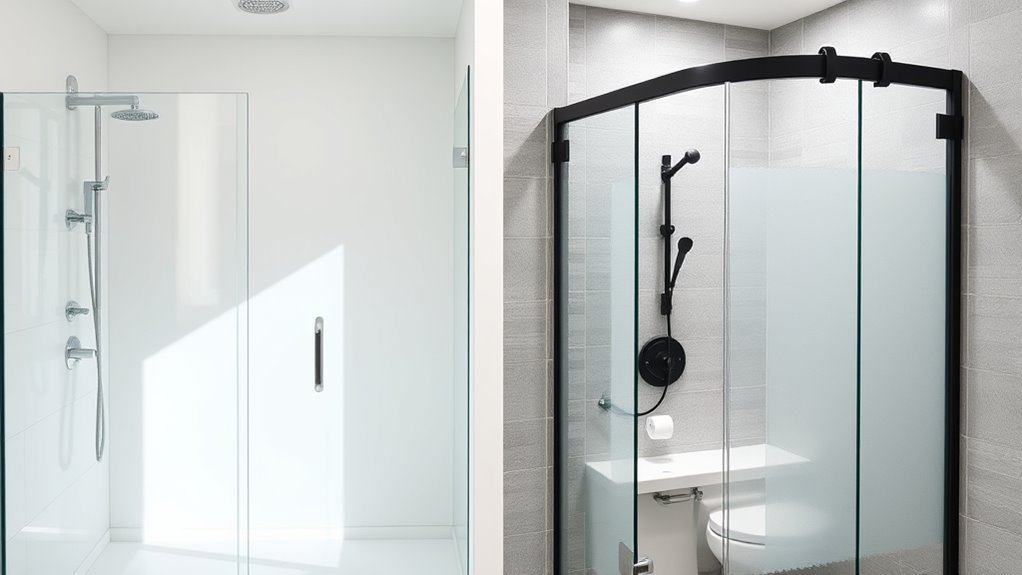
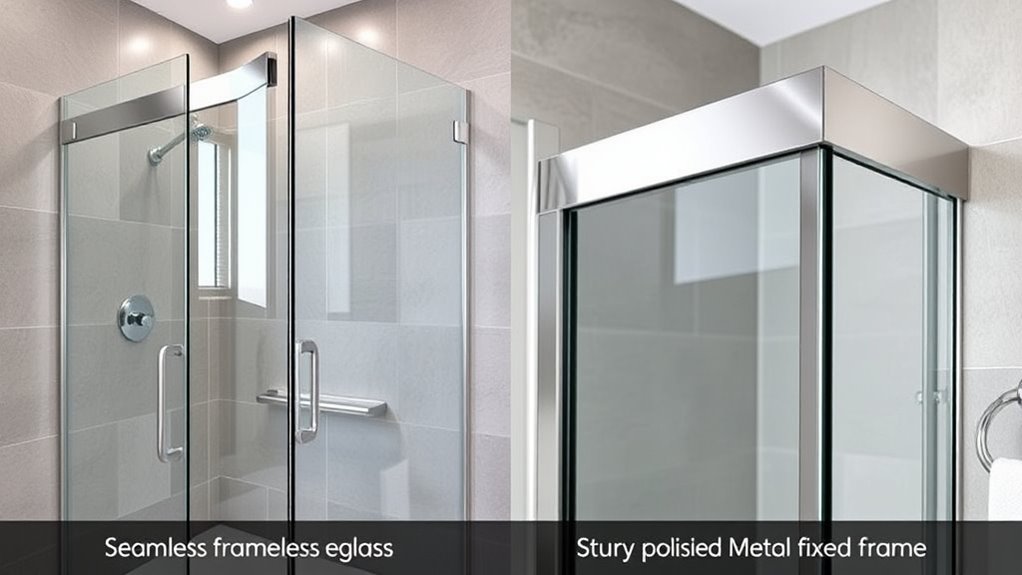
Understanding the Basic Differences Between Frameless and Fixed Frame Enclosures
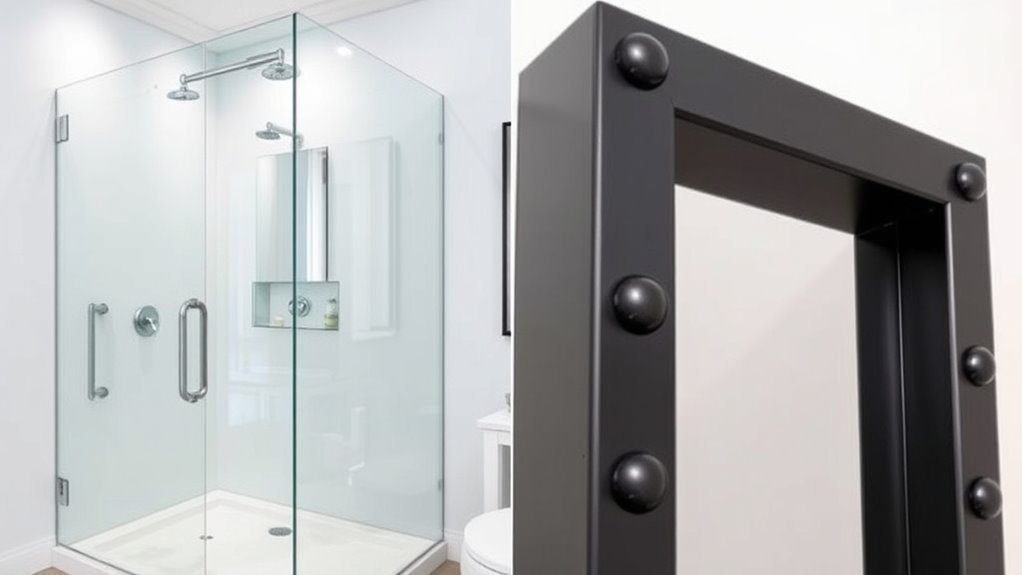
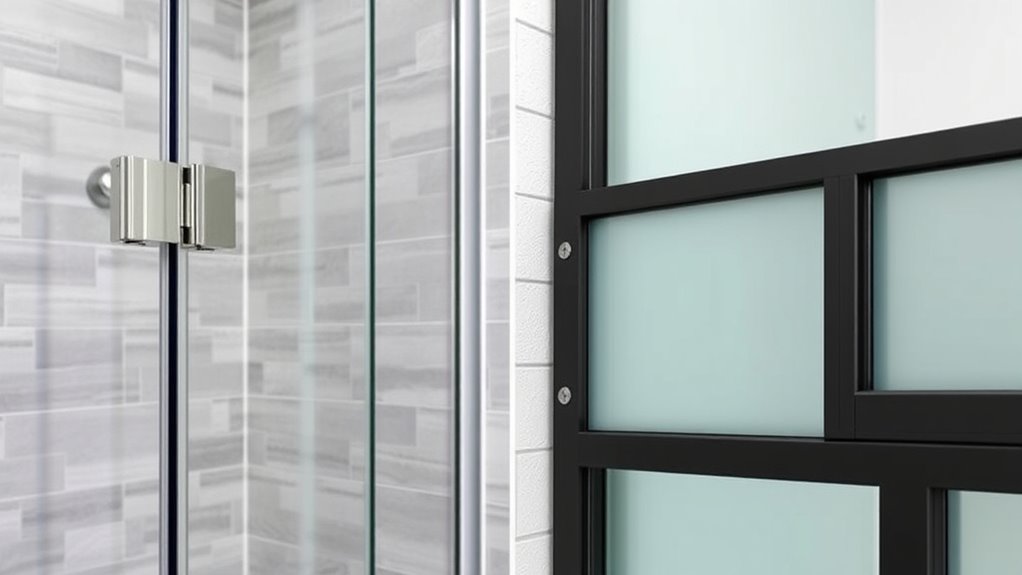
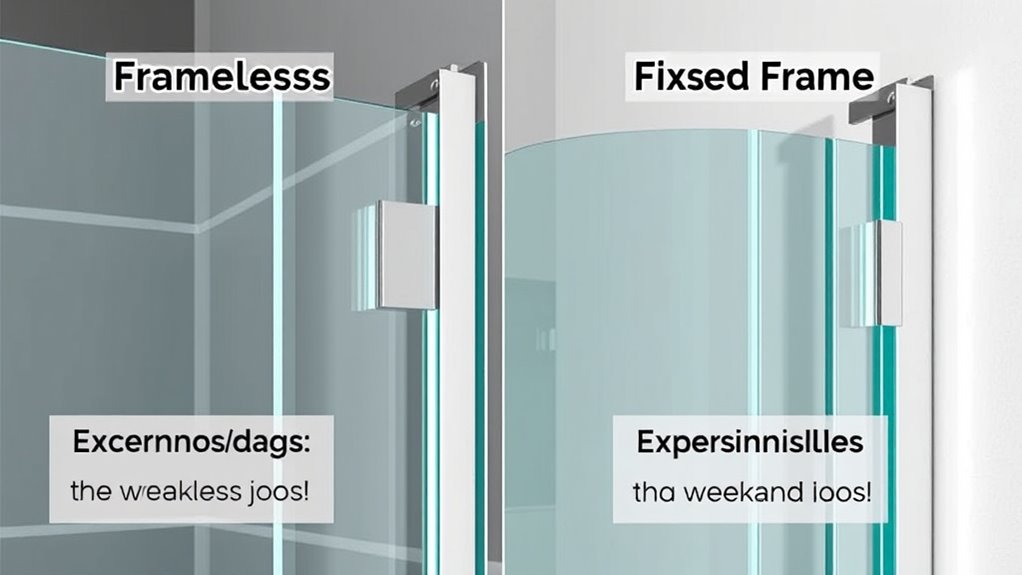
When choosing between frameless and fixed frame enclosures, understanding their core differences is essential. Frameless enclosures feature minimal glass hardware, giving a sleek appearance and making cleaning easier. They rely heavily on advanced sealing techniques to prevent leaks since there’s no frame to support the glass. Fixed frame enclosures, on the other hand, incorporate a sturdy metal or aluminum frame that provides additional structural support. The hardware in fixed frames is often more prominent, which can impact the overall look. While frameless designs emphasize a modern, seamless aesthetic, fixed frames tend to be more durable and easier to install. Additionally, glass hardware plays a crucial role in both styles, affecting both functionality and visual appeal. Recognizing the installation complexity of each type can help you plan better and ensure a successful setup. Selecting the proper sealing techniques is vital for preventing water leaks and maintaining enclosure integrity. Understanding the structural support needed for each design can also influence your choice, especially for larger or custom setups. Knowing these distinctions helps you decide whether your priority is a minimalist style or enhanced stability, guiding you toward the perfect shower enclosure.
Selecting the Right Material and Style for Your Bathroom
Choosing the right material and style for your bathroom depends on your aesthetic preferences, durability needs, and maintenance preferences. For a sleek, modern look, opt for glass with a thickness of at least 3/8 inch, which offers strength and minimizes wobbling. Thicker glass, like 1/2 inch, provides even more durability but can be heavier. Consider hardware finishes that complement your existing fixtures—brushed nickel, chrome, or matte black—since these details impact the overall style. Frameless enclosures often feature minimal hardware, so selecting high-quality, corrosion-resistant finishes ensures longevity. Additionally, understanding the different glass types and their properties can help you make a more informed decision. When choosing between frameless and fixed frame options, examining the installation process can help you determine which style best fits your DIY skills or need for professional assistance. Fixed frames might incorporate more visible hardware, so choose finishes that blend seamlessly with your bathroom decor. Incorporating curiosity about different materials and styles can help you make a more informed decision. Exploring material durability can also guide you toward options that withstand humidity and frequent use, enhancing your bathroom’s longevity.
Gathering Tools and Preparing Your Workspace for Installation
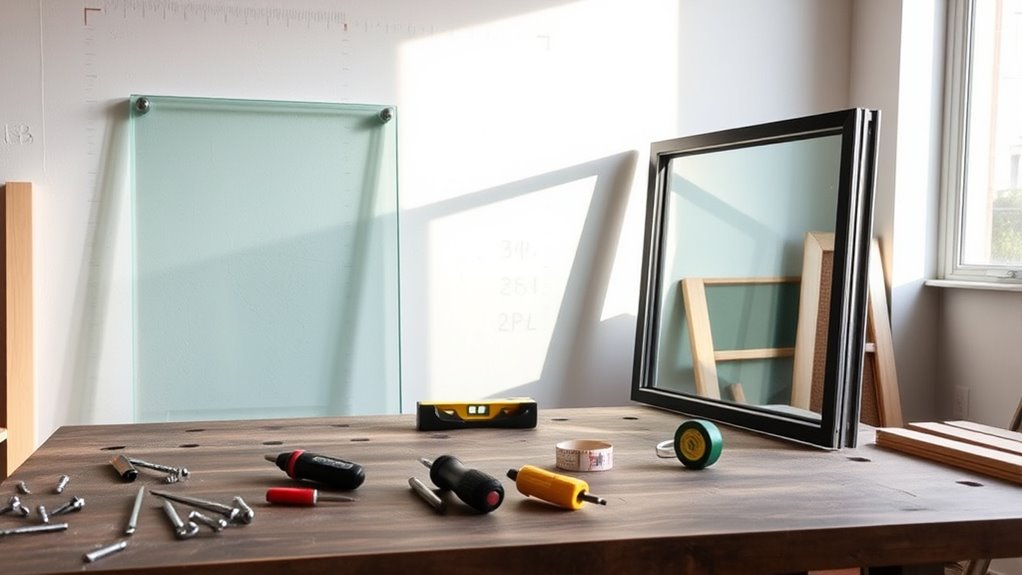
Before starting your shower enclosure installation, gather all necessary tools and clear your workspace to guarantee a smooth process. A well-prepared tools checklist ensures you won’t halt midway. Set up your workspace by decluttering and covering surfaces to protect against damage.
Here are essential items to include:
- Measuring tape and level for precise placement
- Power drill and screwdriver for fast assembly
- Silicone sealant and caulk gun for waterproof sealing
- Safety gear like gloves and goggles for protection
Creating an organized workspace setup minimizes errors and saves time. Make sure tools are within reach and the area is well-lit. Proper preparation sets a strong foundation for a successful installation.
Step-by-Step Guide to Installing a Frameless Shower Enclosure
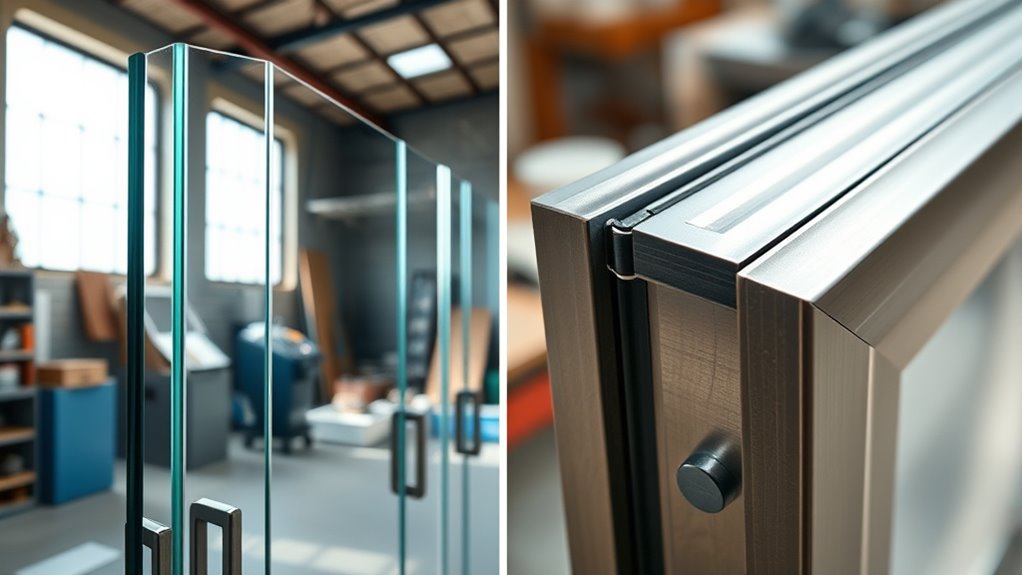
Installing a frameless shower enclosure may seem intimidating, but breaking it down into clear steps makes the process manageable. First, determine the appropriate glass thickness—most frameless enclosures use 3/8-inch or 1/2-inch glass for strength and durability. Measure your space carefully, ensuring precise placement of hinges and brackets. Choose hardware options that complement your style and provide secure support—think about stainless steel or chrome finishes. Attach the hinges to the wall, then carefully lift and position the glass panels, making sure they align correctly. Use a level to verify everything’s straight before tightening the hardware fully. Finally, apply sealant along the edges for waterproofing. Taking your time with each step helps guarantee a professional, leak-proof installation. Understanding industry standards for safety and quality can also guide your choices throughout the project. Additionally, consulting manufacturers’ guidelines ensures compatibility and optimal performance of your components.
Step-by-Step Guide to Installing a Fixed Frame Shower Enclosure
A fixed frame shower enclosure offers a sleek and stable design that enhances any bathroom. To install it properly, start by measuring your space accurately. Next, choose the right glass thickness—typically 1/4” to 3/8”—for durability and safety. When selecting hardware, focus on corrosion-resistant options like stainless steel or brass. Follow these steps:
- Mark the wall studs and install the wall profiles securely.
- Attach the top and bottom rails, ensuring they are level.
- Fit the glass panels into the frames, adjusting for a snug fit.
- Tighten all hardware, paying close attention to hardware selection to prevent leaks and ensure stability. An important aspect of hardware selection is choosing adjustable fittings that allow for fine-tuning during installation, ensuring a perfect fit and long-lasting stability. This flexibility is especially crucial when working with materials with flexibility, as it allows for precise adjustments and creative applications in artistic projects. Proper installation guarantees a sturdy, stylish enclosure that lasts.
Tips for Troubleshooting Common Installation Challenges
Even with careful planning, installation challenges can arise, but addressing them promptly guarantees your shower enclosure remains secure and leak-free. One common issue is leak prevention; ensure all seals and gaskets are properly positioned and tightened to avoid water seepage. If you notice leaks, double-check hardware compatibility—using incompatible brackets or hinges can compromise the fit and cause leaks. Misaligned panels or doors can also be a challenge; use a level frequently during installation and adjust hardware accordingly. Tighten screws gradually, avoiding overtightening that may crack glass or distort framing. When facing stubborn issues, revisit the manufacturer’s instructions or consult a professional. Staying attentive to hardware compatibility and sealing details can save you headaches and ensure a durable, leak-proof enclosure. Additionally, understanding framed vs. frameless shower options can help you select the best design for your space and avoid unnecessary installation problems. Proper sealing techniques are essential to prevent leaks and ensure long-term durability of your shower enclosure. Incorporating personal empowerment strategies, such as patience and methodical problem-solving, can also make troubleshooting more manageable and less stressful. Remember, being aware of environmental impacts and choosing sustainable materials can contribute to a more eco-friendly installation process and long-term sustainability. Moreover, selecting appropriate materials for your specific environment can significantly reduce maintenance issues over time.
Finishing Touches and Maintenance to Keep Your Enclosure Looking New

To keep your enclosure looking new, you need to stay on top of regular cleaning practices and apply protective coatings when needed. It’s also important to establish a routine inspection schedule to spot any signs of wear or damage early. Wall organization systems can help you maintain a tidy appearance and prevent clutter from accumulating. Consistent maintenance will guarantee your enclosure remains in top condition for years to come. Understanding security vulnerabilities can help you identify potential issues before they escalate. Regularly inspecting for wear and tear can prevent minor issues from becoming major repairs. Additionally, being aware of legislative changes related to safety standards can ensure your enclosure remains compliant and safe over time.
Regular Cleaning Practices
Ever wondered how to keep your frameless or fixed frame enclosure looking pristine over time? Regular cleaning is key. To prevent soap scum buildup and mold, follow these practices:
- Use a non-abrasive glass cleaner weekly to remove soap scum and maintain clarity.
- Wipe down surfaces with a microfiber cloth to avoid streaks and water spots.
- Check for mold and clean affected areas immediately with a mild solution to prevent spread.
- Ventilate the space well after cleaning to reduce humidity and mold risk.
Consistent maintenance prevents grime accumulation and keeps your enclosure looking new. Avoid harsh chemicals that can damage seals or finishes. Regular upkeep ensures your investment stays attractive and functional for years to come.
Protective Coatings Application
Applying protective coatings to your enclosure not only enhances its appearance but also provides a durable barrier against moisture, stains, and everyday wear. A quality coating improves glass durability by preventing scratches and damage, ensuring your enclosure stays pristine longer. To get the best results, focus on coating adhesion; proper surface preparation is key. Clean the glass thoroughly to remove dirt and oils, allowing the coating to bond securely. Use a coating suitable for your specific glass type and environment, and apply it evenly to avoid streaks or missed spots. Regularly maintaining the coating will prolong its effectiveness, keeping your enclosure looking new and protected against the elements. With proper application and care, your enclosure will retain its clarity and strength for years to come.
Routine Inspection Schedule
How often should you inspect your enclosure to guarantee it stays in top condition? Regular inspections are essential for maintaining its appearance and functionality. Check monthly for any signs of wear or damage. During each inspection, focus on:
- Sealant application integrity—reapply sealant where cracks or gaps appear to prevent water intrusion.
- Hardware selection—tighten loose screws or replace corroded hardware to ensure stability.
- Frame condition—look for warping, cracks, or corrosion, especially on fixed frames.
- Glass or panel cleanliness—clean surfaces and inspect for chips or scratches that could compromise the enclosure’s look.
Consistent routine checks help you catch issues early, prolonging lifespan and keeping your enclosure looking new. Proper maintenance guarantees ideal performance and aesthetic appeal over time.
Frequently Asked Questions
How Long Does It Typically Take to Master Each Enclosure Type?
You can typically master the installation time for each enclosure type in a weekend, but the learning curve varies. Frameless enclosures often take longer initially due to precise measurements and sealing, while fixed frames may be quicker to install. With focus and practice, you’ll become comfortable with both, reducing installation time and easing the learning curve. Dedicate time to understanding each system’s nuances, and you’ll master them faster.
Can I Upgrade From a Fixed Frame to a Frameless Enclosure Later?
Switching from a fixed frame to a frameless enclosure is like changing gears in a car—you can do it, but it requires careful frame modification to guarantee enclosure compatibility. You’ll need to assess your existing setup and possibly upgrade hardware or walls. While it’s doable later, it’s best to consult a professional to avoid any surprises, guaranteeing a smooth transition and maintaining your enclosure’s integrity.
Are There Specific Safety Considerations for Frameless Vs Fixed Frames?
Yes, there are safety considerations for both frameless and fixed frames. You should prioritize glass safety by choosing tempered or laminated glass to prevent injuries if breakage occurs. During installation, follow precautions like securing the glass properly and ensuring sturdy support. Frameless enclosures may require extra caution due to sharp edges, so always wear protective gear and double-check mounting hardware. Proper safety measures guarantee secure, long-lasting installations for both options.
What Are the Cost Differences Between Frameless and Fixed Frame Installations?
You’ll likely find that frameless installations have higher upfront costs due to their specialized hardware and precise craftsmanship, while fixed frame options tend to be more budget-friendly initially. However, consider maintenance expenses too; frameless designs often require more careful upkeep, increasing long-term costs. Fixed frames usually need less maintenance, saving you money over time. Balancing installation costs with ongoing expenses helps you choose the best option for your budget and needs.
How Do I Choose the Best Enclosure for Small Bathroom Spaces?
Thinking of a small bathroom? You should pick a glass enclosure that maximizes space and style. Opt for frameless designs with thinner glass, around 3/8 inch, for a sleek look that doesn’t crowd the room. Frameless installations are easier and quicker, making them perfect for tight spaces. They create an open feel, like a window to your bathroom’s beauty. Choose wisely, and your small bathroom will feel much bigger and brighter.
Conclusion
By understanding the differences, choosing the right materials, preparing your workspace, following clear installation steps, troubleshooting issues, and maintaining regularly, you’ll confidently master both frameless and fixed frame enclosures in just a weekend. With patience, attention to detail, and a bit of effort, you’ll create a stunning, functional bathroom upgrade. Embrace the process, enjoy the results, and enjoy a beautiful, durable shower enclosure that reflects your style and craftsmanship.