To set up your subwoofer effectively, start by experimenting with placement near walls or corners to boost bass without causing boominess. Connect it securely using RCA or LFE cables, then fine-tune the volume and phase controls for seamless integration with your main speakers. Adjust the crossover to balance deep bass and clarity, and use measurement tools to identify response issues. Keep testing different spots and settings until you achieve smooth, accurate bass—more tips await to optimize your setup even further.
Experiment with subwoofer placement near walls or corners to enhance bass response without causing boomy sound.
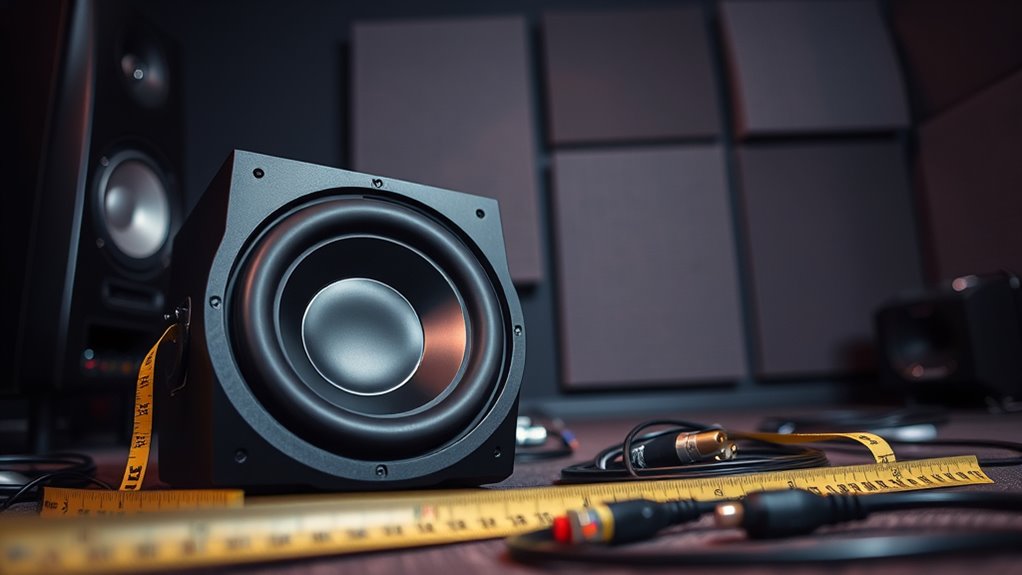
Use measurement tools or apps to analyze room response and identify peaks or dips for optimal positioning.
Adjust phase, crossover, and volume settings incrementally to achieve seamless integration with main speakers.
Test different listening positions and angles to find the most balanced and accurate bass experience.
Secure and run cables properly, avoiding sharp bends or obstructions that can affect sound quality.
Choosing the Right Spot for Your Subwoofer
Choosing the right spot for your subwoofer is essential to achieving deep, balanced bass. Proper woofer placement ensures the sound is even and avoids muddiness or boomy spots. Start by placing your subwoofer near a wall or corner, as this can enhance bass response due to room acoustics. However, avoid placing it directly in a corner if you notice exaggerated or uneven bass. Experiment with different locations to find the spot where bass sounds tight and clear. Keep in mind that room acoustics — such as furniture, curtains, and wall materials — influence how the sound travels and reflects. By paying attention to these factors, you’ll optimize your subwoofer’s placement for a richer, more accurate bass experience.
Connecting Your Subwoofer Properly
To get the best sound, you need to connect your subwoofer correctly. Pay attention to cable placement to guarantee a clear, strong signal, and always use the right type of cable. Don’t forget to set the proper phase so your subwoofer works seamlessly with your other speakers. Additionally, choosing energy-efficient HVAC systems can help maintain optimal temperature control and reduce your energy consumption. Proper exfoliation with glycolic acid can also contribute to healthier skin, which enhances your overall appearance.
Correct Cable Placement
Proper cable placement is essential to guarantee your subwoofer performs at its best. Start by choosing the right cable types—subwoofer cables typically use RCA or LFE connectors. Confirm connector compatibility with your receiver or amplifier to avoid connection issues. Keep the cable run as direct as possible, avoiding sharp bends or pinched sections that could cause signal loss. Maintain proper polarity by connecting the positive and negative terminals correctly, which helps prevent phase issues. Use high-quality cables to minimize interference and ensure clear sound. Avoid running the cable near power cords or other electronics that could introduce noise. Secure the cable along walls or baseboards to keep it neat and prevent tripping hazards. Proper cable placement guarantees ideal sound quality and system performance.
Setting Proper Phase
Setting the correct phase guarantees your subwoofer integrates smoothly with your main speakers, providing tight, balanced bass. Phase alignment ensures that the sound waves from your sub and speakers are synchronized, preventing sound wave interference that can cause muddiness or gaps in bass response. To set the phase properly, start by playing music with prominent bass and listen carefully. Adjust the subwoofer’s phase control or switch between 0° and 180° until the bass sounds fullest and most cohesive with your main speakers. Proper phase setup minimizes destructive interference, creating a seamless bass experience. Remember, small adjustments can make a noticeable difference, so take your time to find the position that delivers the clearest, most impactful sound. Additionally, understanding the importance of sound wave interference can help you better optimize your setup for the best audio performance. Being aware of factual audio concepts can further enhance your ability to fine-tune your system effectively. For example, knowledge about tuning techniques can assist in achieving the most accurate phase alignment for your specific setup. Incorporating accurate measurement tools can also streamline the process and ensure precise adjustments. Using a phase meter or app can help you verify your adjustments with more confidence.
Adjusting the Crossover Frequency for Balance
Adjusting the crossover frequency is essential for achieving a seamless blend between your subwoofer and main speakers. The crossover frequency determines where your subwoofer stops producing bass and your main speakers take over, affecting the overall bass blend. If set too high, the subwoofer may overpower the sound, creating a muddy or boomy effect. If set too low, you might miss out on the full impact of deep bass. To find the right balance, start with the manufacturer’s recommended setting, then gradually modify while listening to familiar music or movies. Your goal is to create a smooth transition between the subwoofer and main speakers, ensuring bass feels natural and cohesive. Fine-tuning this setting enhances the overall sound clarity and stereo imaging. Employing goal setting techniques can help you systematically optimize your setup for the best audio experience. Additionally, understanding the crossover frequency range can help you choose the most appropriate setting for your specific speakers and room environment. Recognizing the typical crossover point range used in various setups can also guide your adjustments for optimal sound integration. It’s also helpful to consider the specific speaker characteristics to tailor the crossover setting to your system’s unique profile. Being aware of the room acoustics can further improve your ability to fine-tune this setting effectively.
Setting the Volume Levels for Optimal Sound
To achieve the best sound balance, you need to set your subwoofer’s volume level correctly. Start by performing a thorough volume calibration, ensuring the subwoofer’s sound pressure complements your main speakers. Begin with a low volume setting and gradually increase it while playing familiar music or test tones. Listen for smooth integration, avoiding overpowering bass or muddy sound. The goal is to match the subwoofer’s output with your room’s acoustics and your listening preferences. Use a receiver’s calibration tools if available, or rely on your ears for adjustments. Proper volume calibration prevents distortion and guarantees your bass feels full without overwhelming the overall sound. Fine-tuning the volume level is key to creating a balanced, immersive listening experience. Room acoustics also play a significant role in how your subwoofer integrates with your audio setup, so consider optimizing your space for the best sound quality. Additionally, paying attention to filter settings can help prevent unwanted noise and ensure clean, clear bass response. Understanding subwoofer positioning can further enhance your audio experience by improving sound dispersion and bass response. Moreover, considering sound wave interactions within your room can significantly improve overall sound quality and subwoofer performance.
Testing and Fine-Tuning Your Subwoofer Placement
To get the best sound, you need to analyze how your room responds to the subwoofer’s placement. Move around and listen carefully to identify where the bass sounds most balanced and powerful. Making small adjustments based on your listening position helps verify even, clear bass throughout your space. Additionally, considering room acoustics and placement can significantly enhance your subwoofer’s performance. Using a measurement microphone can help accurately analyze the room’s response and fine-tune your setup for optimal sound. Incorporating sound frequency analysis techniques during setup can also improve your focus and decision-making process, ensuring a more precise placement. Being aware of regional differences in home theater setups can further optimize your experience based on your specific environment.
Room Response Analysis
How can you guarantee your subwoofer delivers the best sound in your room? The key is analyzing your room response through acoustic measurement. Use a microphone and software to test the frequency response at your listening position. Look for peaks and dips that indicate problematic room modes. Fine-tune your placement and settings to smooth out these irregularities.
Here’s a quick overview:
Room Response Factors
Your Adjustments
Peak in bass frequencies
Move subwoofer closer or farther
Dip in response
Reposition or add bass traps
Overall uneven response
Use EQ to balance frequencies
Consistent response
Confirm with repeated tests
This process ensures your subwoofer’s sound is accurate and immersive, creating a flawless listening experience.
Listening Position Adjustments
Once you’ve analyzed your room response and made initial adjustments, it’s time to focus on your listening position. Your placement impacts how the subwoofer interacts with room acoustics and your overall sound. To optimize, try these steps:
Move your listening spot slightly forward or back to find the spot with the best bass response.
Sit at different angles to identify where bass sounds most balanced.
Use a mirror to locate the subwoofer relative to your listening position, ensuring it’s not obstructed.
Adjust your seat to avoid standing waves or bass nulls caused by room acoustics.
Common Mistakes to Avoid During Setup
Many beginners make the mistake of placing their subwoofer in the wrong spot, which can considerably affect sound quality. Avoid choosing a subwoofer color that blends poorly with your room decor, as it might tempt you to hide it, reducing ideal placement. Additionally, don’t overlook the importance of subwoofer shape; a bulky, irregular shape can limit where you position it. Common errors include placing the sub too close to walls or corners, which can cause boomy bass, or too far from your listening position, leading to weak sound. Always test different spots, listening for smooth, balanced bass. Proper placement ensures you get the best performance from your subwoofer, regardless of its color or shape. Steer clear of these mistakes for ideal sound.
Frequently Asked Questions
How Do I Know if My Subwoofer Is Compatible With My Receiver?
You can tell if your subwoofer is compatible with your receiver by checking its specifications for matching power ratings and connector types. Confirm your receiver has a dedicated subwoofer or LFE output. Proper speaker placement and understanding room acoustics help optimize sound. If the subwoofer’s impedance matches your receiver’s recommendations, and you can connect it via the correct cables, they should work well together for a balanced audio experience.
What Are Signs My Subwoofer Is Incorrectly Positioned?
If your subwoofer is incorrectly positioned, you’ll notice uneven bass distribution and sound distortion. Poor subwoofer placement can cause certain areas to have boomy or muffled bass, making the overall sound unbalanced. You might also hear rattling or vibrations that indicate it’s not properly aligned. To fix this, experiment with different locations, ideally near a wall or corner, to improve bass response and eliminate sound distortion.
Can I Use Multiple Subwoofers for Better Sound?
Yes, you can use multiple subwoofers for better sound. Proper subwoofer placement is key; spread them out to avoid localization and improve bass distribution. Adjust crossover settings on each sub to blend seamlessly with your main speakers. Experiment with positioning to minimize phase issues and ensure even bass coverage. Using multiple subs enhances overall sound quality, delivering richer, more consistent low frequencies throughout your space.
How Often Should I Recalibrate My Subwoofer Setup?
You should recalibrate your subwoofer setupevery 6 to 12 months, or whenever you notice changes in sound quality. Regular calibration guarantees peak performance and balanced sound. During adjustment intervals, check for any shifts in positioning, room acoustics, or equipment changes that could affect sound. By maintaining consistent calibration, you’ll keep your subwoofer sounding its best and avoid potential audio issues that come with outdated settings.
Is It Necessary to Use a Subwoofer Calibration Microphone?
Using a calibration microphone isn’t just helpful—it’s like having a superhero for your sound system. It guarantees precise sound adjustment by accurately measuring your subwoofer’s performance. Calibration microphones are essential, especially if you want your bass to hit perfectly and evenly. Without one, you risk missing out on ideal sound quality. So, yes, investing in a calibration microphone is worth it to achieve the best, most balanced audio experience.
Conclusion
So, after all that fuss, you might think setting up a subwoofer is straightforward. Yet, here you are, tweaking, testing, and still chasing that perfect bass. Ironically, the more you fuss, the more it sounds like a chaotic concert instead of a smooth, deep rumble. But don’t worry—sometimes, the best setups come from a little patience and a lot of trial and error. Happy listening, and may your bass be just right!
The Complete Earc and ARC Explained Checklist Playbook
Unlock the secrets of HDMI ARC and eARC with this comprehensive checklist playbook that reveals essential setup tips and troubleshooting strategies you can’t afford to miss.